
Click here to go to printable recipe: Mom’s Meat Pies with an Irish Touch
In my previous post, I was talking about PI Day (π Day) and the baked goods that sound like π, so with pies on my mind, I thought of some delicious savoury pies that my mom used to make. I cannot recall from whom or when exactly she got the recipe, but she had it for as far back as I can remember. The pastry and shape were always as pictured at the top of this post; she usually divided the batch of dough in half, and made two family-size pies. The filling was sometimes tuna, but more frequently ground beef (Mexican picadillo.)
As a nod to St. Patrick’s Day (March 17), I looked around for an Irish meat pie, and the most common type found on line was a hand pie (patty, individual size) with a filling of ground lamb or beef, Worcestershire sauce and vegetables, such as carrot, onion and in some cases, of course, potatoes and cabbage. For this batch, then, I am using my mom’s heirloom recipe, keeping the shape, but dividing the dough into six portions, for individual-size pies, and preparing the filling with an Irish touch.
Mom’s Meat Pies (with an Irish Touch) –
Pays de carne de mi mamá (con un toque irlandés)
Printable recipe: Mom’s Meat Pies with an Irish Touch
Ingredients (for six portions)
Dough:
1 ½ cups all-purpose flour, plus more for dusting
1 tsp baking powder
½ cup butter, cut into cubes
6-7 tbsp water, as needed
To brush: water, 1 egg
Filling:
1 lb (454g) lean ground beef
1 cup (about 1 medium) potato; washed, peeled, and finely diced
½ cup (about ¼) onion; peeled and finely chopped
2 cups cabbage; shredded, washed and drained
1 tbsp oil
½ tsp dried thyme
2 tbsp Worcestershire sauce, or to taste
½ cup water
Salt and pepper, to taste
Prepare dough: Place flour in a mixing bowl, making a well, and placing the butter in the centre; sprinkle baking powder on the flour (photo below, left). Break up butter with hands or a wooden spatula, mixing with the flour and baking powder (photo below, right):

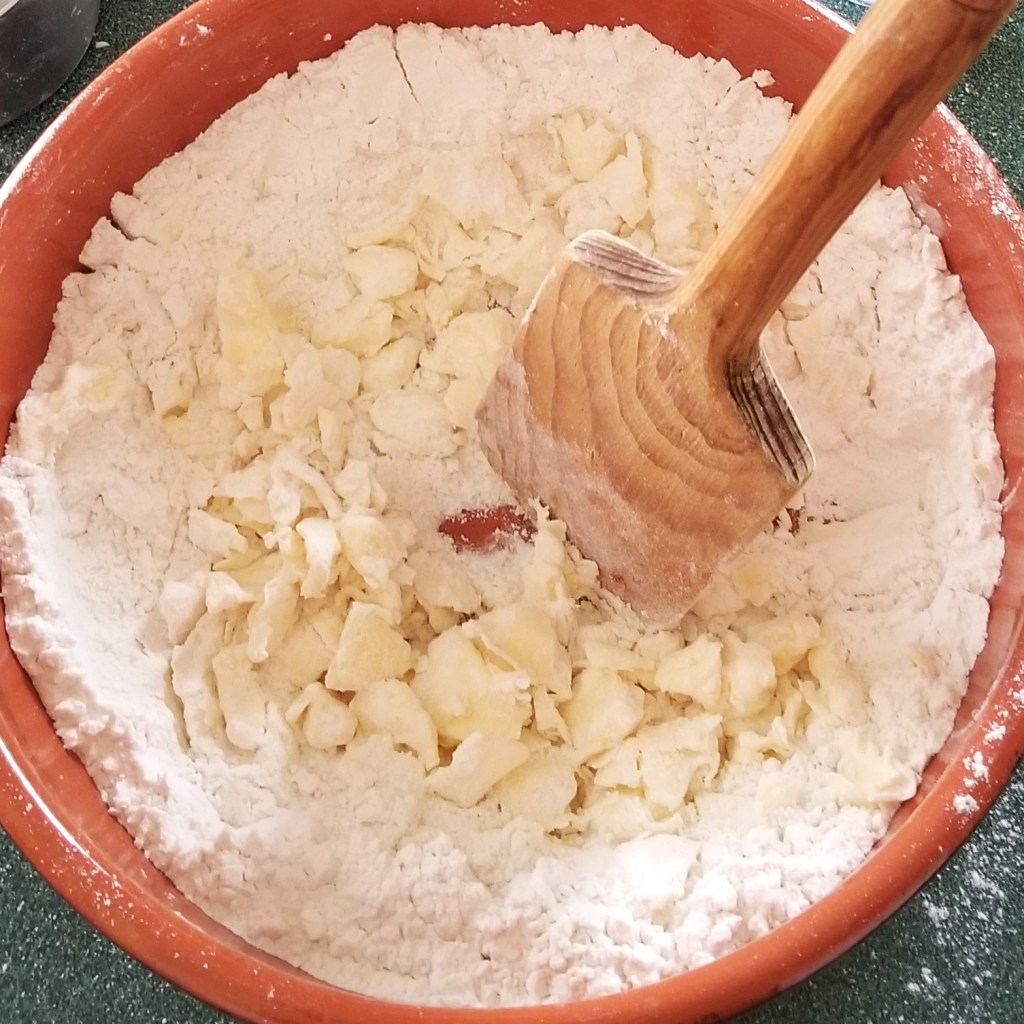
Continue until reaching a uniform sandy texture, then add a quarter of a cup of water (photo below, left). Gradually add water, one tablespoon at a time, while gently kneading, until a soft dough is obtained; form into a ball, and cover with a clean kitchen towel (photo below, right):

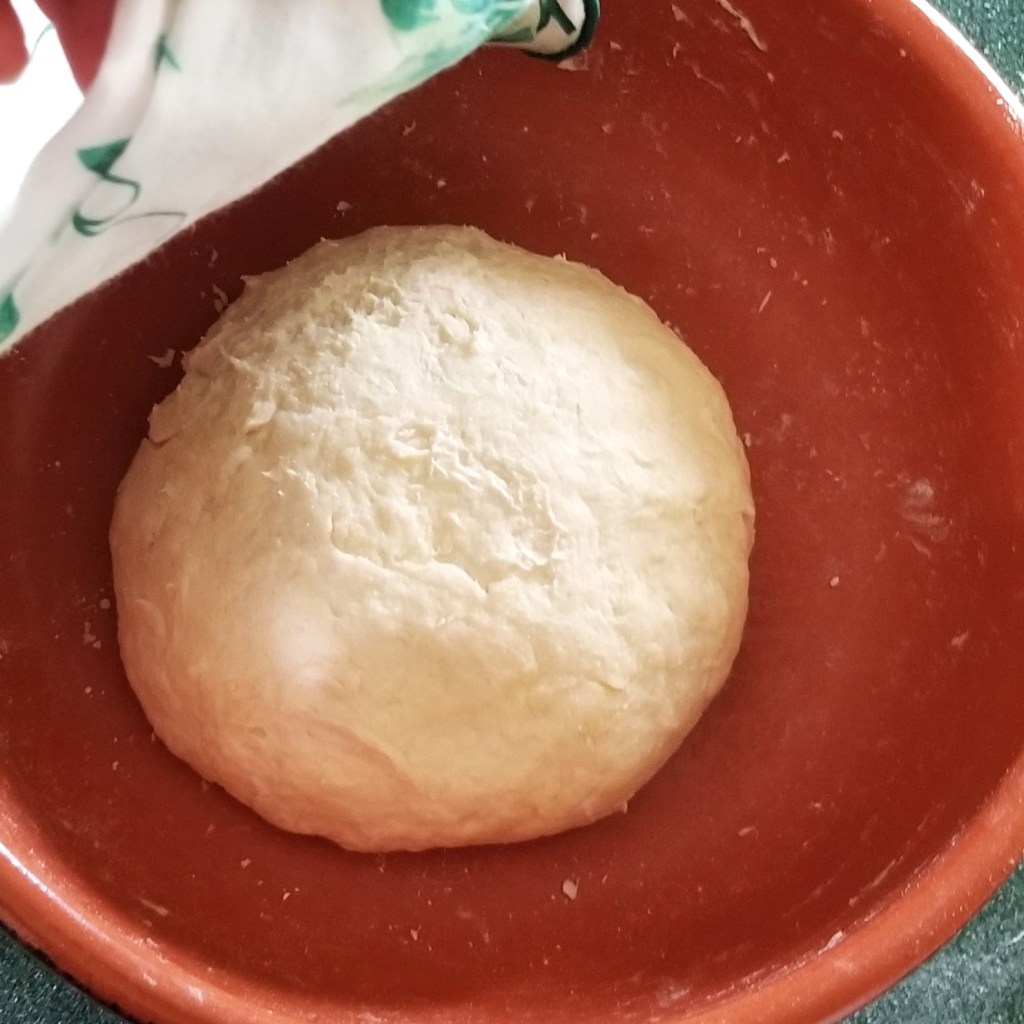
Allow to rest in the fridge for one hour.
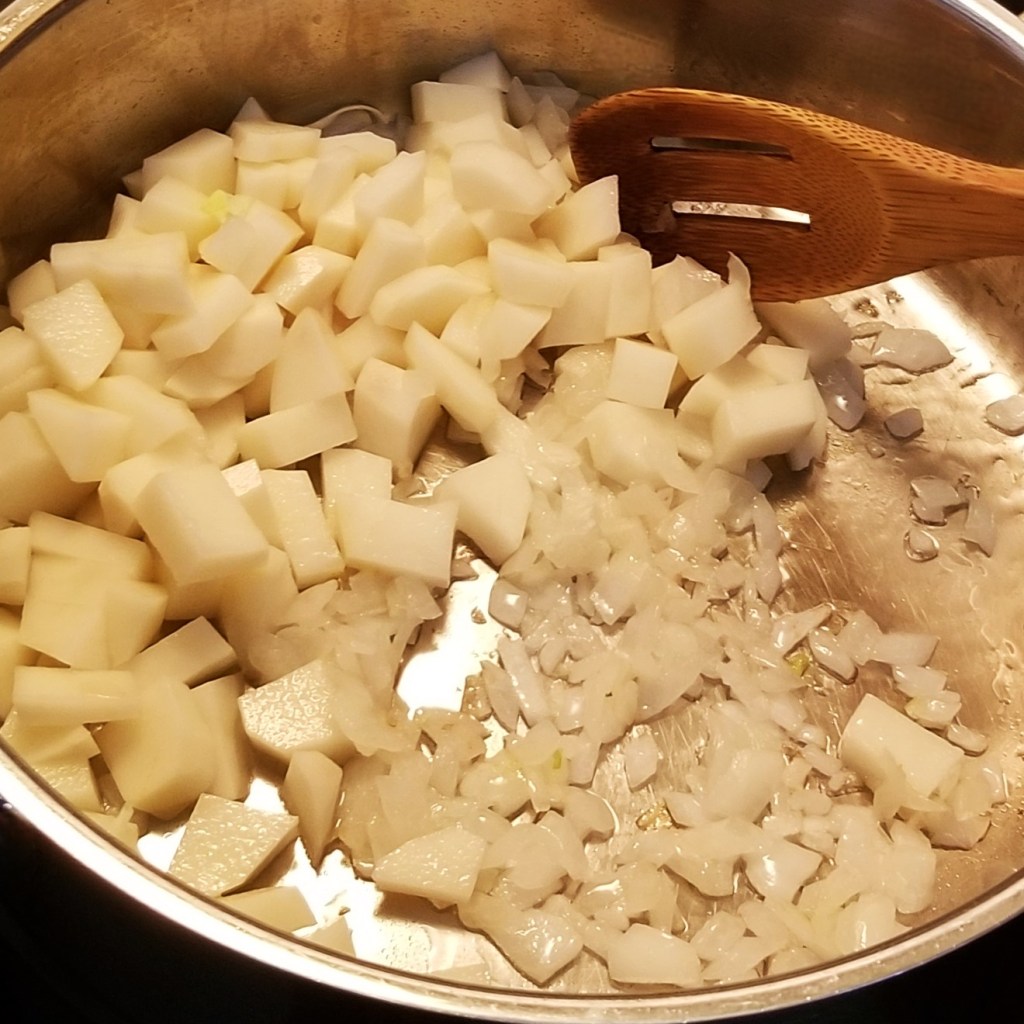
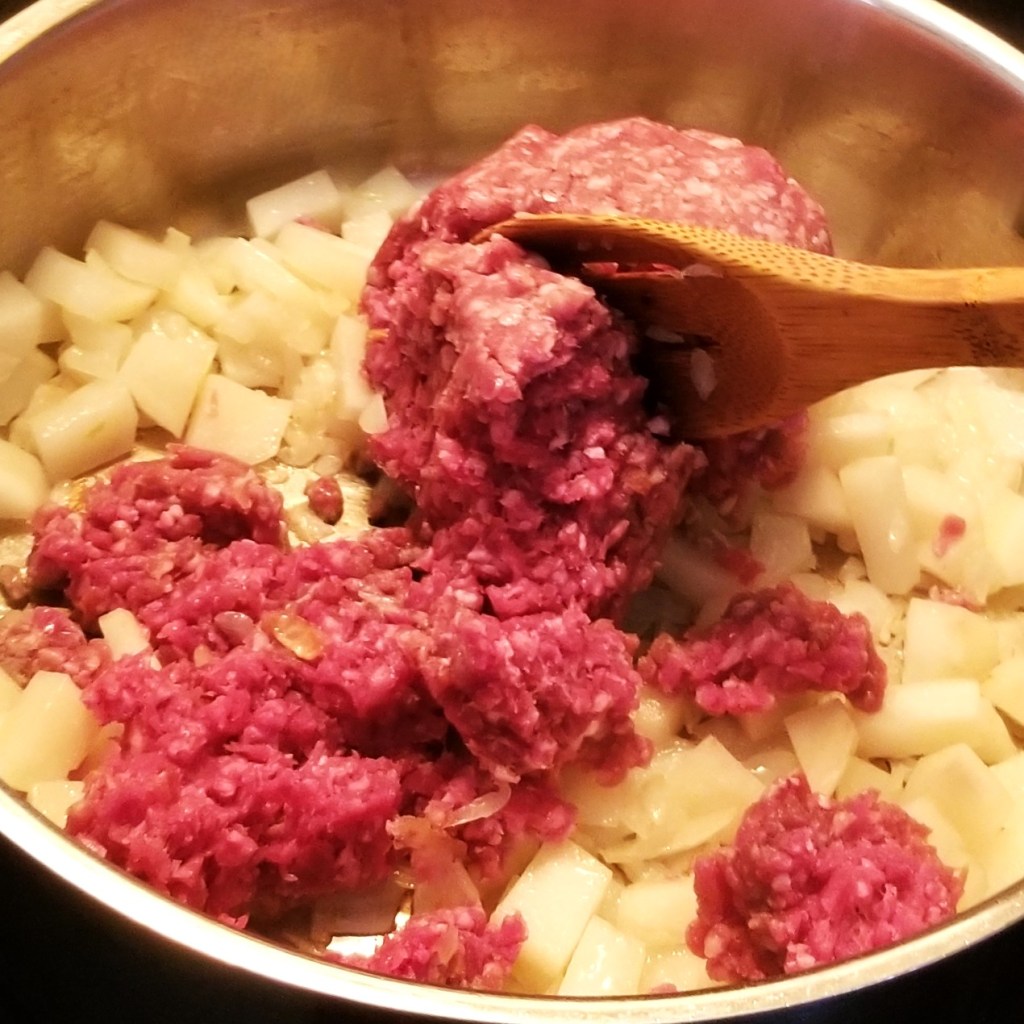
Meanwhile, prepare filling: Warm up oil in a large pan over medium heat, add onion and sauté until translucent and just starting to change colour, then add diced potatoes (photo below, left); incorporate potatoes with onion and oil to coat, then allow to cook undisturbed for three minutes. Add ground beef, breaking up into small chunks with a spoon (photo below, right):
Continue cooking and mixing, scrapping any brown bits from the bottom of the pan, until the meat is no longer pink, then add a good splash of Worcestershire sauce, thyme, and salt and pepper, to taste (photo below, left). Stir in cabbage (photo below, right):


Pour half a cup of water in (photo below, left). Reduce heat to a simmer, then cover pan (photo below, right):


Cook for five more minutes, then remove from heat, uncover, and let cool to room temperature.
Prepare a baking sheet by lining with parchment paper; set aside. Beat egg in a small bowl; reserve.
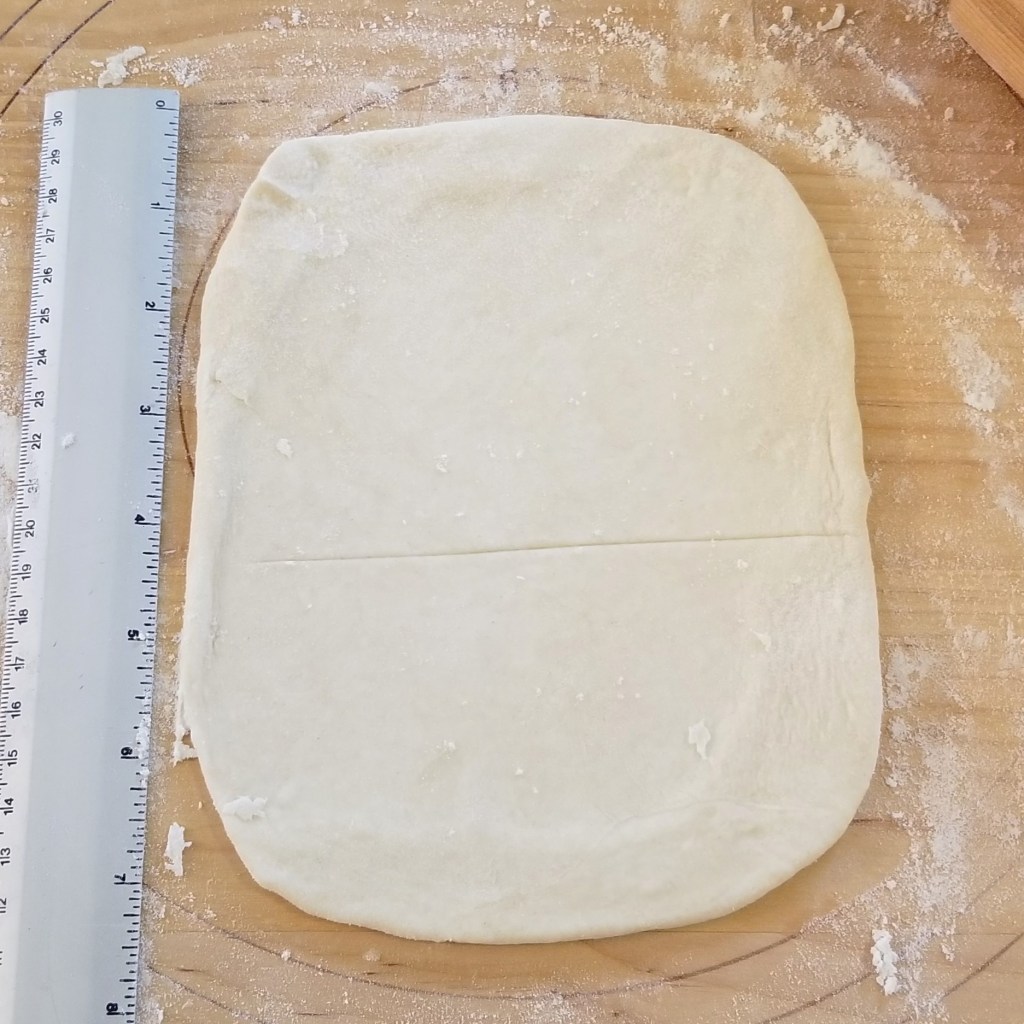
Assemble and bake: Preheat oven to 400°F (200°C). Take dough out of the fridge an divide into six portions (approximately 77 g each for my batch). Working with one portion at a time, roll into a ball, then flatten slightly and pat the edge to form a square, and place on floured working surface (photo below, left). Use a rolling pin to form a 6×7 in (15×18 cm) rectangle, score a mark parallel to, and 4 in (10 cm) from, a short side (photo below, right):

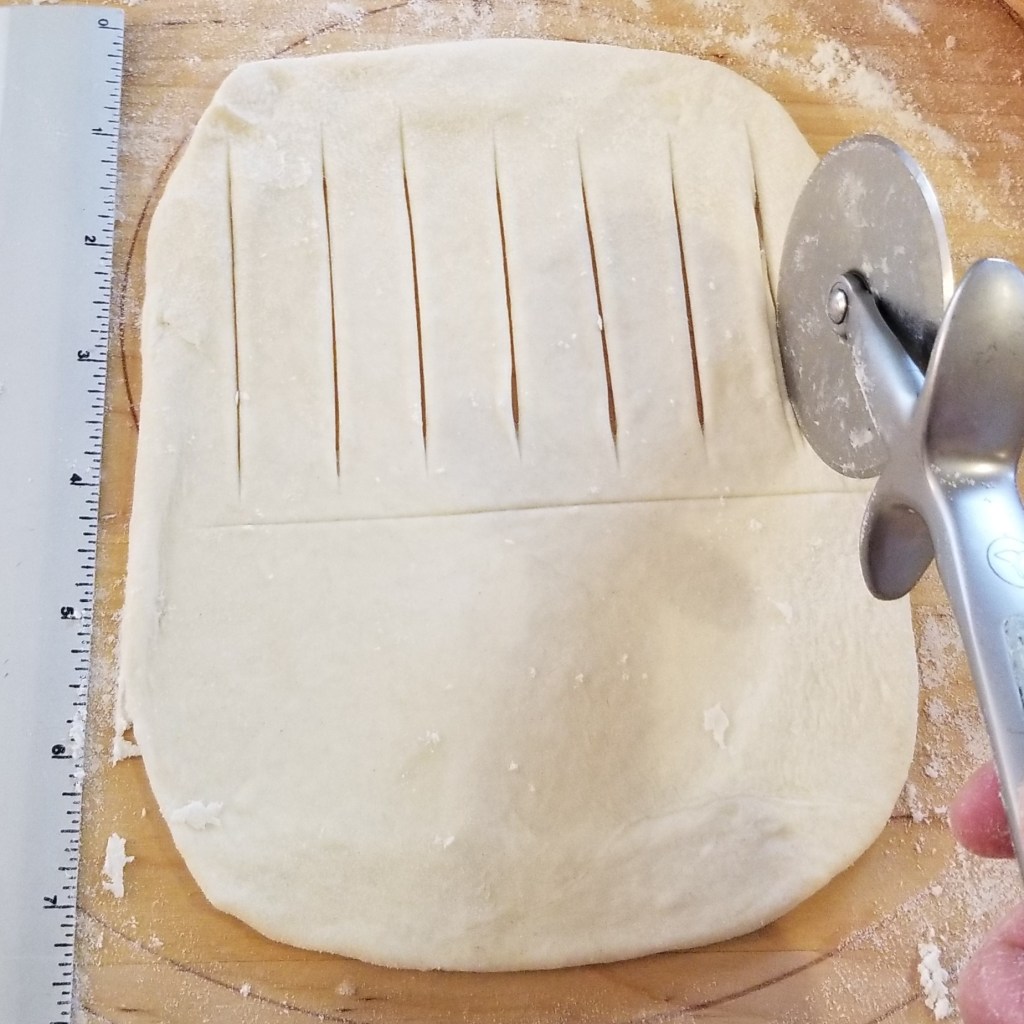
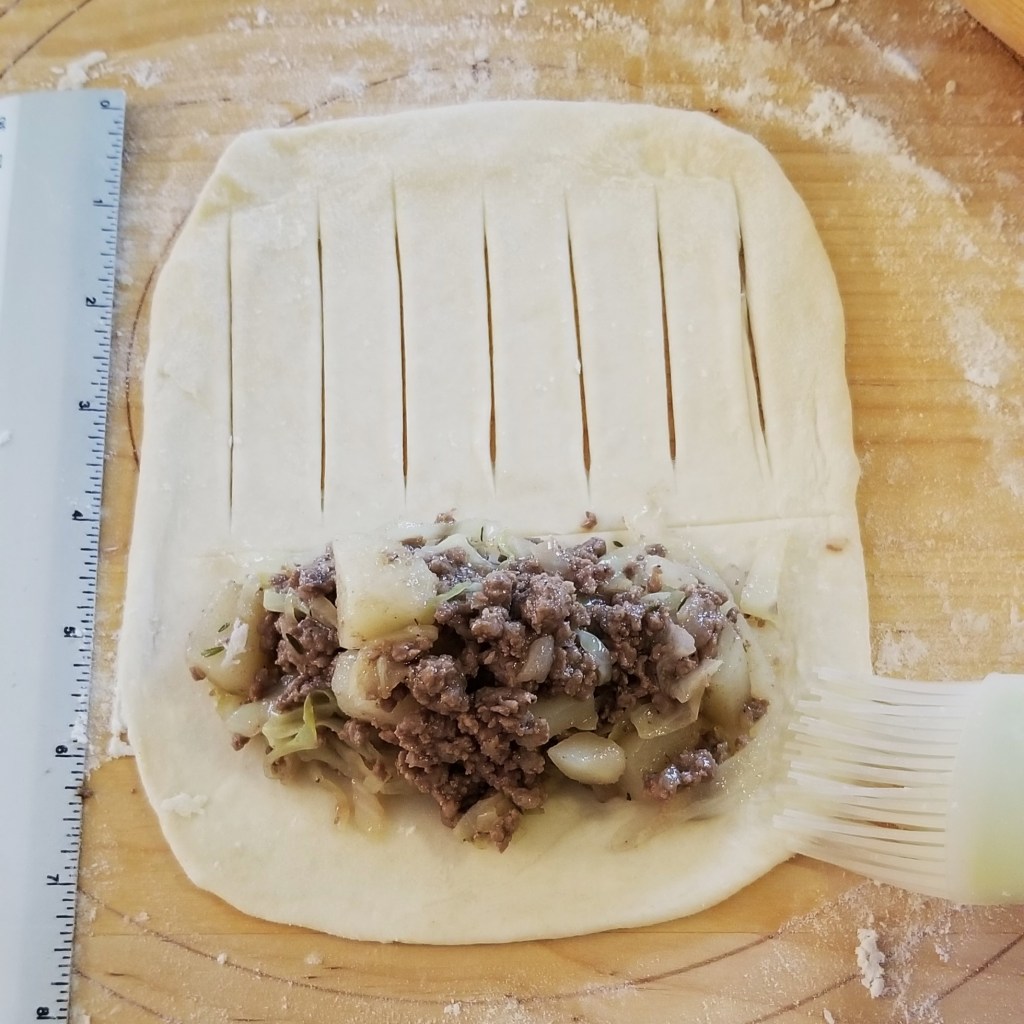
Score perpendicular lines, about 0.5 in (1.25 cm) apart, on the larger section (see photo below, left). Scoop a generous amount of filling on the other section, keeping a 0.5 in(1.25 cm) edge around, including the scored end; brush edge very lightly with water (photo below, right):
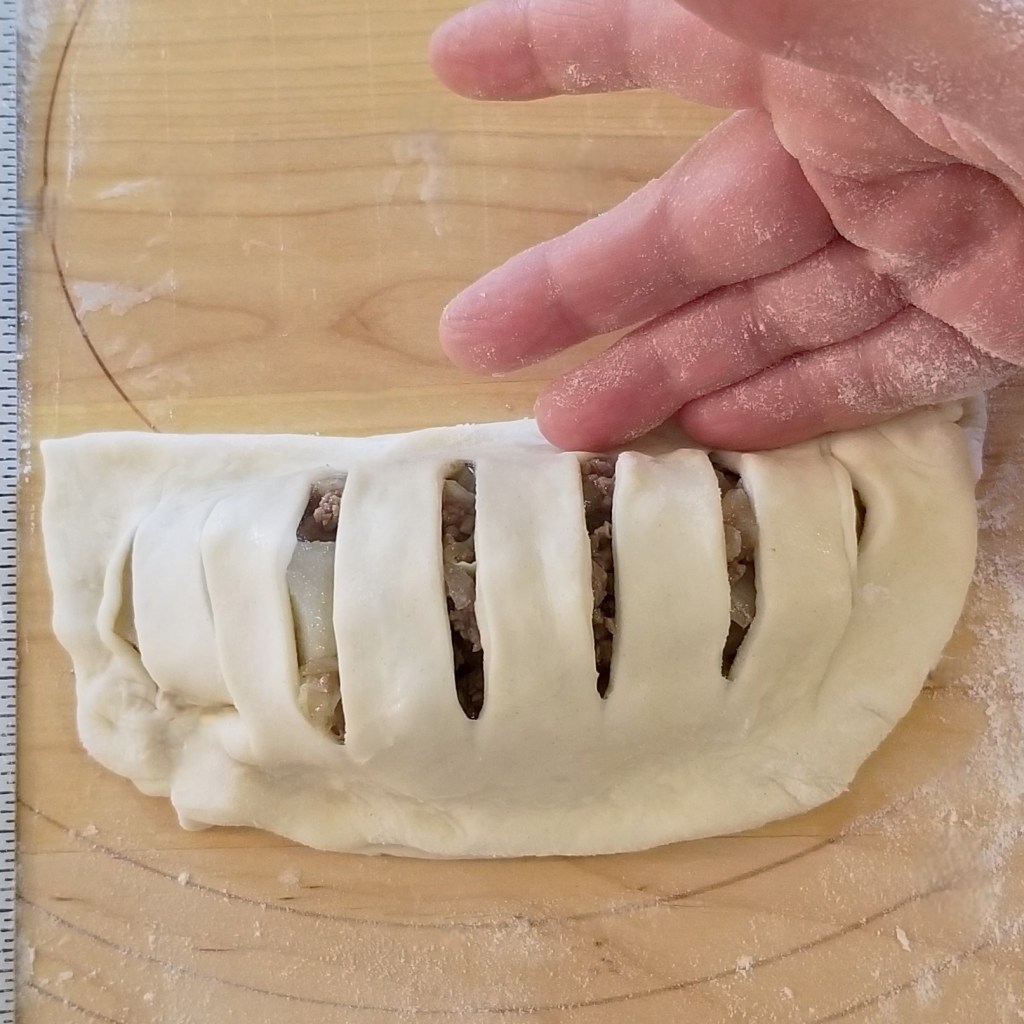
Fold scored section over the filling, then seal the pie by pressing down all around the edge, including folded side (photo below, left). Pinch and fold all around the end with fingers, shaping corners to form a neat rectangular edge, then press with a fork to finish pie (photo below, right):
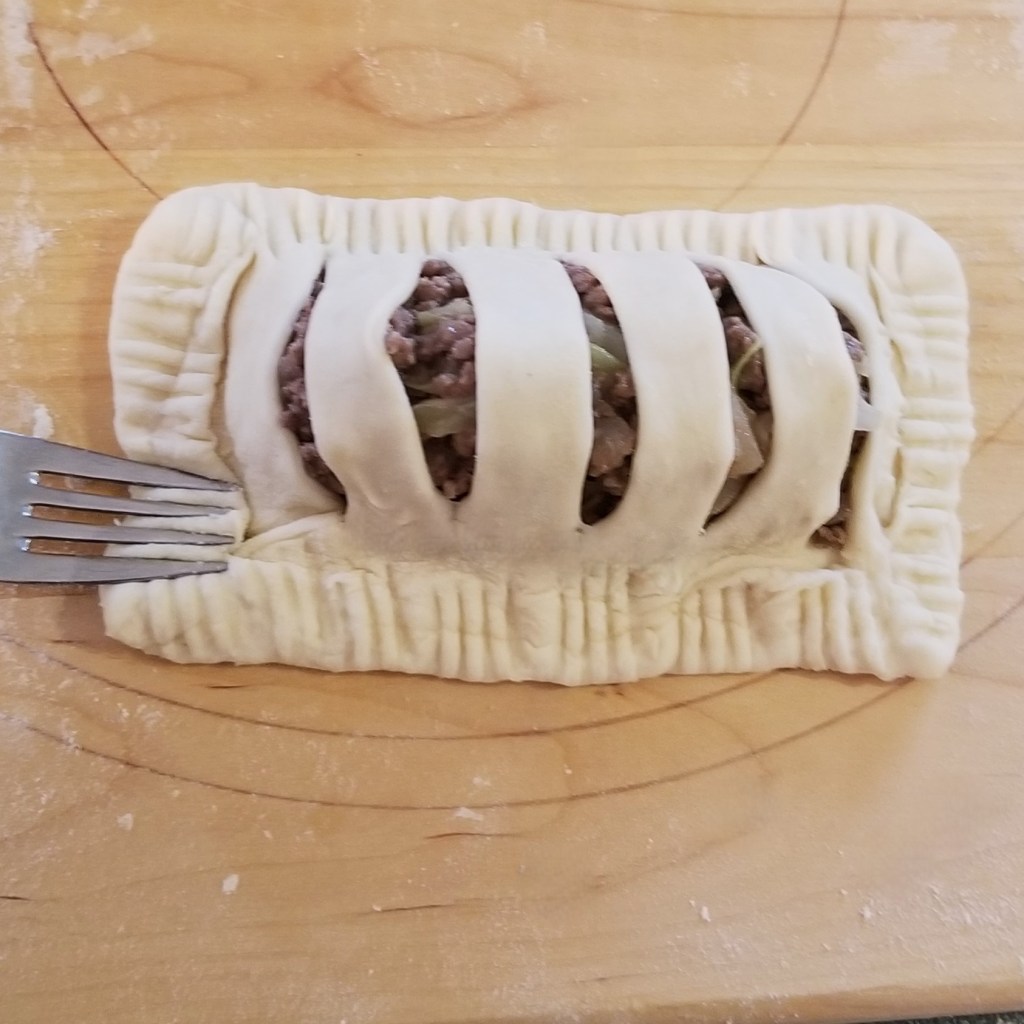
Carefully heft and transfer to prepared baking sheet, using a flat spatula (photo below, left). Continue with the rest of the dough to form six pies. Brush with egg (photo below, right):

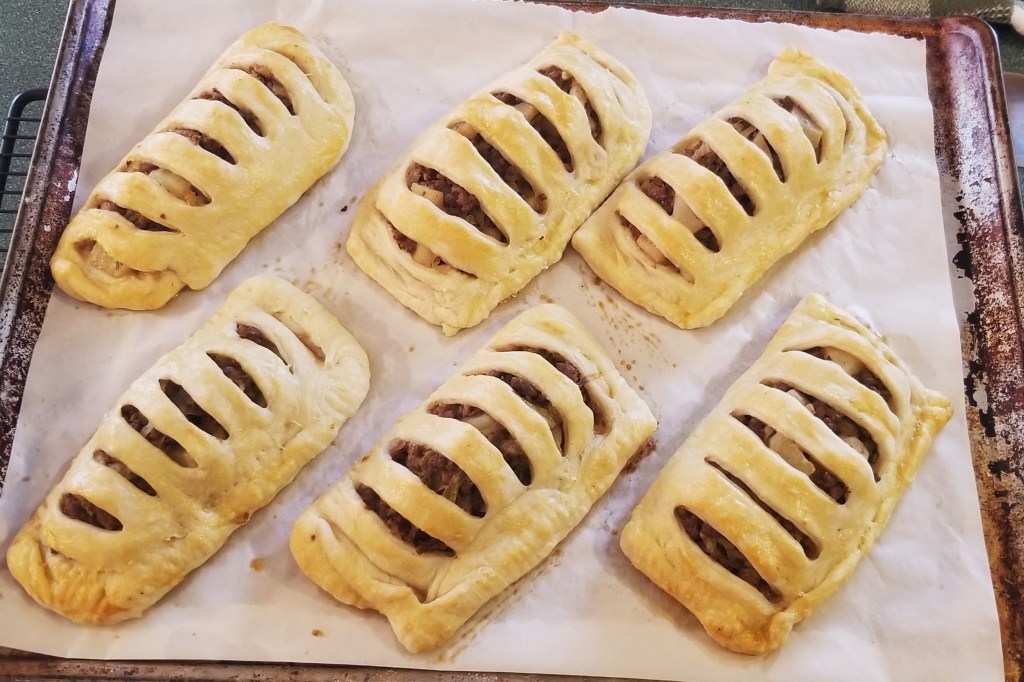
In the photo below, left, the six pies ready for the oven. Bake for approximately 25 minutes, rotating tray halfway, until golden brown; remove from oven (photo below, right):

These delicious pies may be eaten right away, or at room temperature. The filling was very rich:
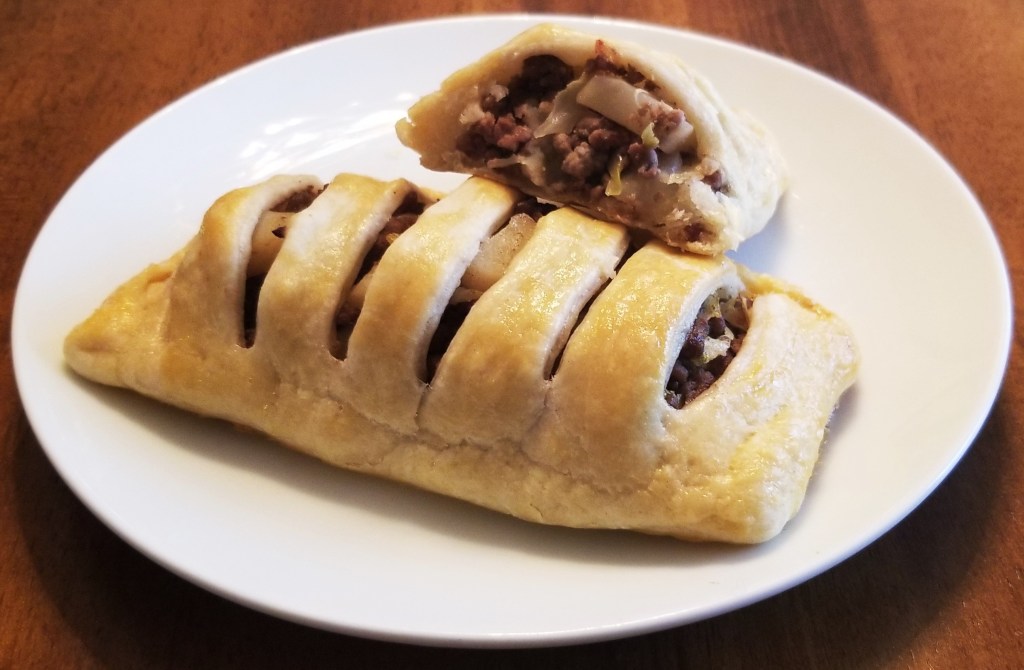
My husband and I had them for supper, with some HP sauce on the side. I must confess that they were so good, we ended up sharing an extra pie in that seating.
Happy St. Patrick’s Day!
For your convenience, click on the picture or highlighted text below for products available on Amazon™. DISCLAIMER: Any reviews included in this post are my own, for items I have purchased, not provided by any company; as an Amazon Associates Program affiliate, I might receive a commission for any purchases originated from the links below, at no extra cost to you. Thank you to readers who have bought other products starting with a click from my links.

I am bringing my recipe to Full Plate Thursday #738 with Miz Helen @ Miz Helen’s Country Cottage.
I am sharing my post at Thursday Favourite Things #702, with Bev @ Eclectic Red Barn, Pam @ An Artful Mom, Katherine @ Katherine’s Corner, Amber @ Follow the Yellow Brick Home, and Linda @ Crafts a la Mode.
I am joining Fiesta Friday #581 with Angie @ Fiesta Friday, this week co-hosting with Jhuls @ The Not So Creative Cook.


These look and sound like they would be so delicious.
LikeLike
They were!
LikeLiked by 1 person
YUM!! I love a good meat pie!
Don’t forget to join us over at the Creatively Crafty Linky Party every Wednesday through Sunday
https://creativelybeth.com/creative-crafts-linky-party-2/
Pinned!
Creatively, Beth
LikeLike
Thank you, Beth, I will drop by for sure!
LikeLike
Classic meat pies with a delicious Irish spin. Totally drool-worthy! Thanks for sharing & for joining Fiesta Friday Party!
LikeLiked by 1 person