Over the years, I have shared recipes for different kinds of bread, which are traditional in Mexican ofrendas (offerings) to the dearly departed on the Día de muertos (Day of the Dead, All Souls Day) on November 2. The name “pan de muerto” – “bread of the dead”, first brings to mind one type that is available nationwide, flavoured with orange blossom water, and fashioned in a round shape, which may represent the natural and endless cycle of life and death, and decorated with small pieces of the same dough, to symbolize bones and tears. In recent years, many variations on this bread have been created, such as stuffing with pumpkin paste, cream cheese or hazelnut spread, or adding flavourings like chocolate or even savoury mole, which also change the colour to brown. Another innovation, which has been trending for almost a decade now, is to add black edible agents, either to the dough, or to coat after baking. Activated charcoal or food colouring are popular choices, but the original method is to use dry corn husks (called totomoxtle , form totomochtli in Nahuatl), the traditional wrapper for tamales; in this application, the dry corn husks are burnt to ashes and ground, then added to the traditional dough, and/or mixed with sugar to coat the bread after baking.
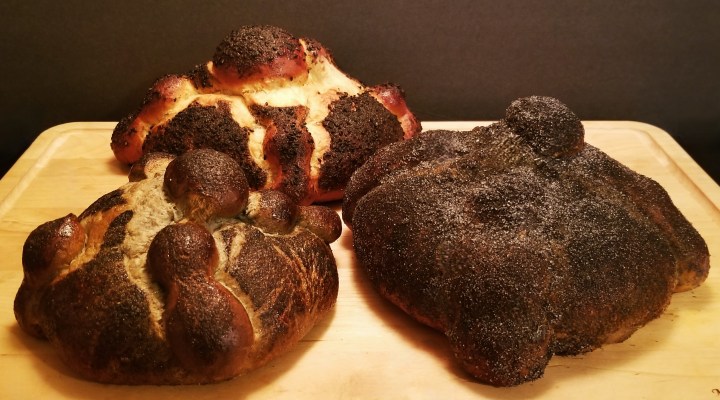
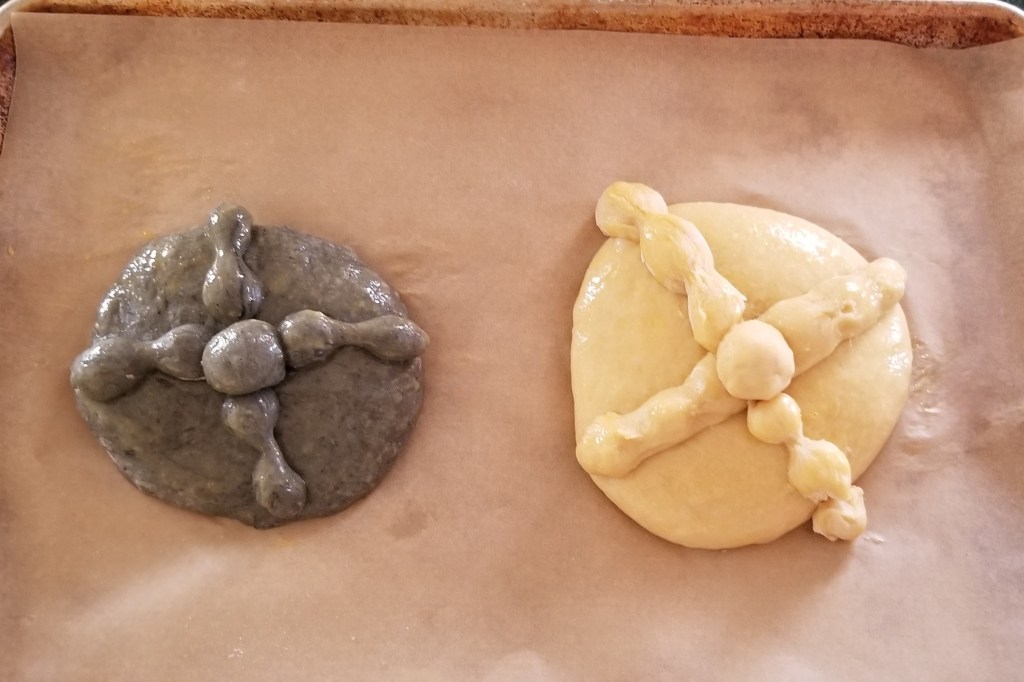
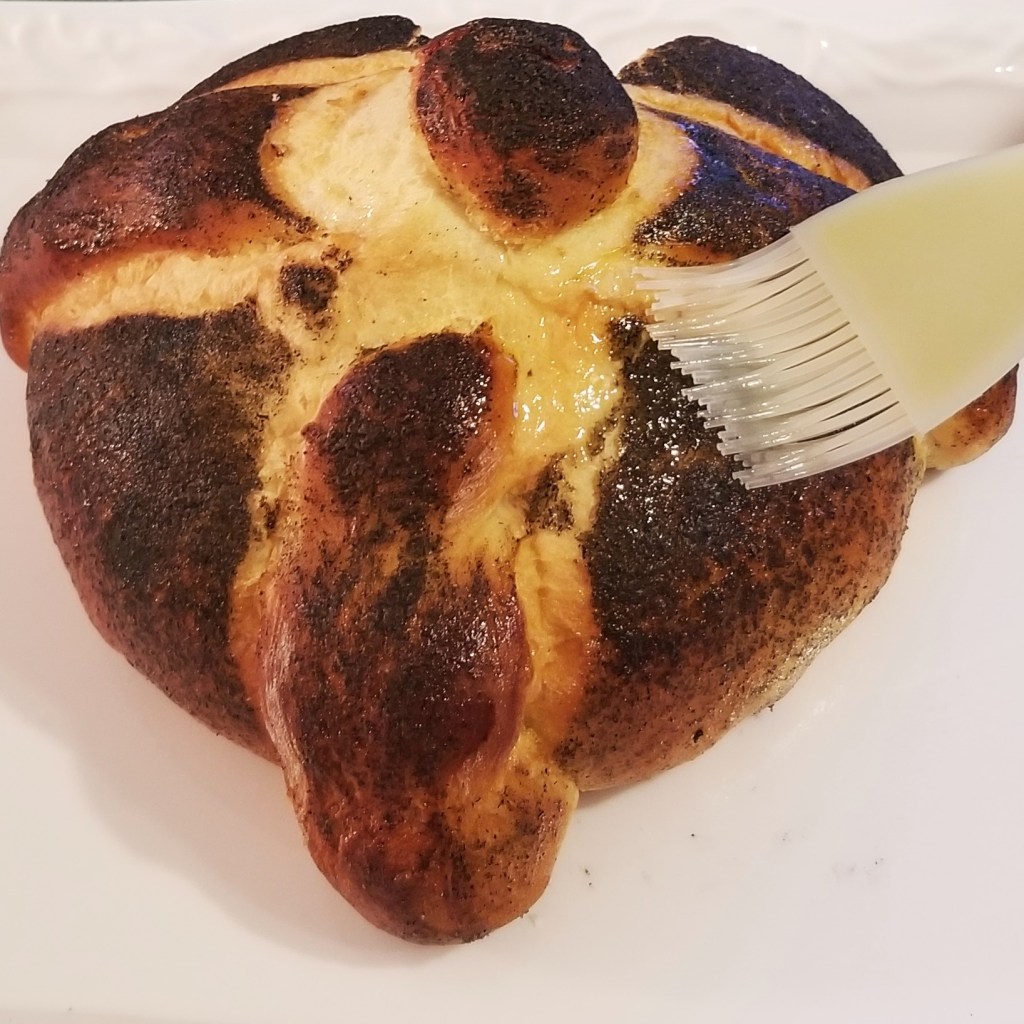
I decided to give this black bread a try, with three different variations, as seen in the photo at the top of this post. I prepared a regular batch of dough, using my recipe for pan de muerto, then divided it; after rising and forming, they all were brushed with an egg wash, but I decided to also coat them with an ash and sugar mix before baking. Extra elements were used for each bread, in the photo at the top of this post, clockwise from left: One small portion was mixed with corn husk ashes, to colour the dough; the second was sprinkled with black sesame seed, and the third was finished, after baking, with a brush of melted butter, and coated with more black sugar mix.
Black Day of the Dead Bread – Pan de muerto color negro
Printable recipe: Day of the Dead Bread
Printable directions: How to prepare ashes from dry corn husks (totomoxtle)
Ingredients
To test yeast:
1 envelope (8 g) instant dry yeast
¼ cup lukewarm water
1 tsp granulated sugar
For dough:
4 cups all-purpose flour
6 eggs
½ cup butter; softened but not runny
1 tsp salt
½ cup granulated sugar
2 tbsp orange blossom water (or rose water)
1 tsp ground star anise (or orange zest, optional)
½ tsp nutmeg (optional)
For brushing before baking:
1 egg
For coating:
2 tbsp butter, melted
Granulated sugar
For black colouring:
Dry corn husks (totomoxtle)
Prepare totomoxtle ashes: Take dry husks out of their packaging; the husks are generally clean, but discard any with stains or dark spots (probably from mould). Pick a few of the clean husks:
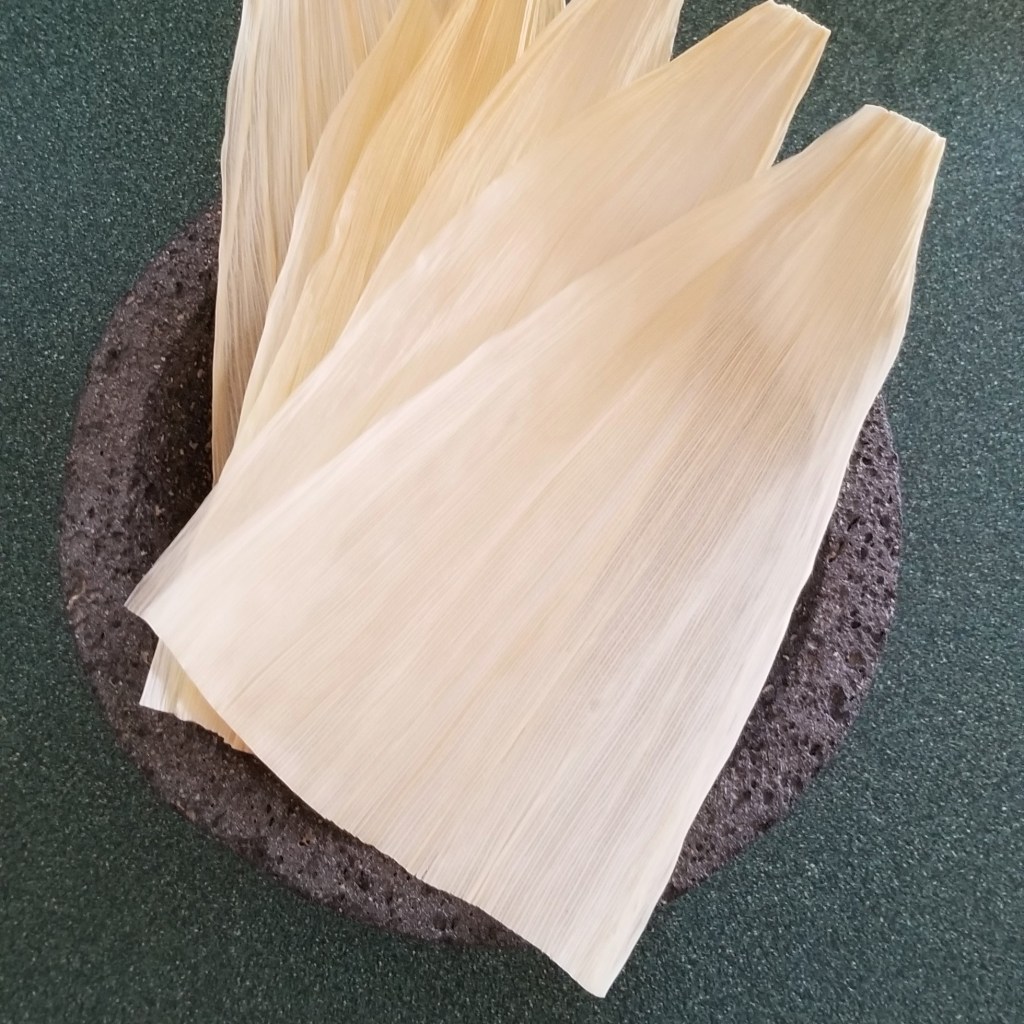
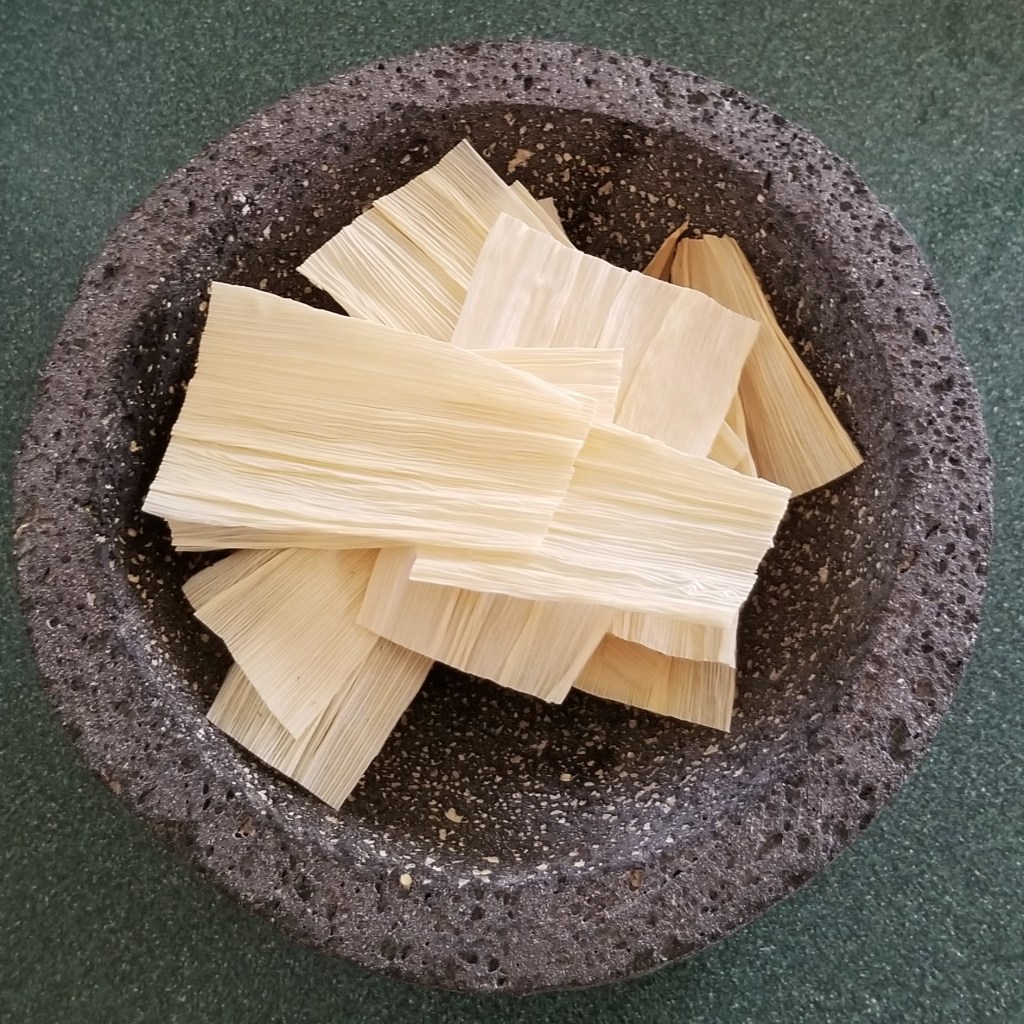
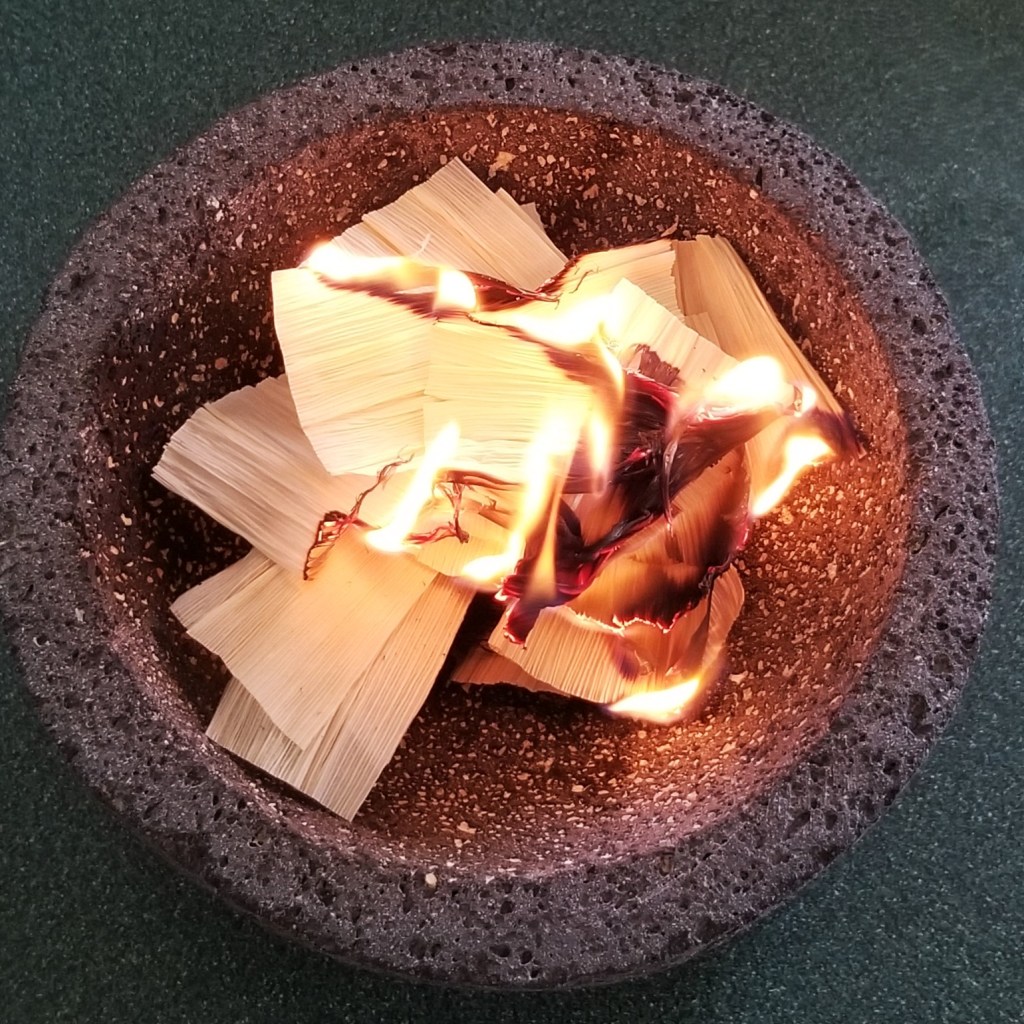
To safely burn the dry corn husks, choose a completely clean (especially no oil) heavy pot, iron skillet or grill, or a stone mortar. This last option is very convenient because later on, the ashes will have to be ground; I used my molcajete (volcanic rock Mexican mortar). Place vessel on a non-flammable surface, and remove any objects from around, especially any plastic. Cut the corn husks into pieces to fit the container (photo below, left). Light with a long match or a wand lighter (photo below, right):
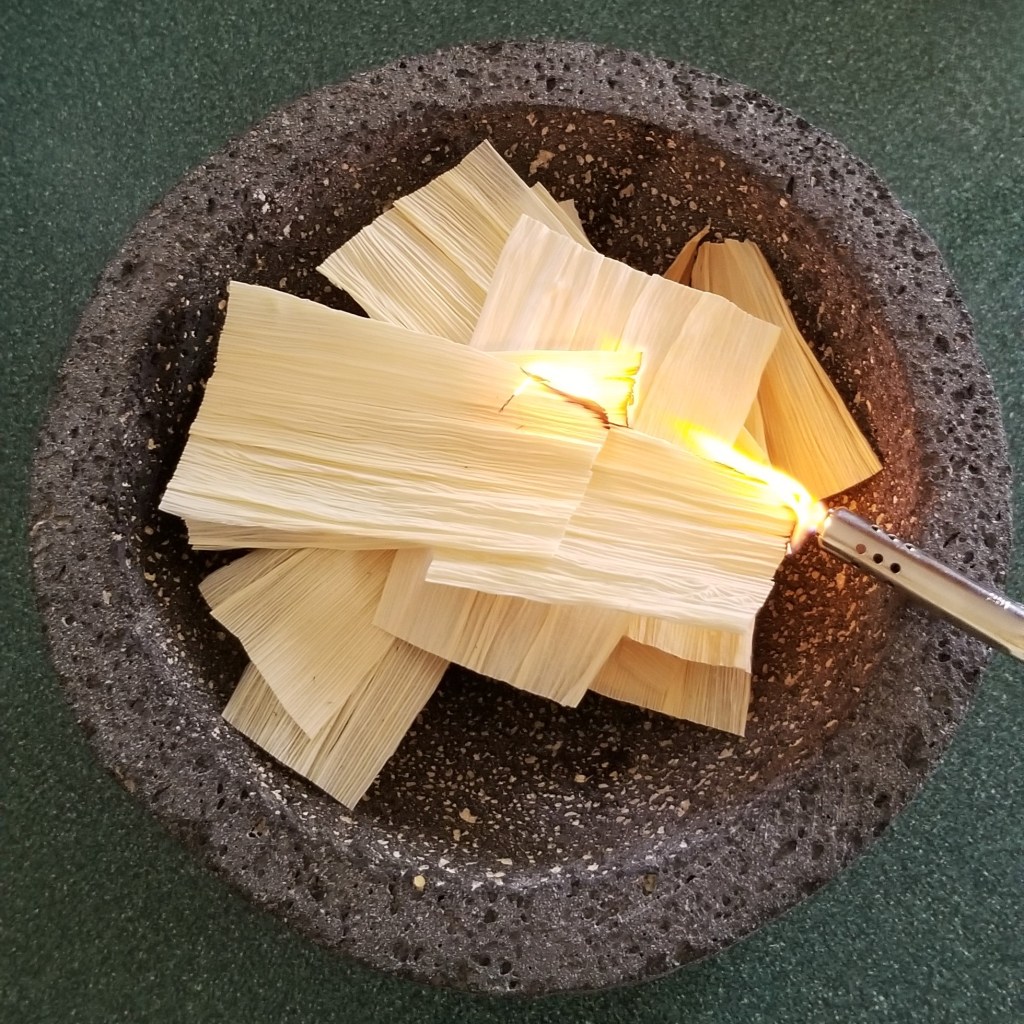
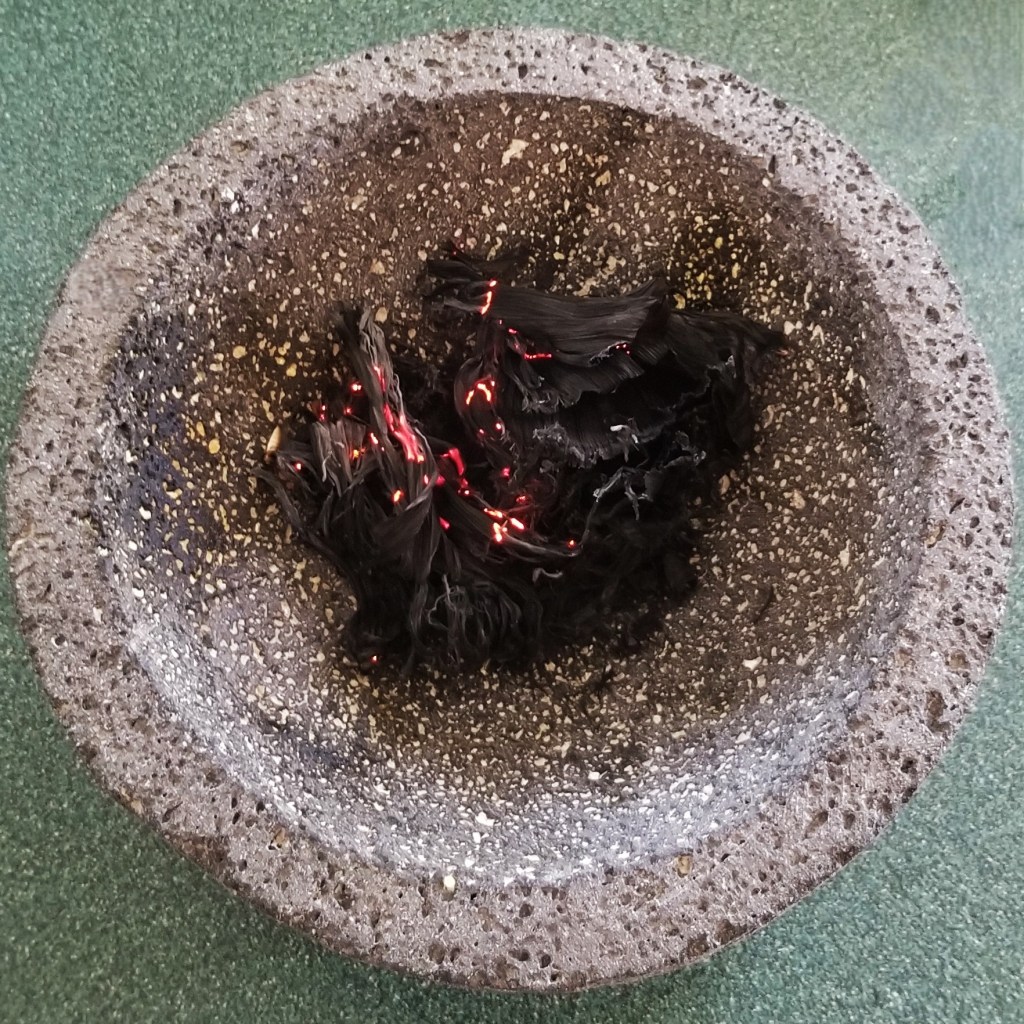
Step back and allow the flames to propagate to all the husks (photo below, left). Wait until all are burnt, and the fire extinguishes by itself (photo below, right):
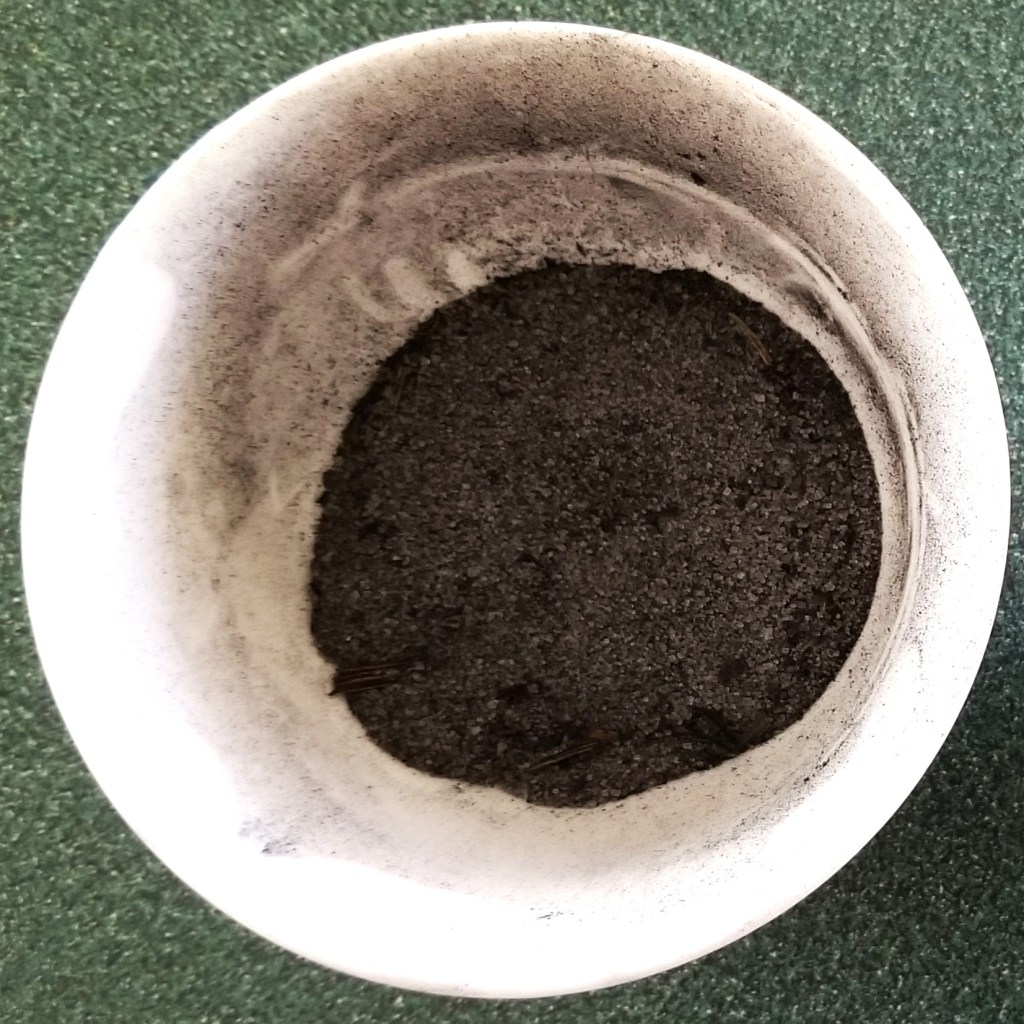
Crush the ashes with a spoon or the mortar’s pestle (photo below, left). Continue until the ashes are reduced to fine powder, then transfer to a bowl, using a dry kitchen brush, or a clean paper towel (photo below, right):
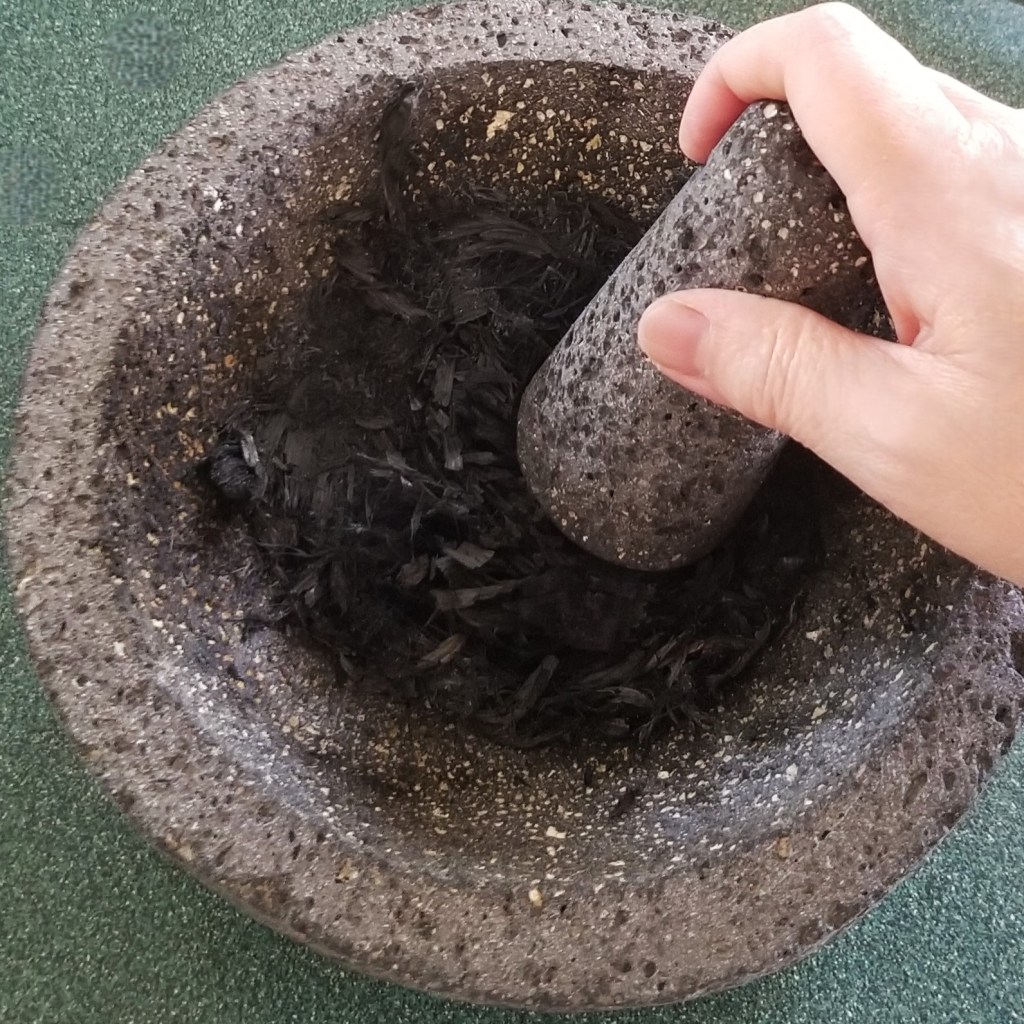
For this recipe, about four teaspoons of ashes were needed; repeat with more husks, as necessary. Reserve ashes.
Prepare regular Day of the Dead bread dough:
Instant yeast may be sprinkled directly on the flour with the rest of the ingredients, but I always like to pre-mix with lukewarm water and sugar in a small bowl, to test if it is still viable, and to give it a head start. After a minute or so, it should start bubbling and dissolving in the sugary water.
Place flour in a large bowl, forming a well in the centre. Sprinkle salt on the flour; to the well in the middle, add eggs, softened butter, sugar, and flavourings (I used only orange blossom water); add the yeast mixture at the end, and incorporate all in the well with hands or a spatula:
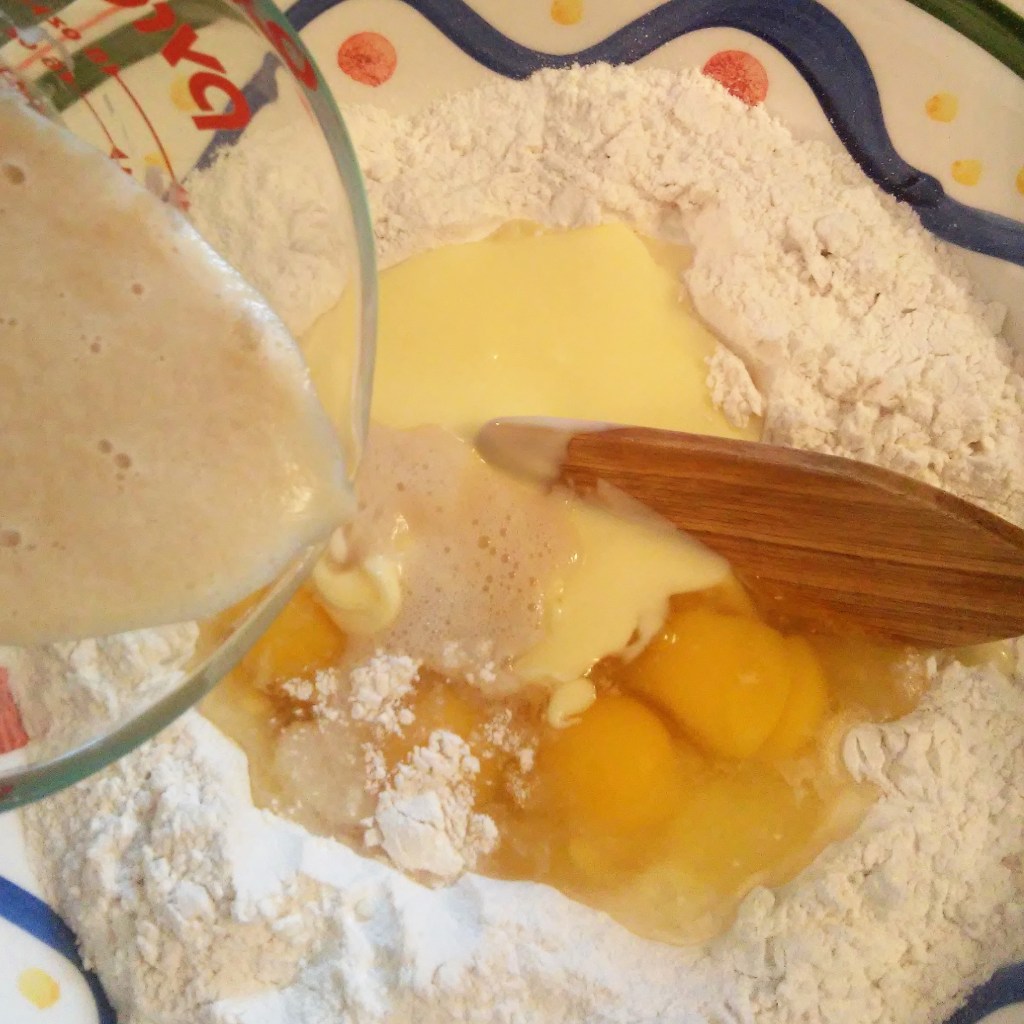
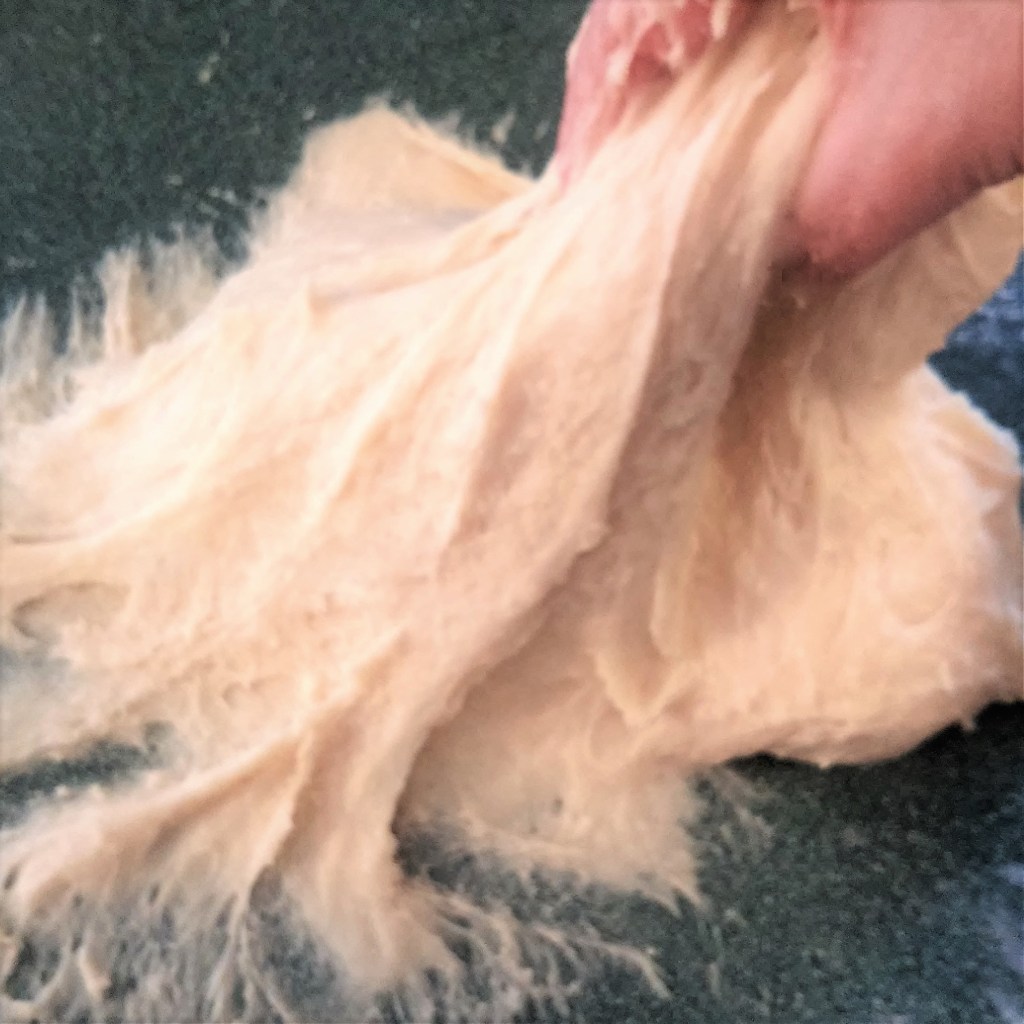
Incorporate flour slowly with a spatula, then dump mixture onto a clean working surface. Knead the mixture by folding edges over to the centre, flipping and trying to pick up the dough; this will seem impossible at first, since the dough will be extremely sticky. Continue kneading, pulling, folding and flipping; do not add any flour (photos below, from left: dough after 10, 20 and 30 minutes of kneading):
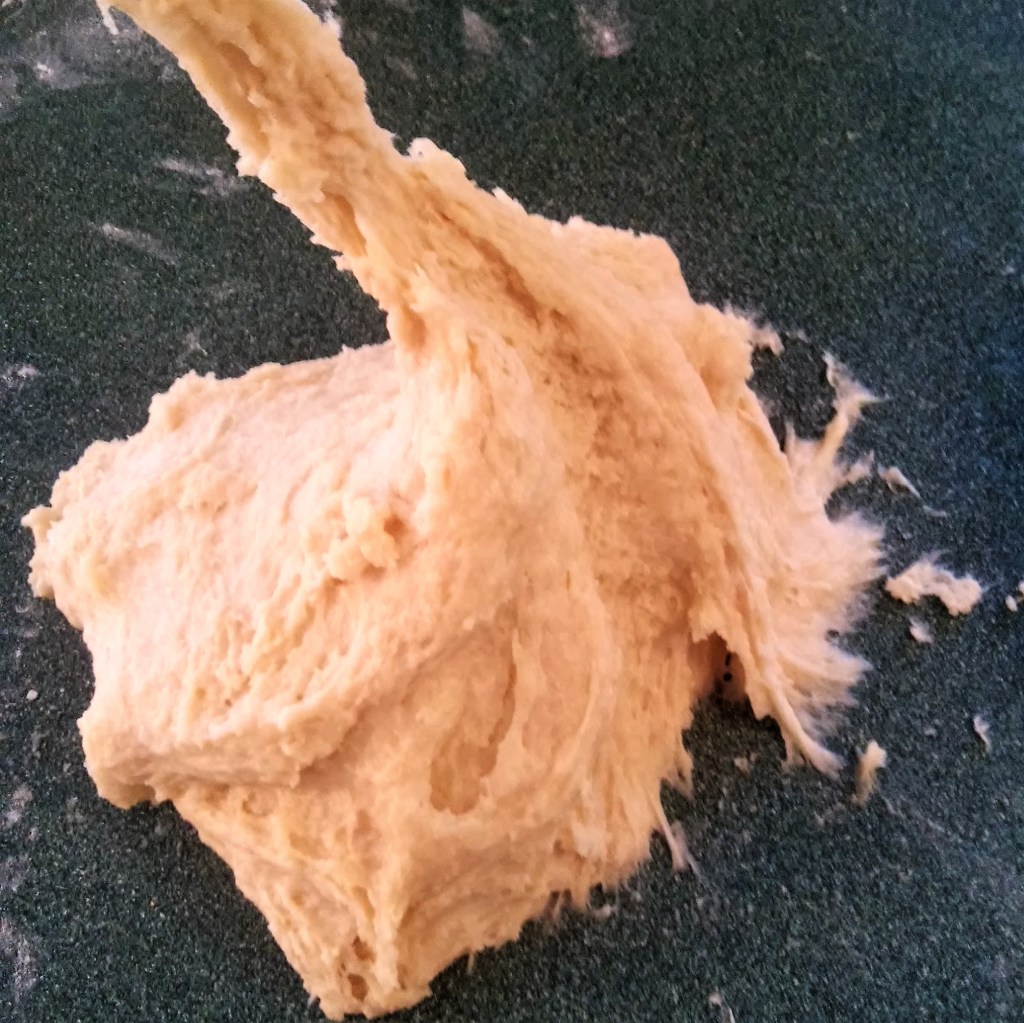
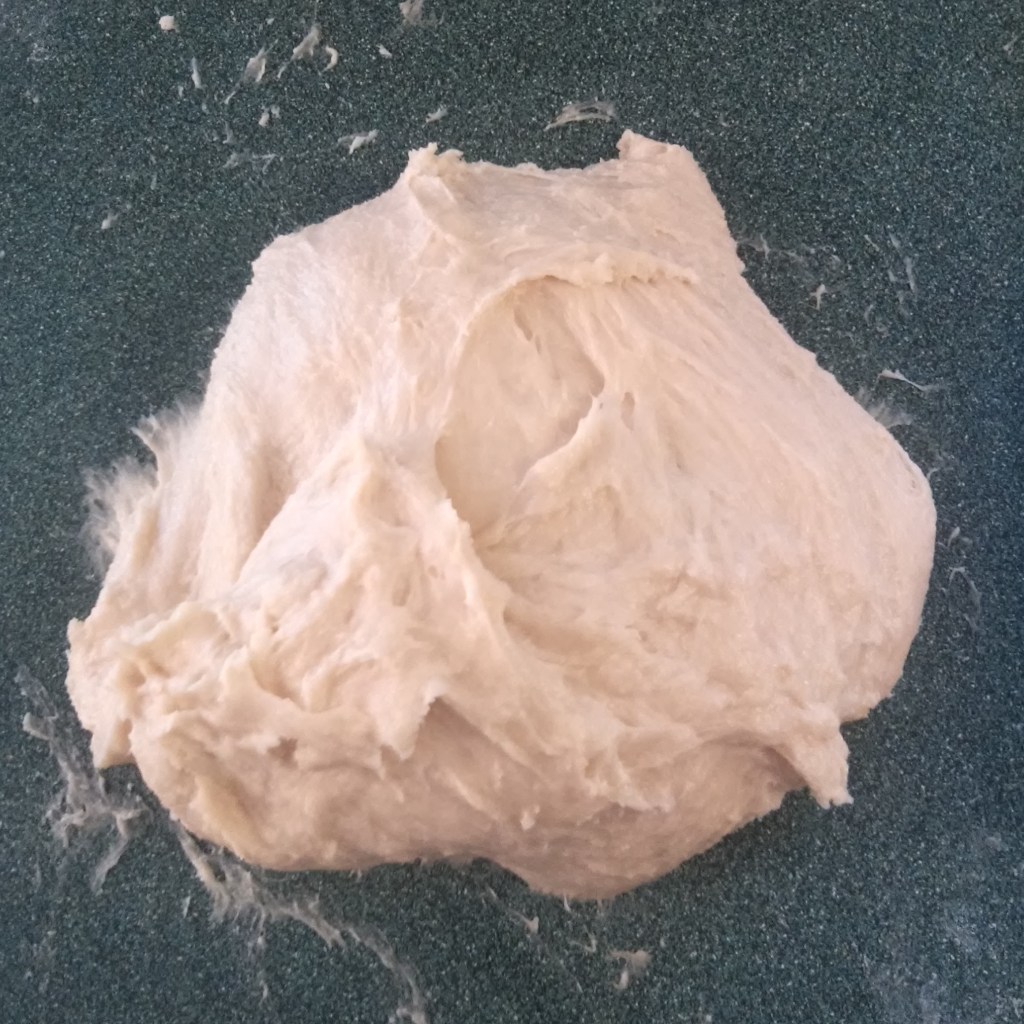
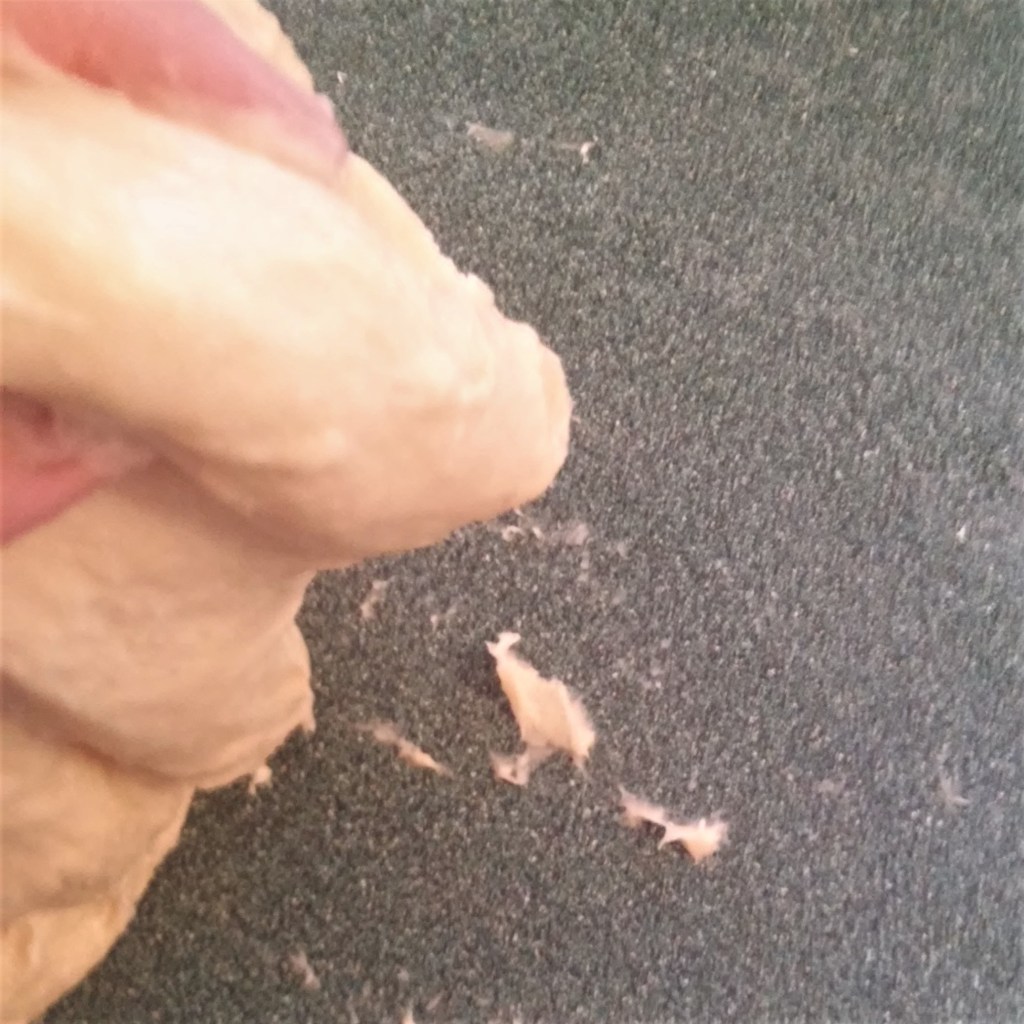
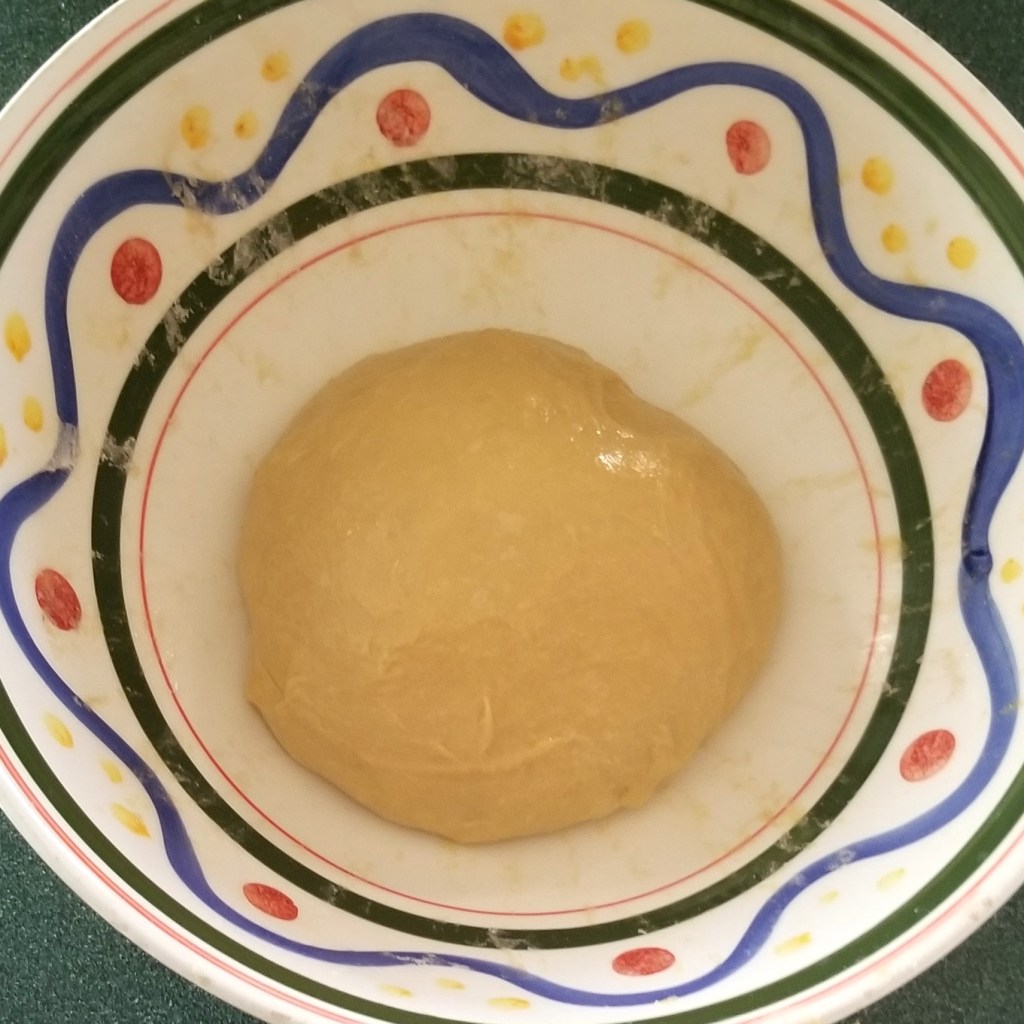
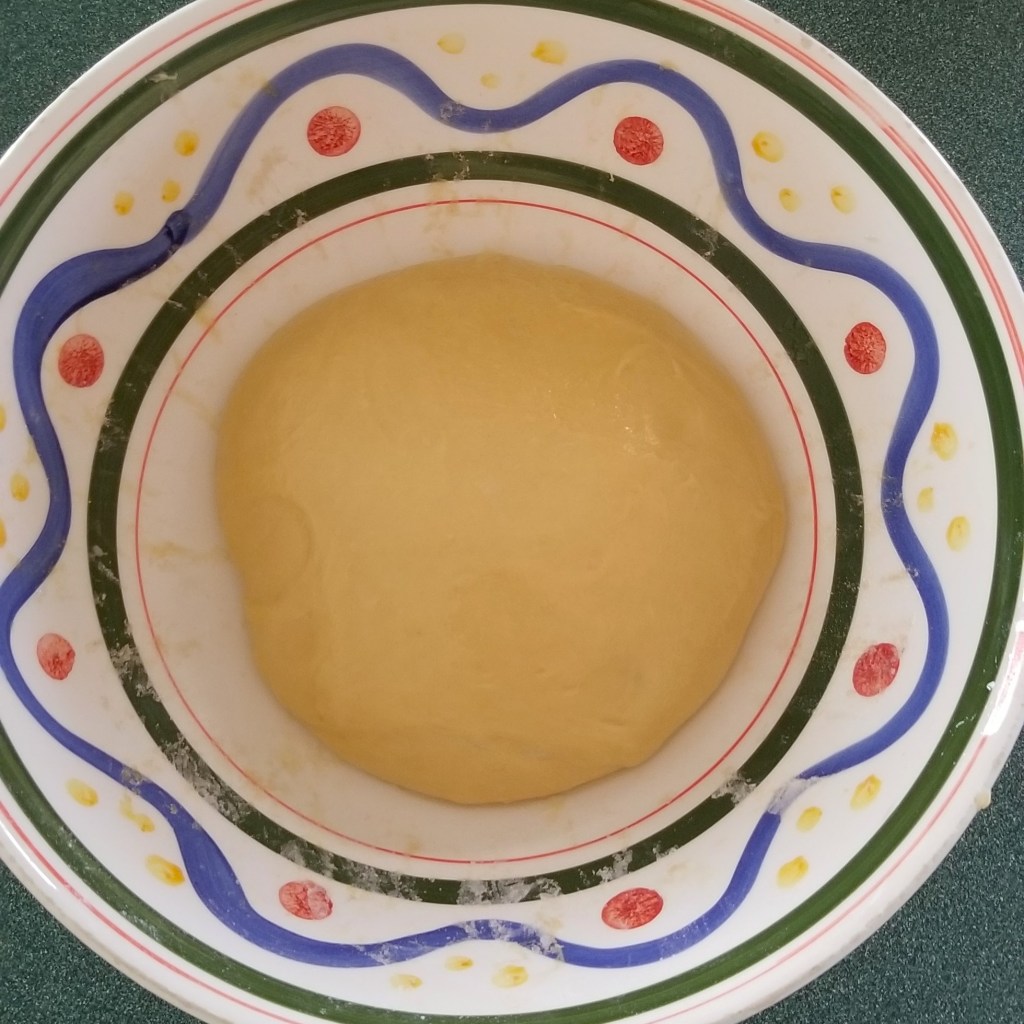
The dough will become elastic and easy to handle, and almost all of a sudden, will come off easily from hands and table (photo below, left). If it is too sticky at this point, add a sprinkle of flour and continue kneading, until the dough comes off the table and hands, and may be stretched without breaking (photo below, right):
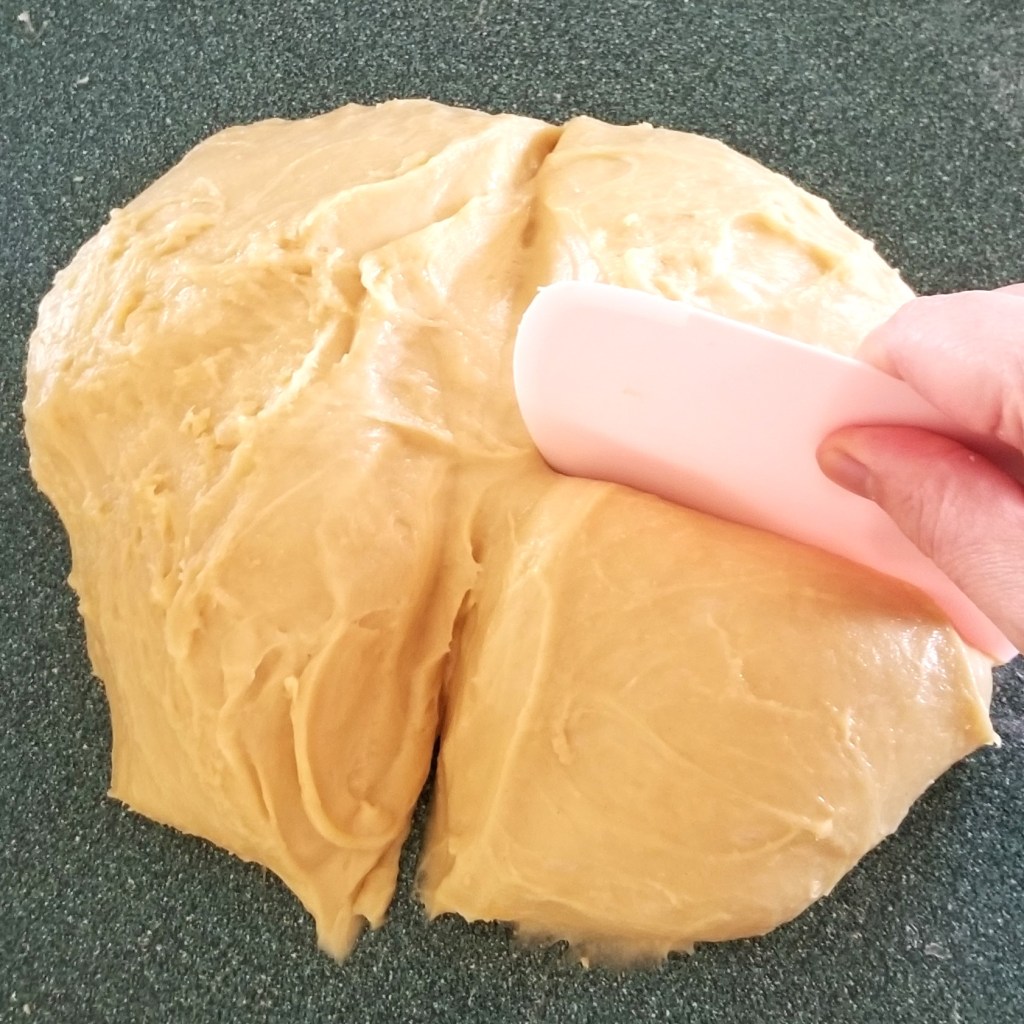
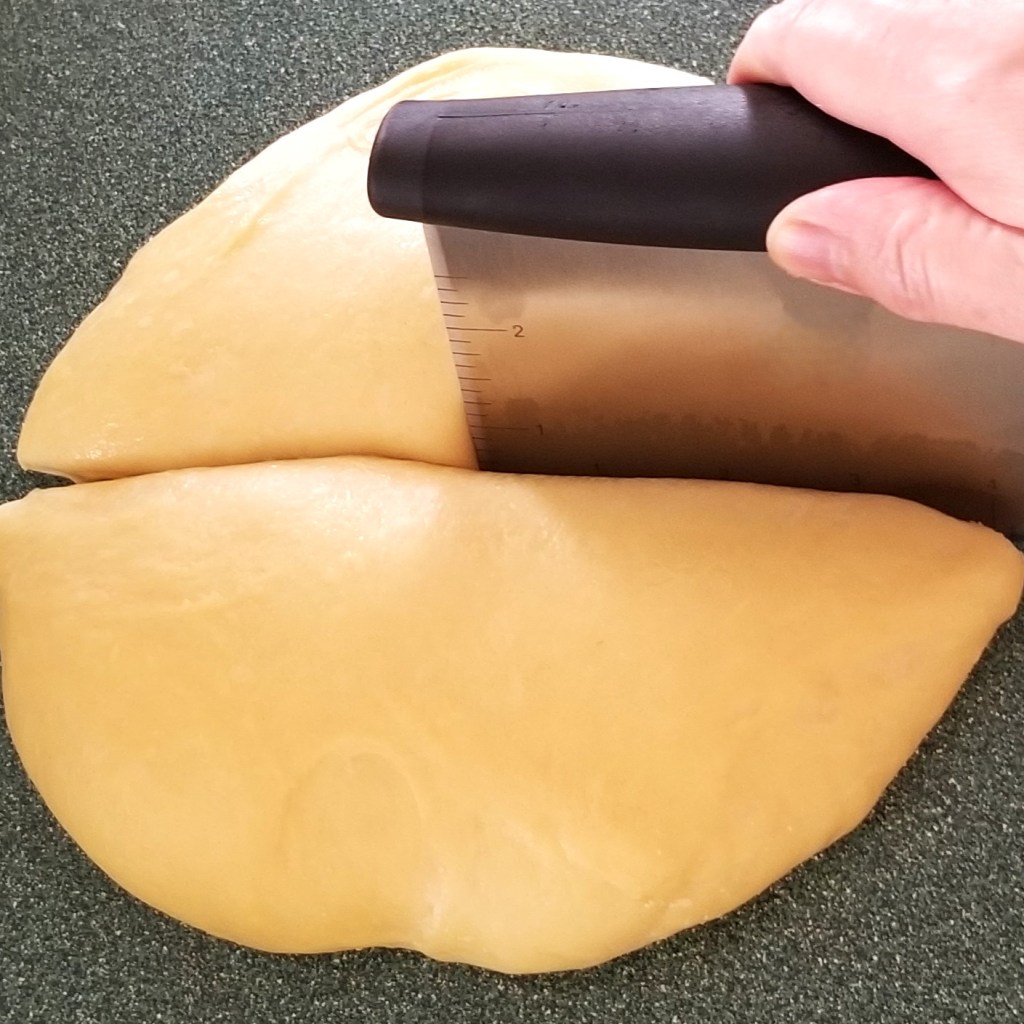
Pull edges and gather, to form a ball; at this point, I divided the dough, taking about one quarter from the ball:
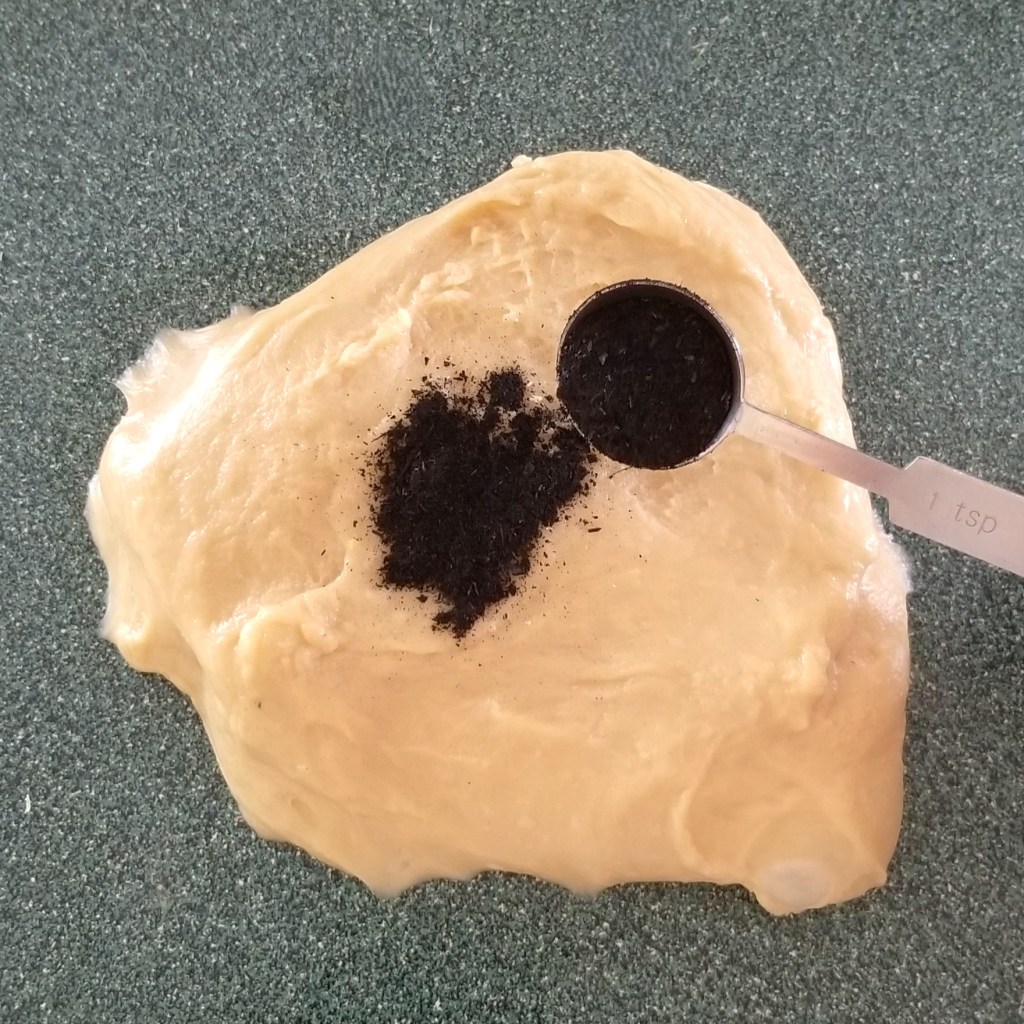
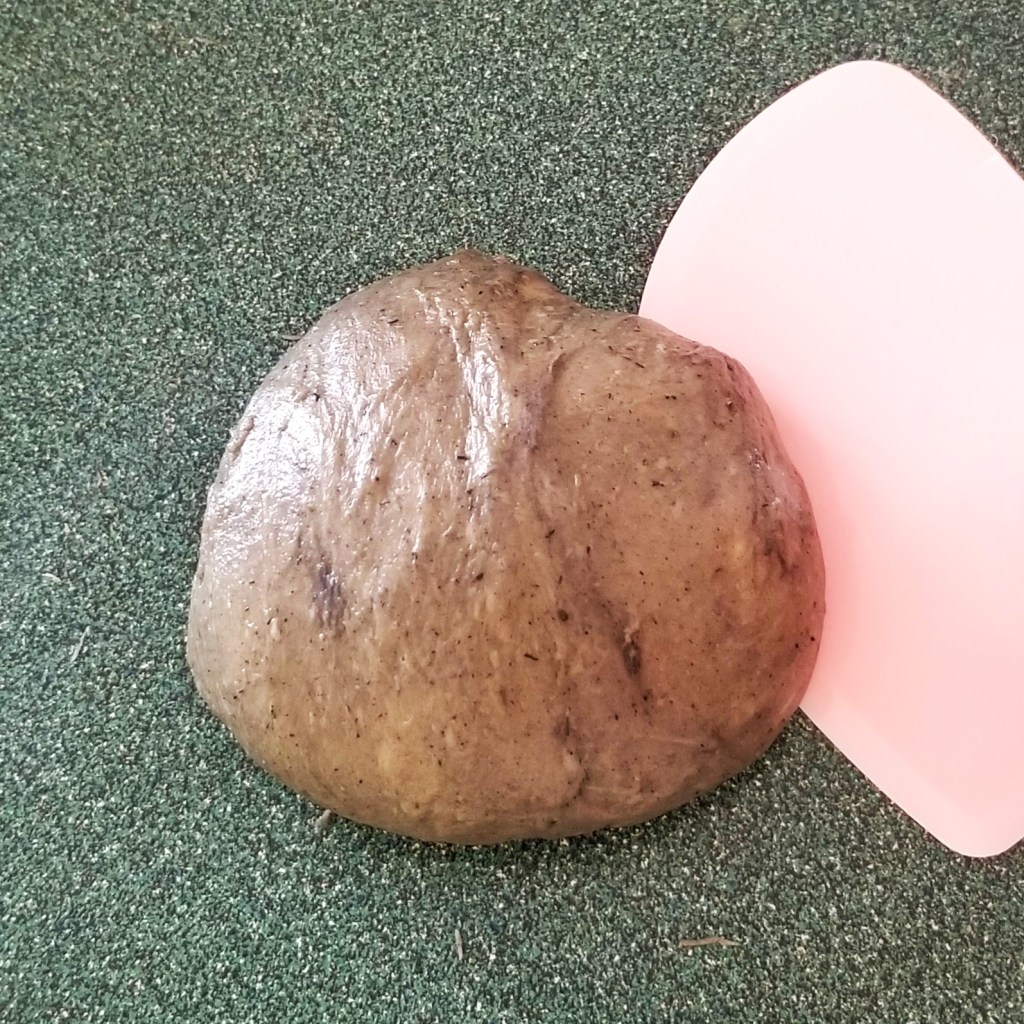
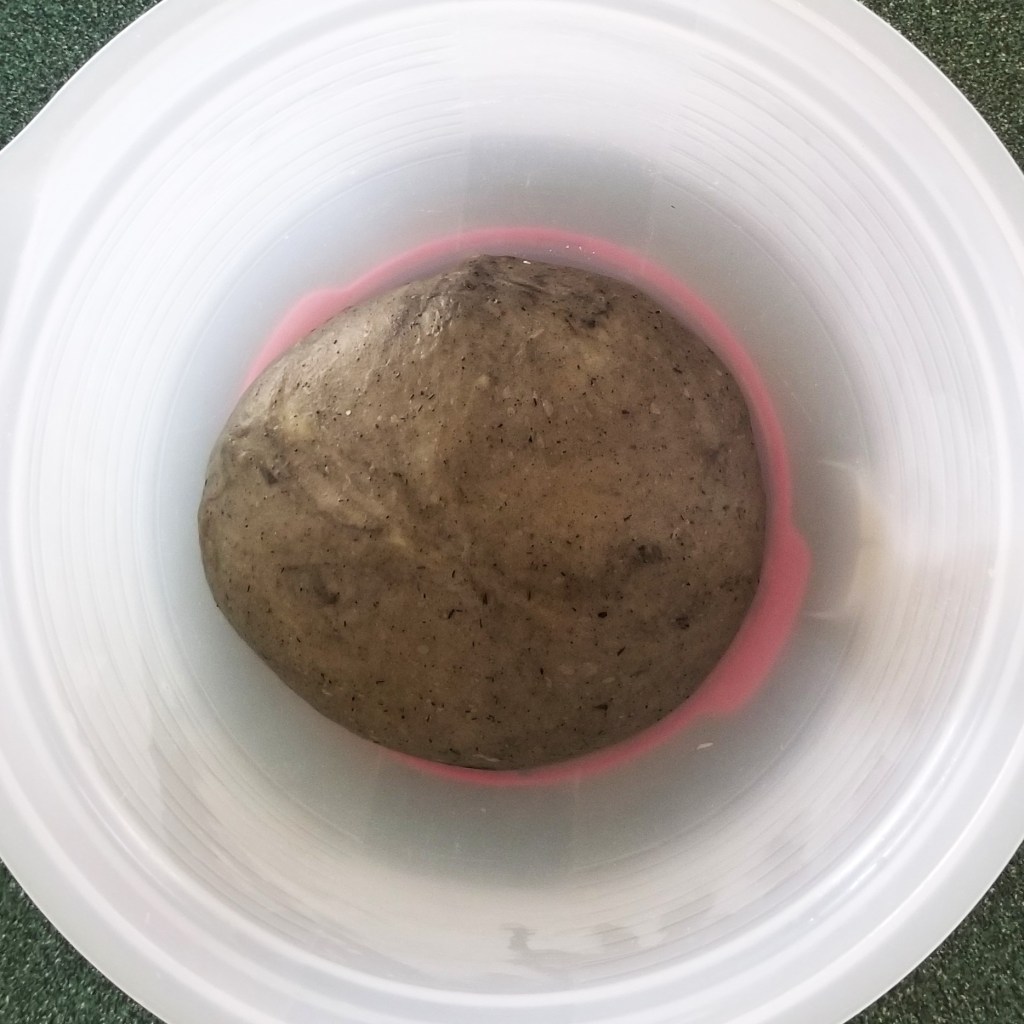
For a darkened dough, I added one teaspoon of totomoxtle ashes to the small piece (photo below, left), then kneaded to mix in and colour the dough; I finished by pulling edges and tucking under, to form a ball (photo below, right):
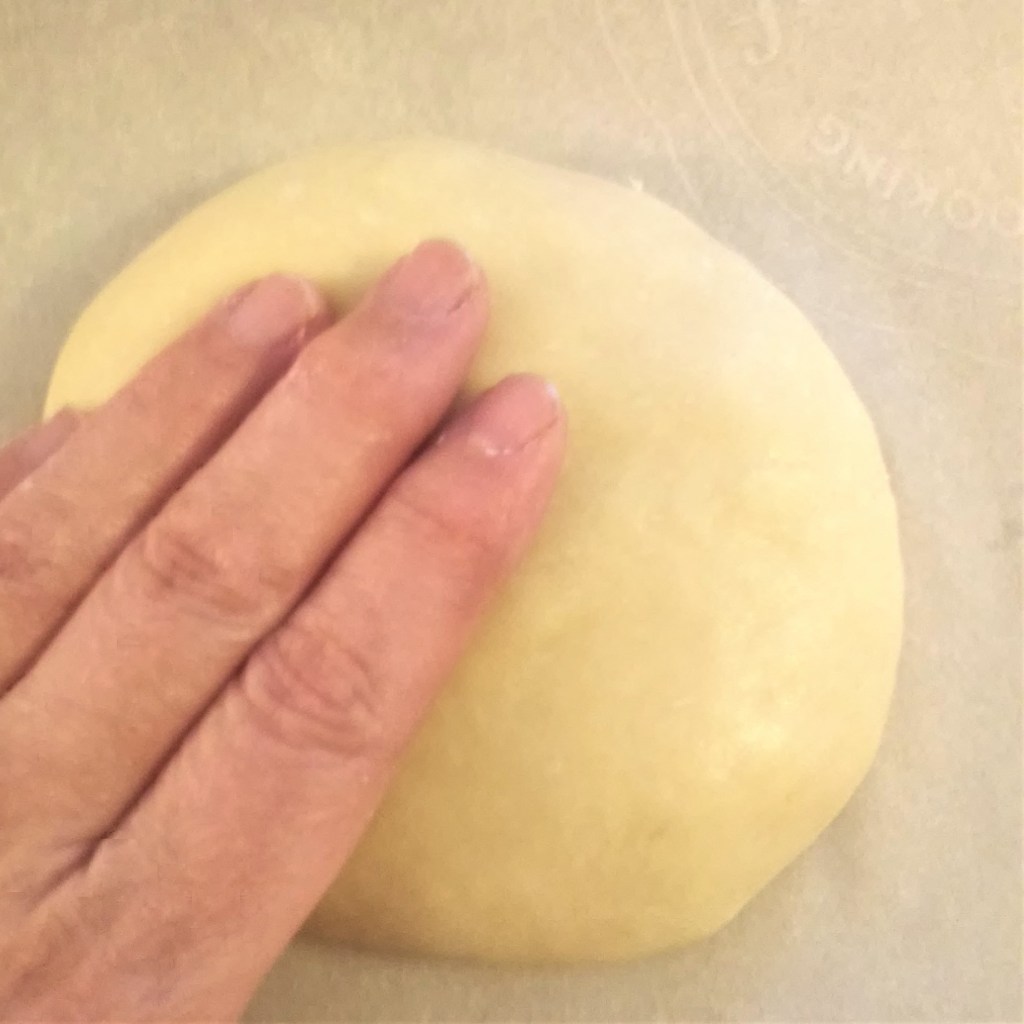
Transfer to a lightly greased bowl (photo below, left). Form the rest of the dough into a ball, and place in another lightly greased bowl (photo below, right):
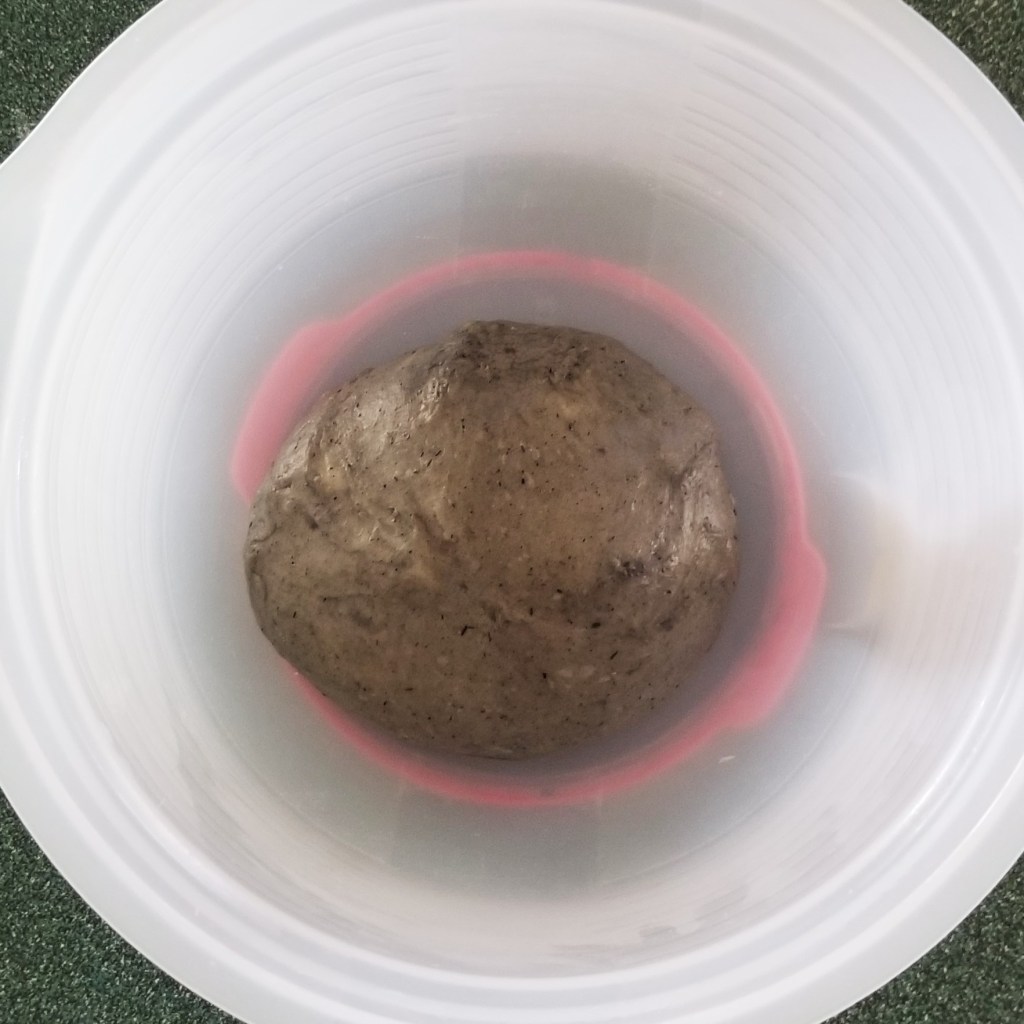
Cover with clean towels, and allow to rest for 30 to 40 minutes. The pieces of dough will relax, and expand a little:
Meanwhile, prepare two baking sheets by lining with parchment paper, and reserve.
Prepare toppings: Mix the rest of the totomoxtle ashes (about one tablespoon), with two tablespoons of sugar (photo below, left); mix until well incorporated (photo below, right):
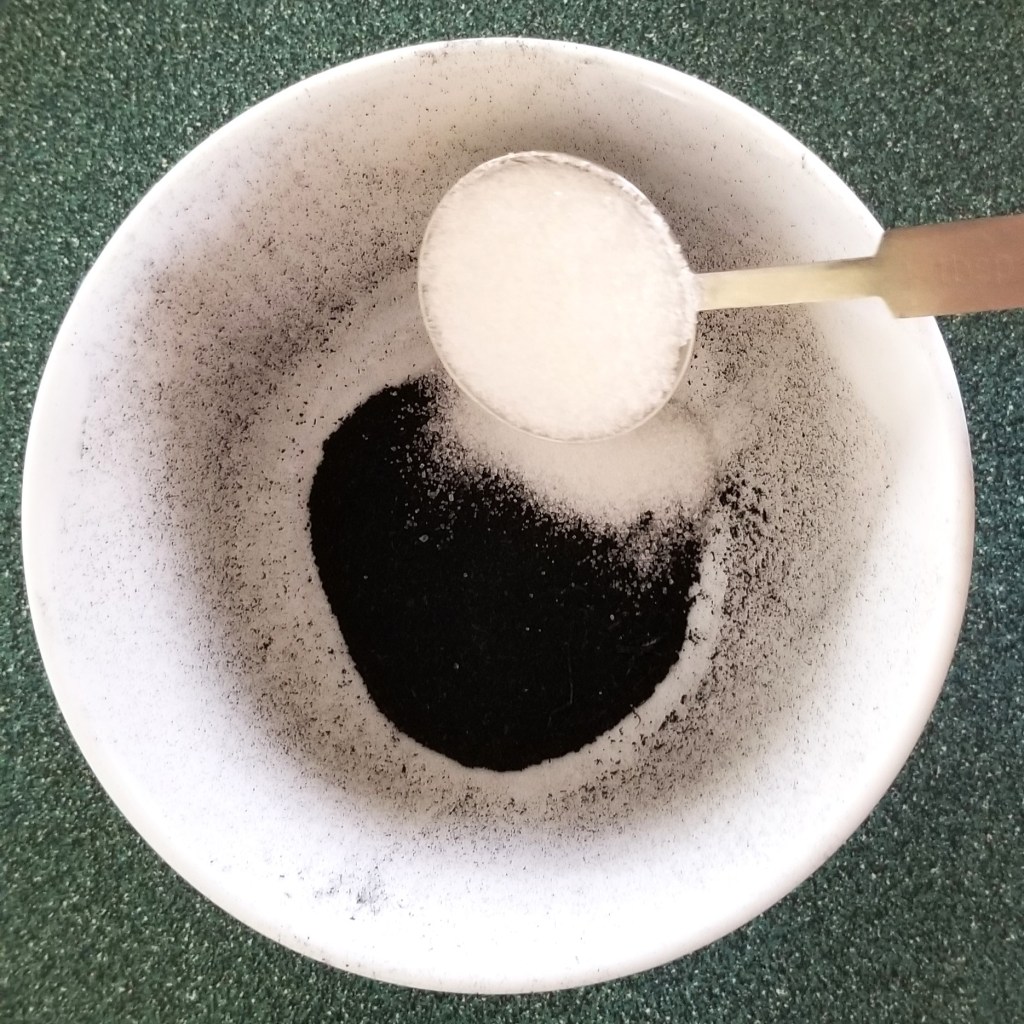
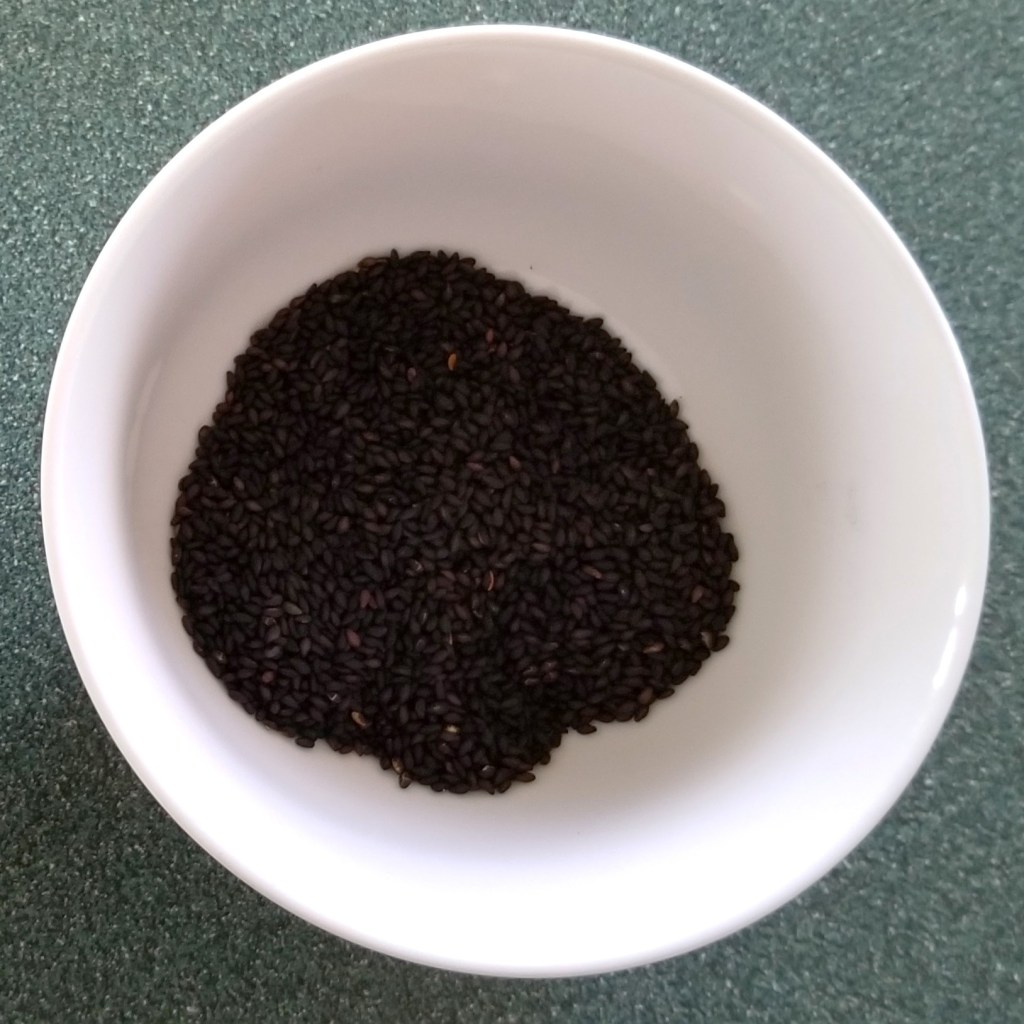
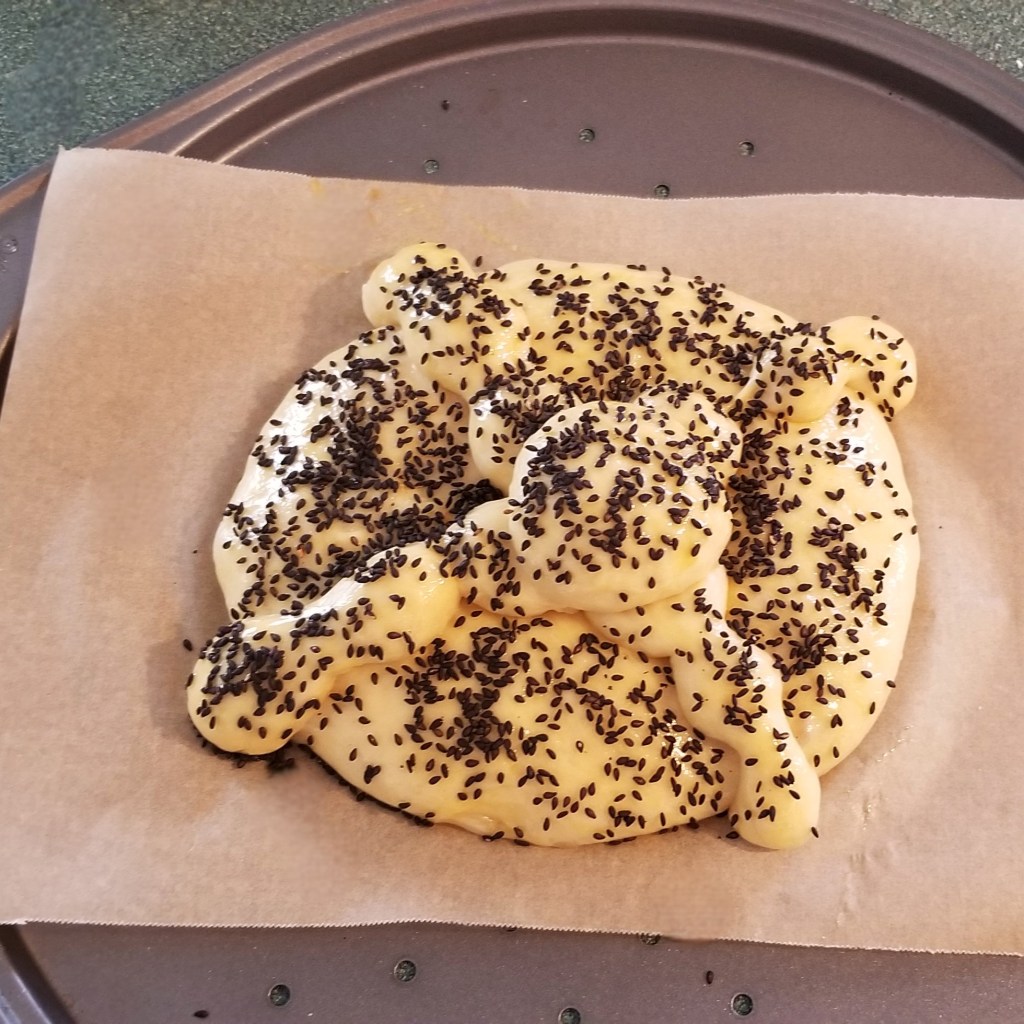
If using, place black sesame seed in a bowl (photo below, left). Beat the last egg in a small bowl (photo below, right):
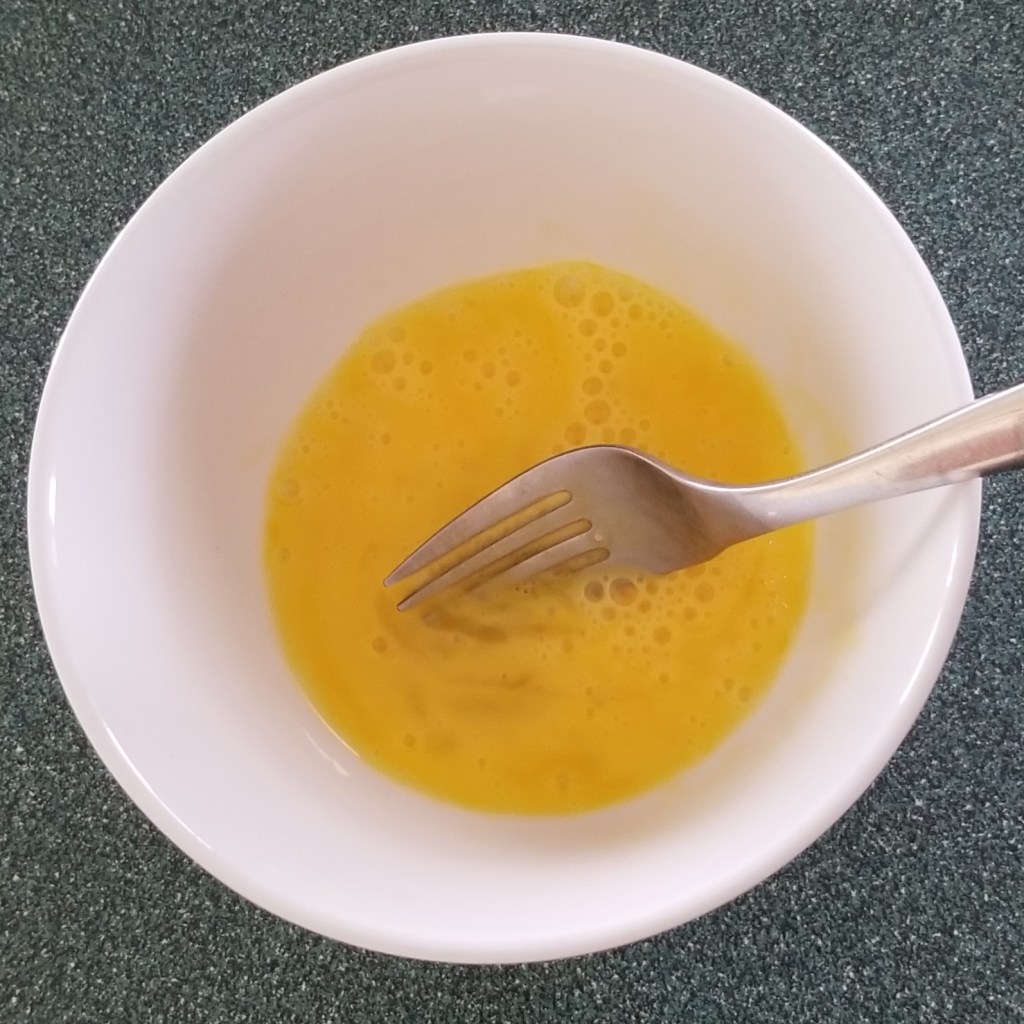
Reserve.
Take the relaxed dough, to form the bread. Divide dough, depending on size wanted for the final bread; I divided the plain dough in half:
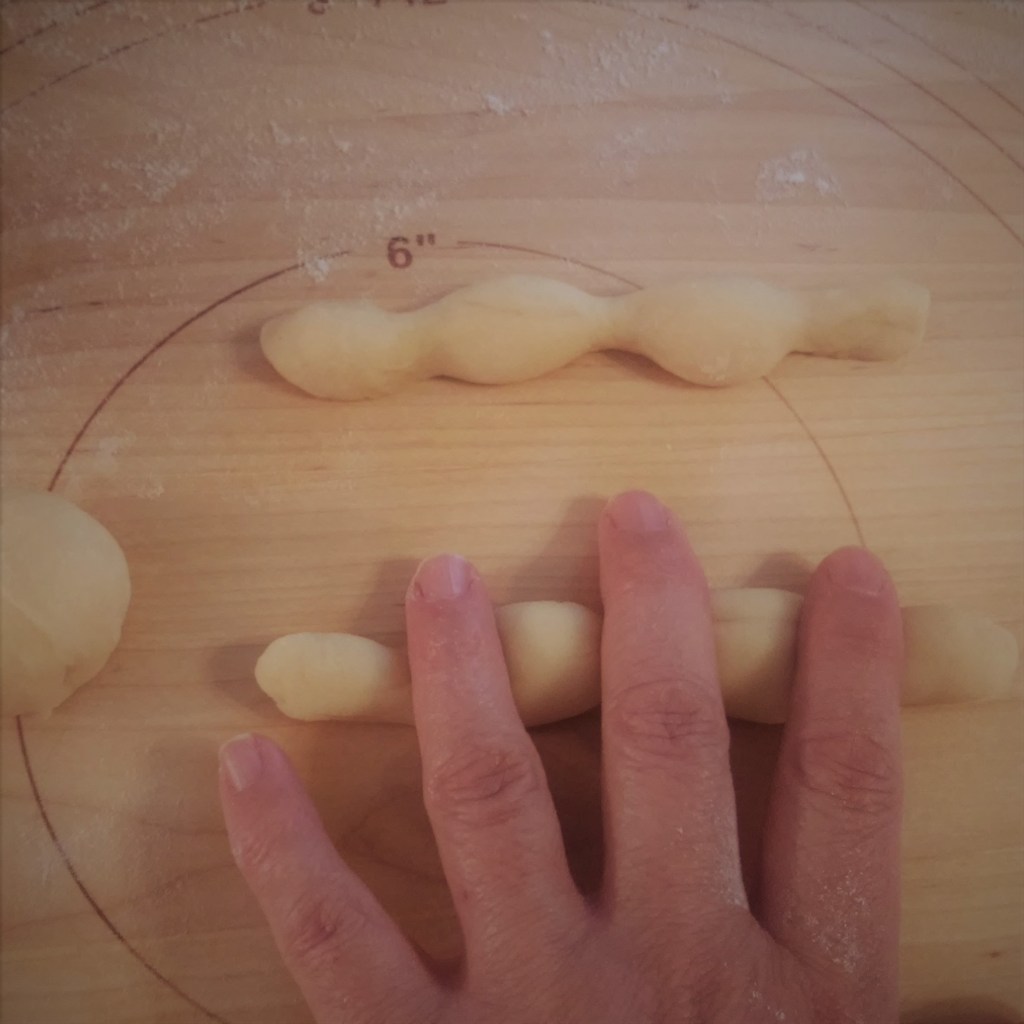
Working with clean and lightly floured hands, and one section of dough at a time, take about one fifth to one quarter of the dough and reserve. Form a round domed shape with the larger section, again pinching the dough towards the centre, and keeping the seam down; place on one of the prepared baking sheets, pressing softly to flatten the dome to form a round shape (photo below, left). Take the reserved smaller piece, and roughly divide into thirds; form one piece into a ball, again pinching, and reserve, with the seam facing down. Roll the other two pieces into ropes, and using wide spread fingers, make indents to form four to six bumps, shaping like a beaded string (photo below, right):
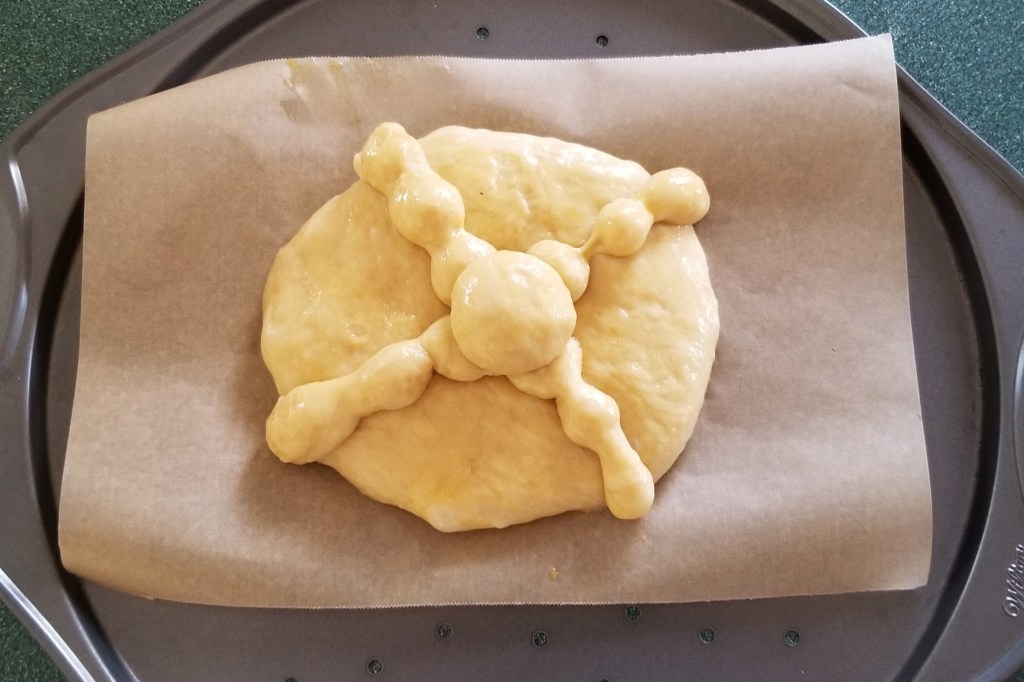
Brush the top of the round piece on the baking sheet with the reserved egg wash, then place the beaded ropes across each other:
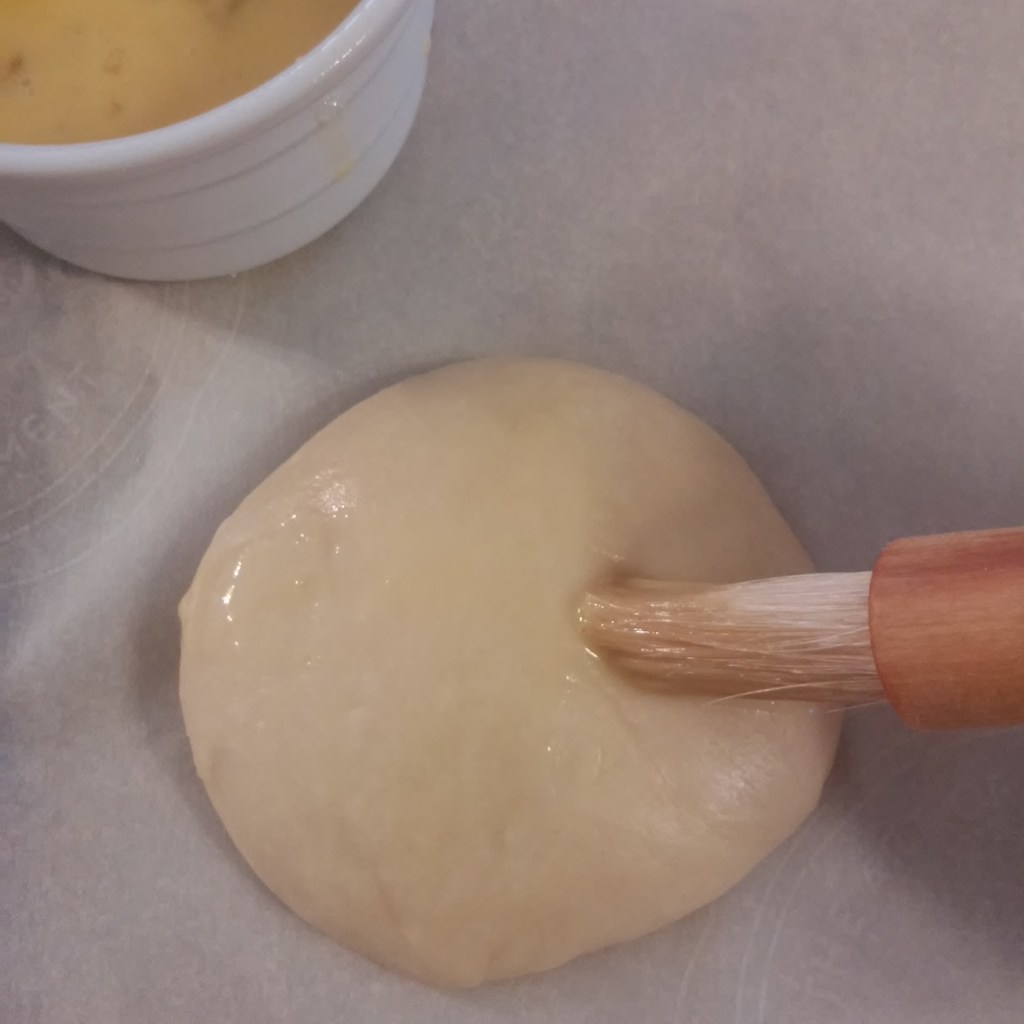

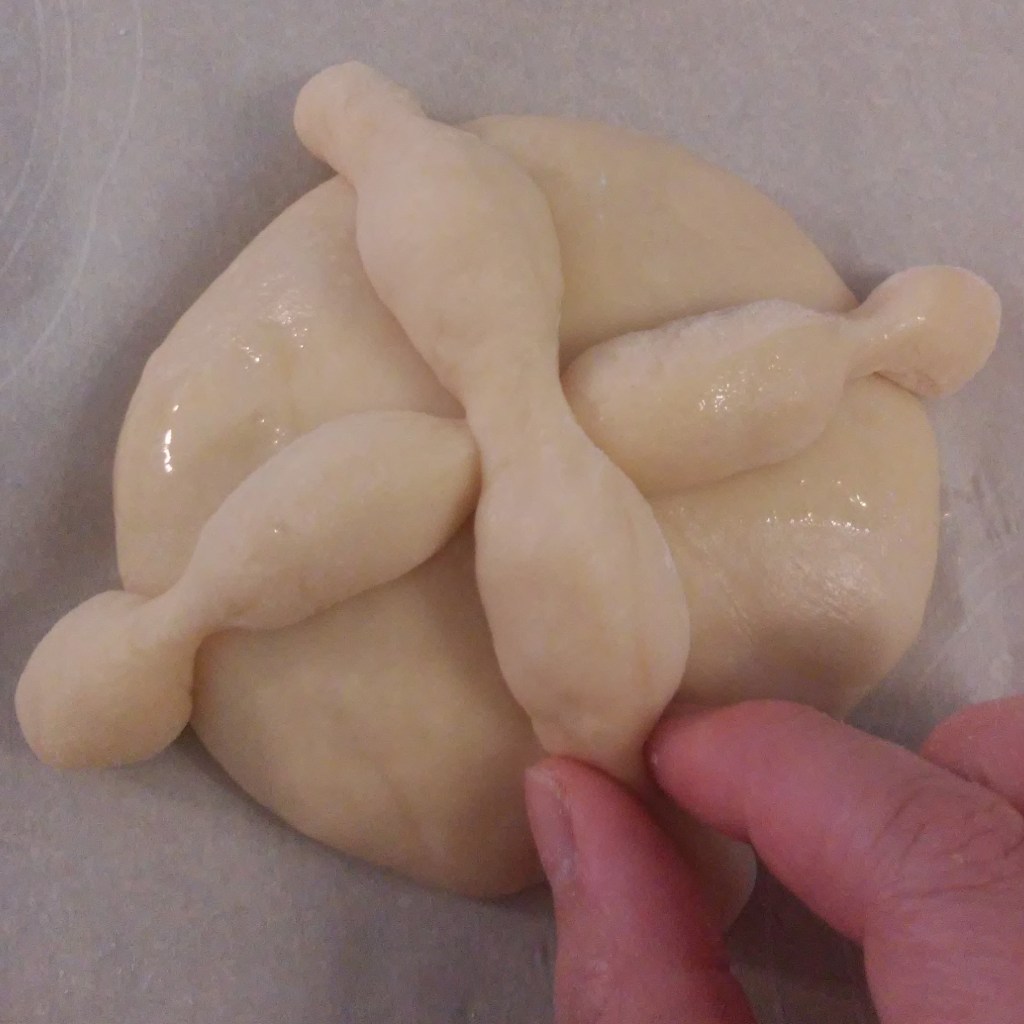
Press in the middle with one finger (photo below, left); brush ropes with egg wash (photo below, right):
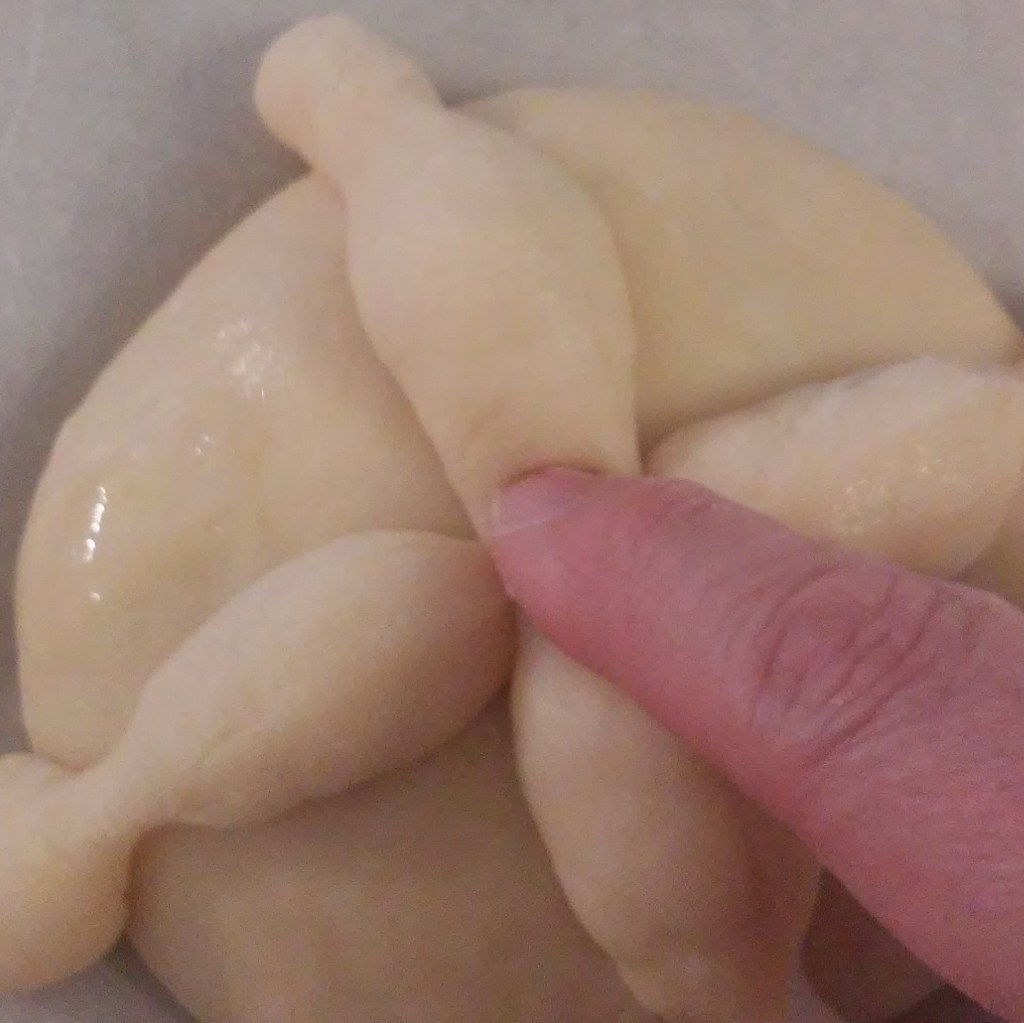
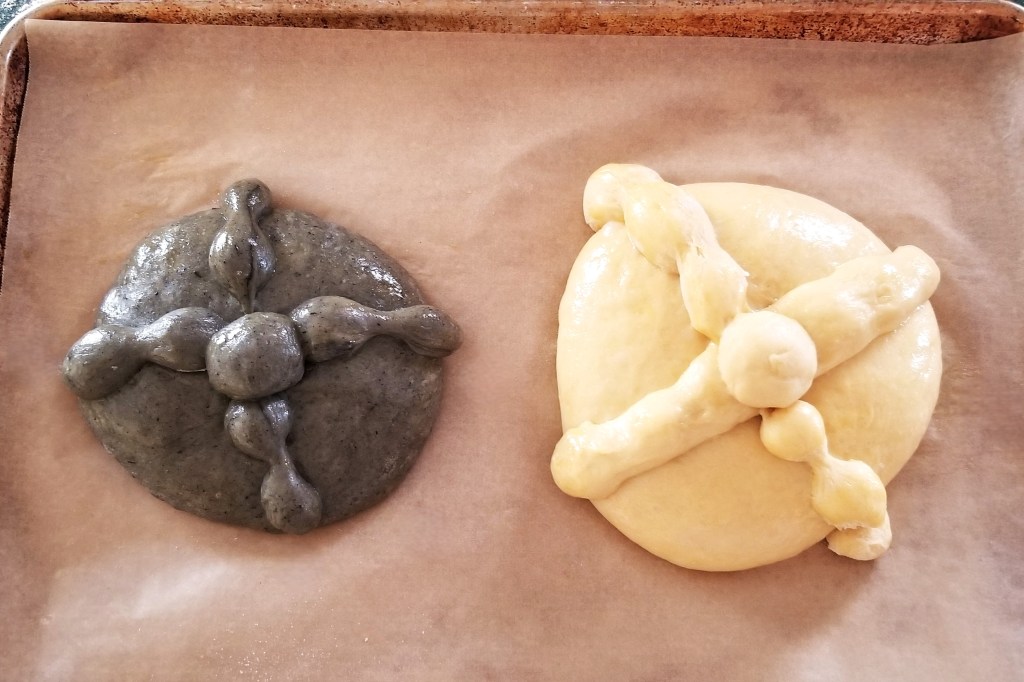
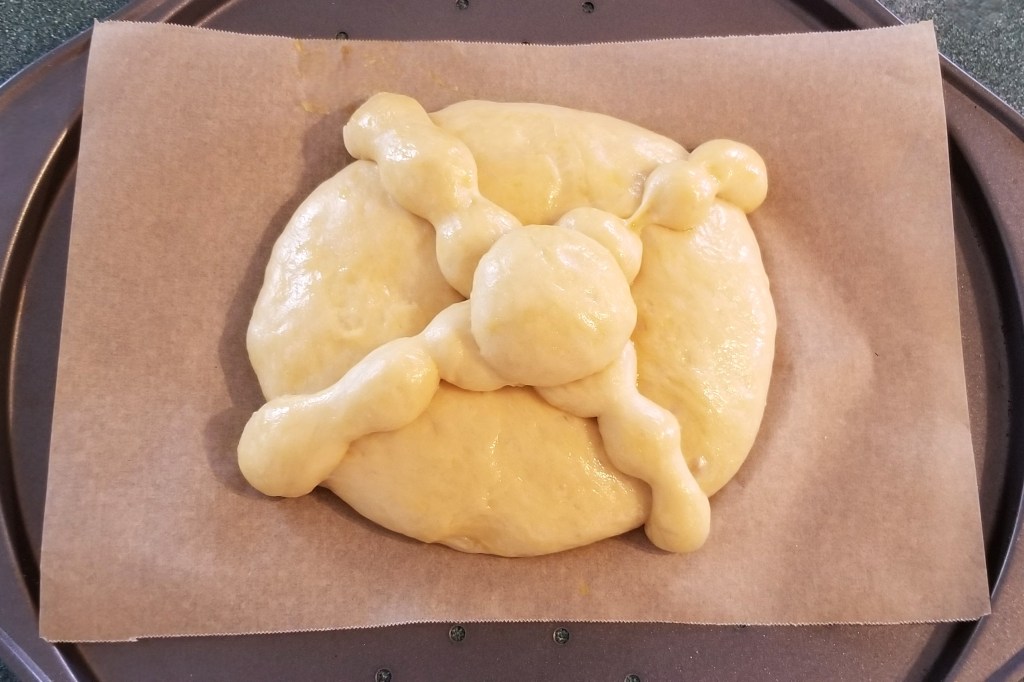
Place the reserved small ball on the top of the indent at the centre; brush with egg, as well. This is the final shape of the bread. Repeat with the other sections of dough (I kept the dark dough in one piece):
Keep trays in a warm spot, checking every hour or so, until the breads rise and look puffy and have increased noticeable in size. This batch took a little over two hours:
Pre-heat oven to 350°F (180°C).
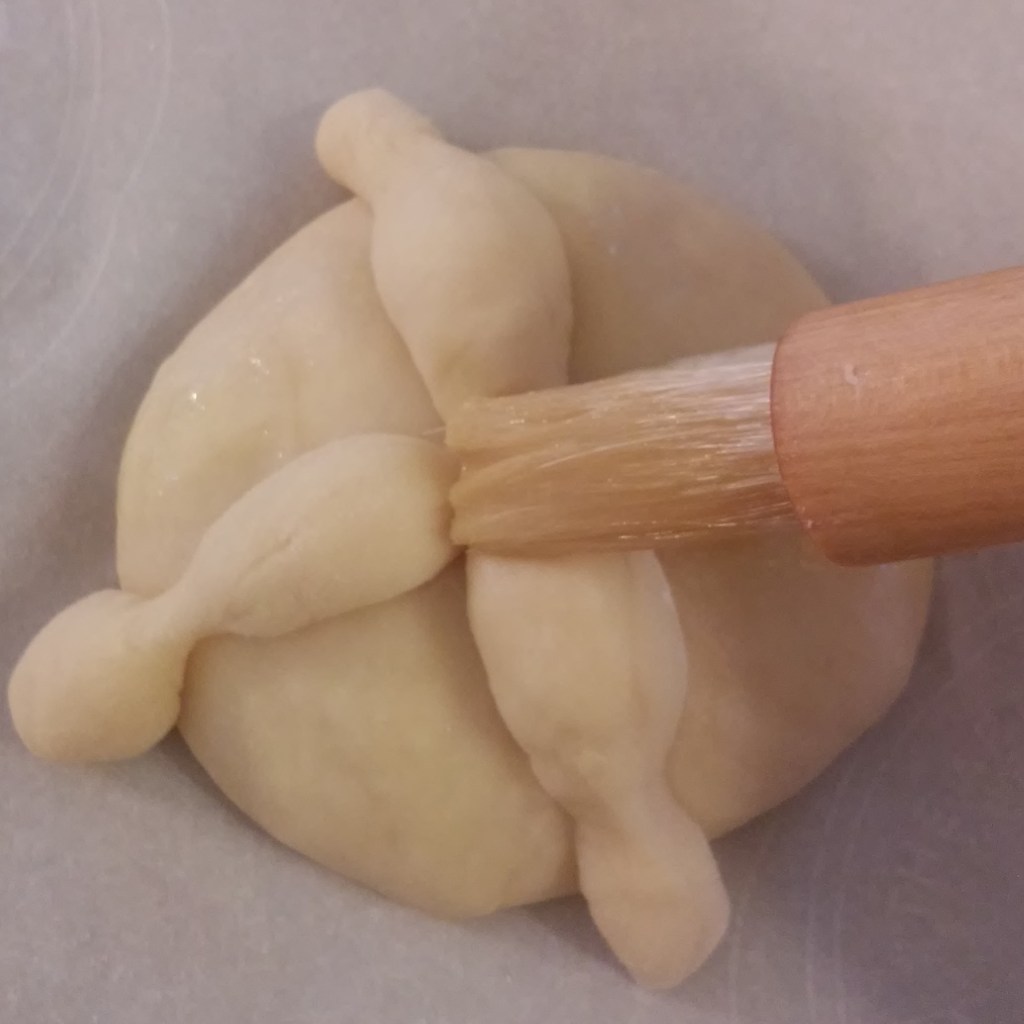
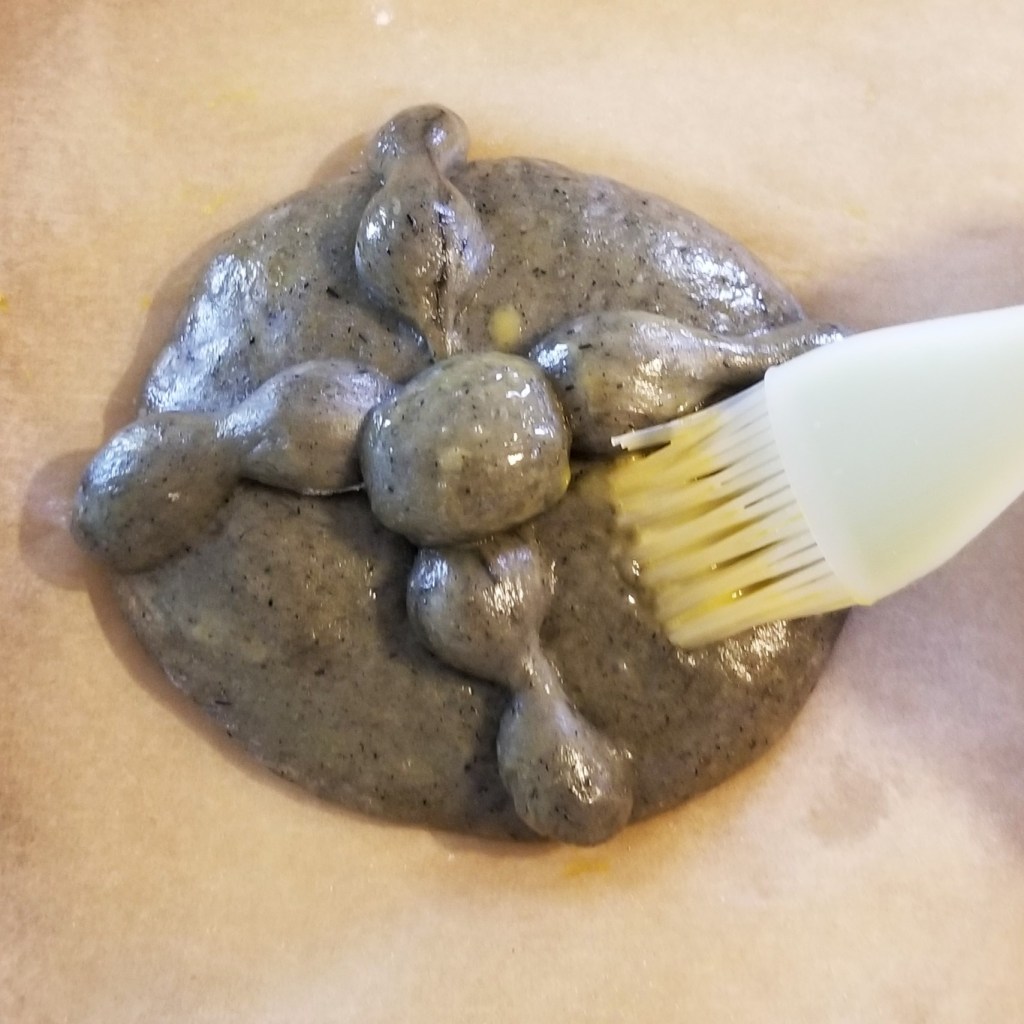
Very carefully brush breads with egg wash a second time (photo below, left). This is not usual, but I decided to sprinkle with the totomoxtle and sugar mix at this point; I used a fine colander, to make the sprinkling easier and more uniform than with a spoon (photo below, right):

I also tried sprinkling one of the plain breads with black sesame seed (photo below, left); I did not care for the effect, so I then sprinkled with totomoxtle and sugar mix, as well (photo below, right):

The breads are ready for the oven:
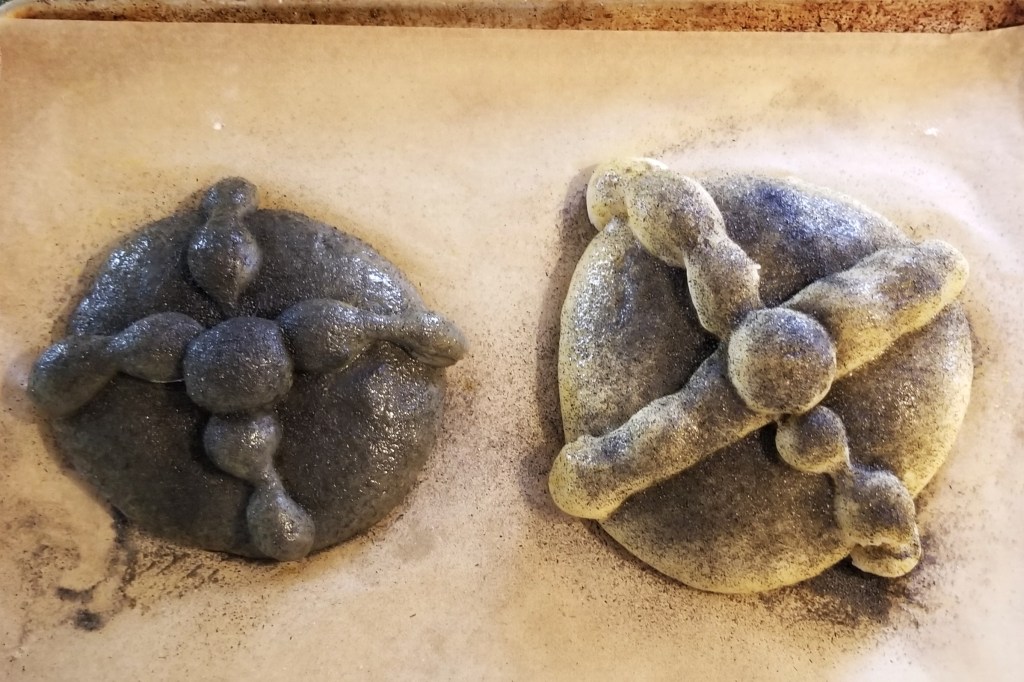

Bake in pre-heated oven for 15 minutes, then switch bottom tray to the top and top one to the bottom, and also rotate each tray 180 degrees, so the side that was facing the front of the oven, faces the back. Continue baking for another 15 minutes, then check, every 5 minutes, until the bottom of the bread is golden brown; take out of the oven (this batch took 35 minutes total baking time):
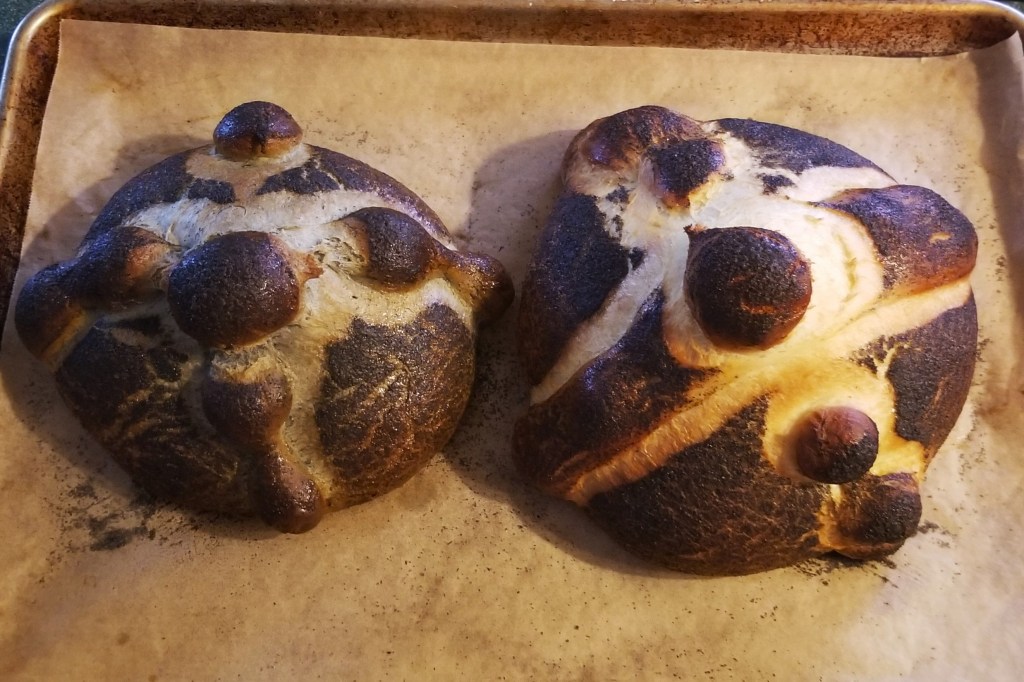
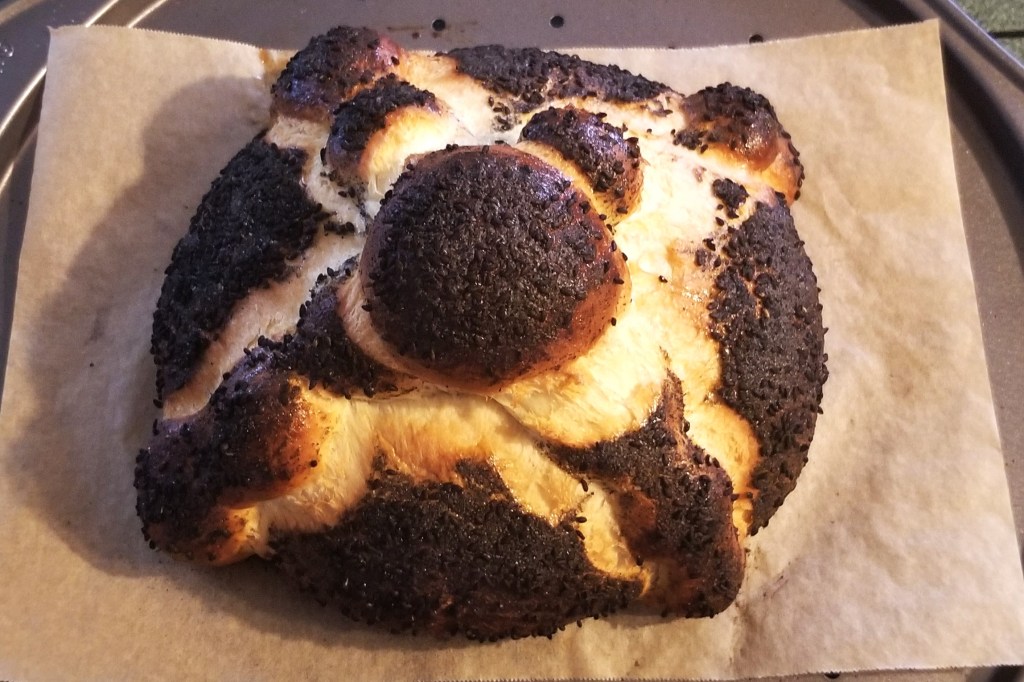
I liked the dark coating, and the contrast with the white stripes from rising of the bread during baking, but for a completely black effect, I brushed one of the pieces with melted butter (photo below, left), and coated with totomoxtle and sugar mix, again through a colander. The bread was now completely covered in dark sugar (photo below, right):
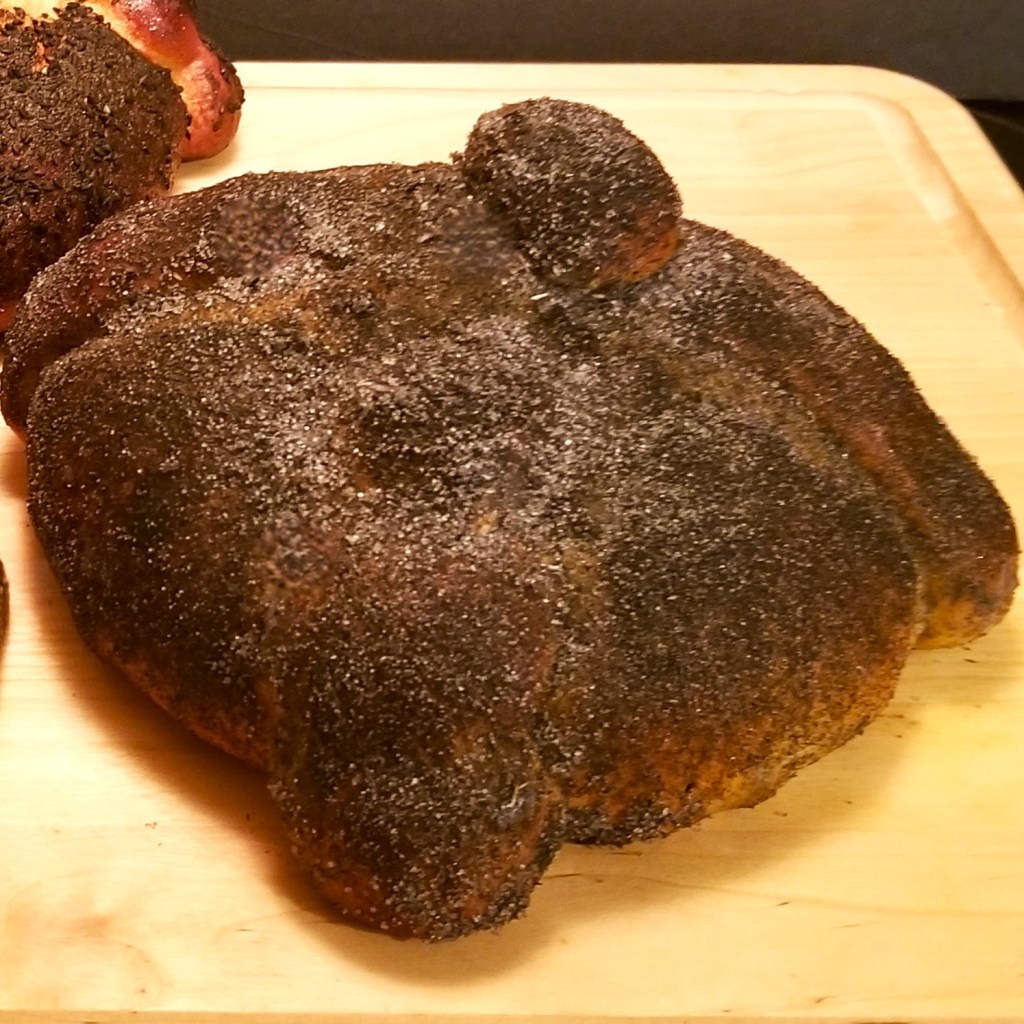
The flavours of all three pieces were delicious, but the dark dough was just a little dry, and since I only used one teaspoon of totomoxtle ashes, the crumb was not black, but grey (photo below, left); also, the orange blossom flavour was not as prominent. For the plain dough, the flavour and texture were just as strong and fluffy as expected from regular Day of the Dead bread, especially the one coated with sugar mix after baking; as for the black sesame seed, the flavour was not too strong, but the seeds added colour and a lovely crunchy texture to the crust (photo below, right):
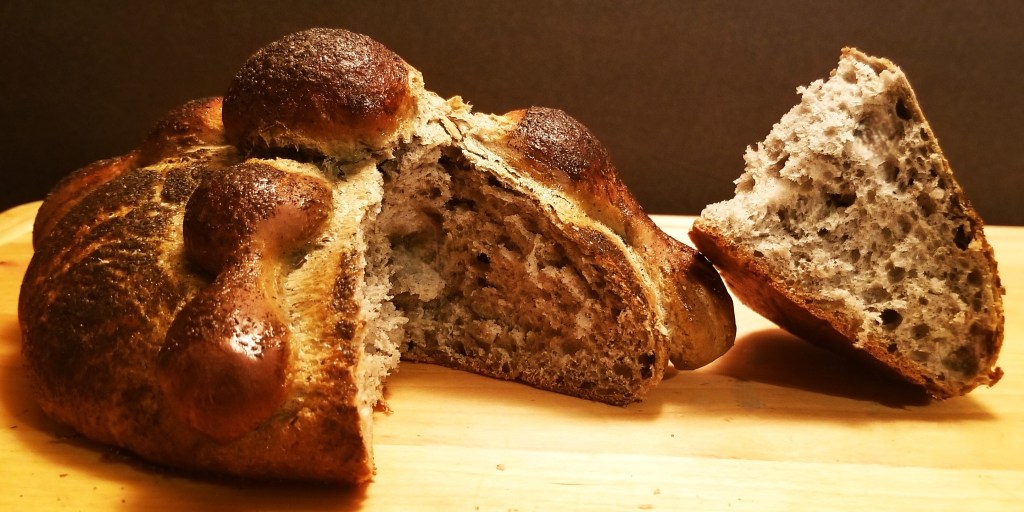
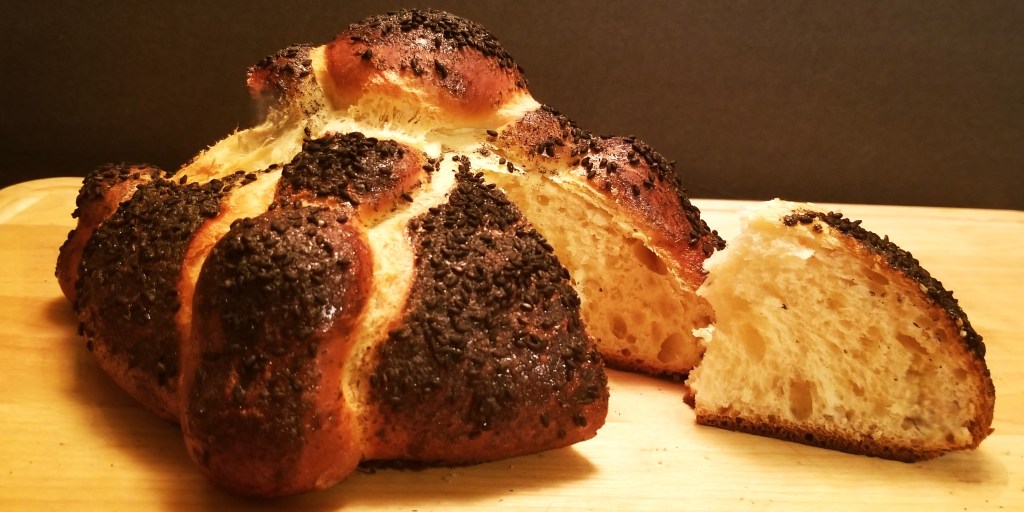
For a true black bread, it would be necessary to add a lot more totomoxtle ashes to the dough, so it would be better to reduce some flour accordingly, to prevent dryness, and mix the ashes with the flour from the beginning of the recipe. I liked the sugar coating before baking, but coating after baking provides a more uniform and completely black crust. And I definitely liked the texture and colour of the crust from the piece sprinkled with both, the totomoxtle and sugar mix, and the black sesame seed.
Which one was your favourite?
FUN FACTS: Halloween and Día de Muertos (Day of the Dead) are fall celebrations that seem culturally too different to be put abreast as part of one holiday, but seen from a less rigid way, their origins are not that far apart. In England, All Saints’ Day, on November 1st, was known as All Hallows-mas during the Middle Ages; people prepared for their celebration with a vigil the night before (October 31), that is, All Hallows’ Eve. And Odilo, the fifth Abbot of Cluny, in France, assigned November 2 as All Souls’ Day in 998 AD, a day specific for remembering and praying for those who had passed away but were still in the process of purification; this observance gradually spread throughout the Catholic Church towards the end of the 10th century. The three days all together were sometimes referred to as All-hallow-tide. All Saints’ Day and All Souls’ Day became part of the Spanish Catholic culture, which the missions brought to Mexico during colonial times, known as Día de todos los santos, and Día de los fieles difuntos, respectively, with the latter popularly called Día de muertos. Nowadays, Halloween has become a day to be frightened in a fun way, while the Day of the Dead is still a highly religious celebration, to remember the dearly departed.
Have a Happy Halloween and a Blessed Día de muertos
For your convenience, click on the highlighted text below for products available on Amazon™. DISCLAIMER: Any reviews included in this post are my own, for items I have purchased, not provided by any company; as an Amazon Associates Program affiliate, I might receive a commission for any purchases originated from the links below, at no extra cost to you. Thank you to readers who have bought any other products starting with a click from my links!


I am sharing my recipe at Full Plate Thursday #718 with Miz Helen @ Miz Helen’s Country Cottage.
I am bringing my recipe to Thursday Favourite Things #684 with Katherine @ Katherine’s Corner, Bev @ Eclectic Red Barn, Pam @ An Artful Mom, Amber @ Follow the Yellow Brick Home, and Linda @ Crafts a la Mode.
I am joining Fiesta Friday #561 with Angie @ Fiesta Friday.


Dead bread, how perfect for the time of year. Seems its difficult getting the colour just right, I wonder if a little black food dye or squid ink might help? Great recipe post though thank you.
LikeLike
Hi, Mason! Yeah, a lot of bakers use food colouring, but I wanted to stay away from artificial agents. The ink might give a funny taste to the bread, I think, lol.
LikeLiked by 1 person
I’d gi natural too. Healthier and better flavour.
LikeLiked by 1 person
Hello Irene. That looks very fancy. I bet it tastes delicious too.
LikeLike
Hi, Tracy! Thank you, yes, it is very tasty; the crumb is buttery and light, and the orange blossom flavour delicate. I also enjoy kneading it by hand, it’s very relaxing.
LikeLiked by 1 person