Before the arrival of the Spaniards, several indigenous cultures in Mexico dedicated part of their harvest, or foods prepared from it, to their gods. Corn (maize) and beans were two crops that complemented each other in every aspect, from the balance in the cultivated field (milpa) achieved by beans nurturing the corn, and corn in return serving as a climbing stake for the beans, to the kitchen, where they rendered their strong nutritional profile together in the pots and grills of deft cooks, combined in dishes as simple as boiled beans (etl) and tortillas (tlaxcalli). During their month of Etzalcualiztli, the Mexica (Aztec) celebrated the return of the rains as the forecast of a promising harvest (it would be around the month of June); they prepared a dish of corn and beans called etzalli. to honour their god of rain, Tlaloc, also connected to water and fertility of the earth. After the Spanish conquest, all native ceremonial rituals were eradicated or modified to accommodate the imposed Catholic practices. The harvest thanksgiving celebration was moved to November, at the end of the actual harvest, especially for corn; farm owners continued to provide their workers with a meal of corn and beans, but in the form of bean tamales, served with a spicy salsa and eventually, mole.
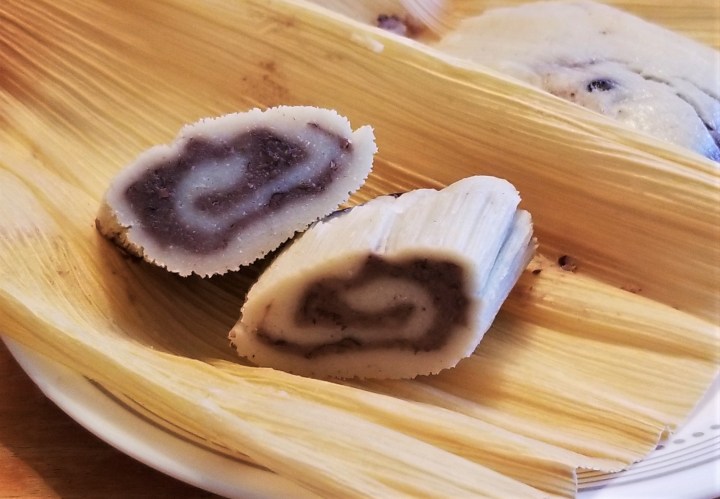
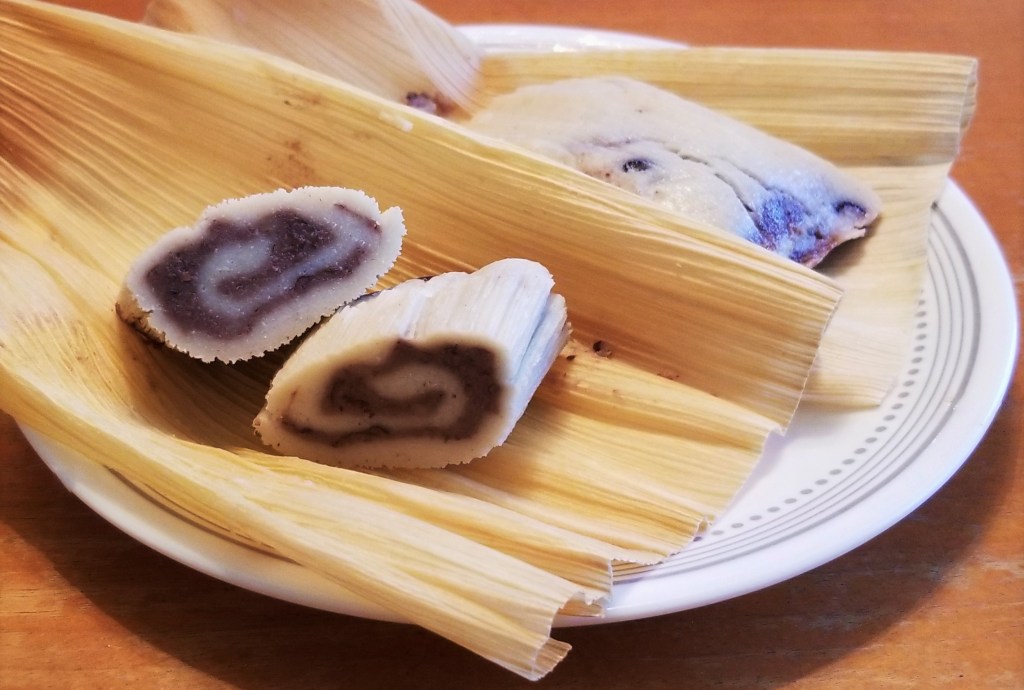
The bean tamales pictured at the top of the post, put together as layered rolls, and steamed, wrapped in corn husks, became the traditional foodstuff to share at the end of the corn harvest in several farming regions of Central and Southern Mexico, from Tonatico and Tlahuac, to the state of Oaxaca, where they continue to prepare the simple, yet tasty and visually interesting delight that is the layered tamal de frijol.
Layered Bean Tamales – Tamales de frijol en capas
Ingredients
For the corn paste:
2 cups corn flour (masa harina, such as Maseca™)
1 ½ cups broth (or water, for vegetarian option)
6 tbsp lard (or vegetable oil for vegetarian option)
1 tsp salt, or to taste
For the beans:
2 cups cooked pinto or black beans
2 tbsp lard (or vegetable oil, for vegetarian option)
½ tsp salt, or to taste
To assemble and serve:
Dry corn husks
2 cups prepared red mole (homemade or from jar)
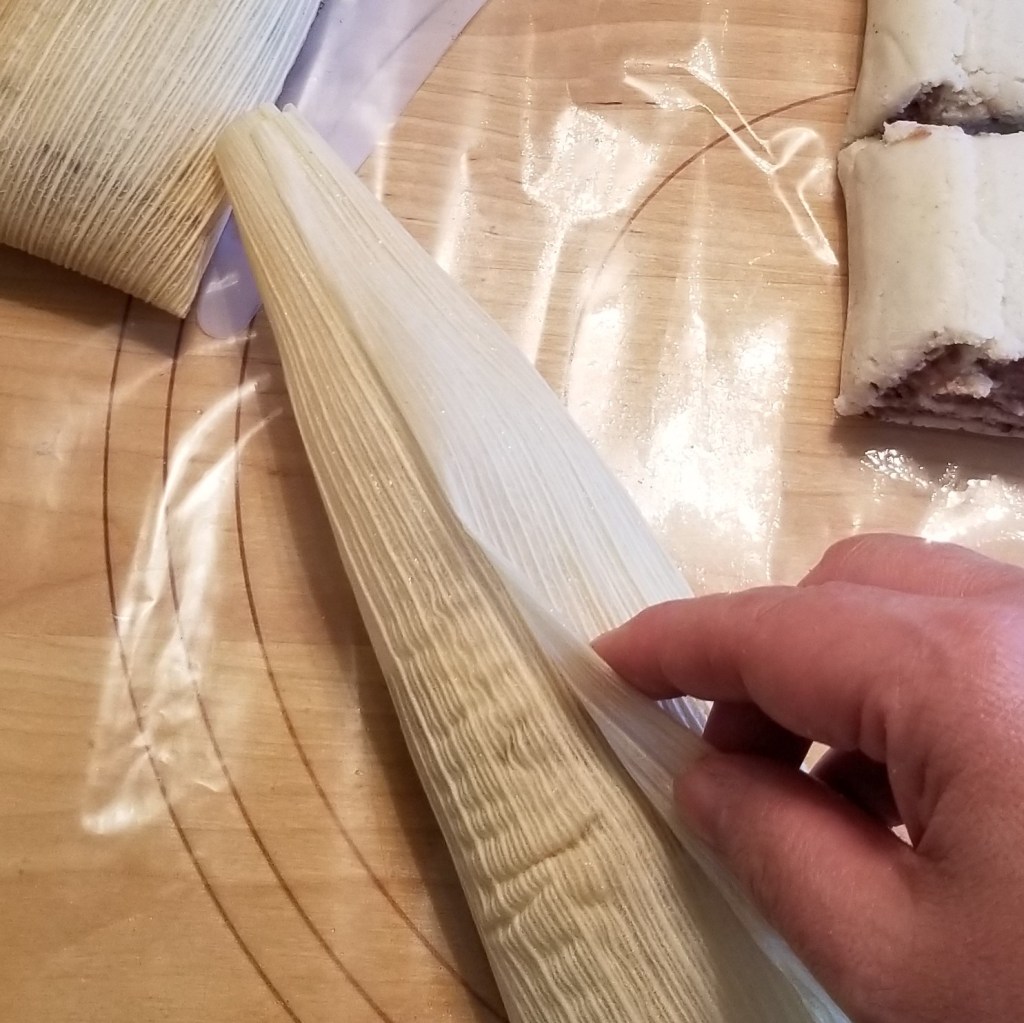
Prepare husks: Wash husks under running water, separating them very carefully. Discard pieces with stains or dark spots. Dunk the rest in water and drain a couple of times, then let soak in hot water for at least 20 minutes:
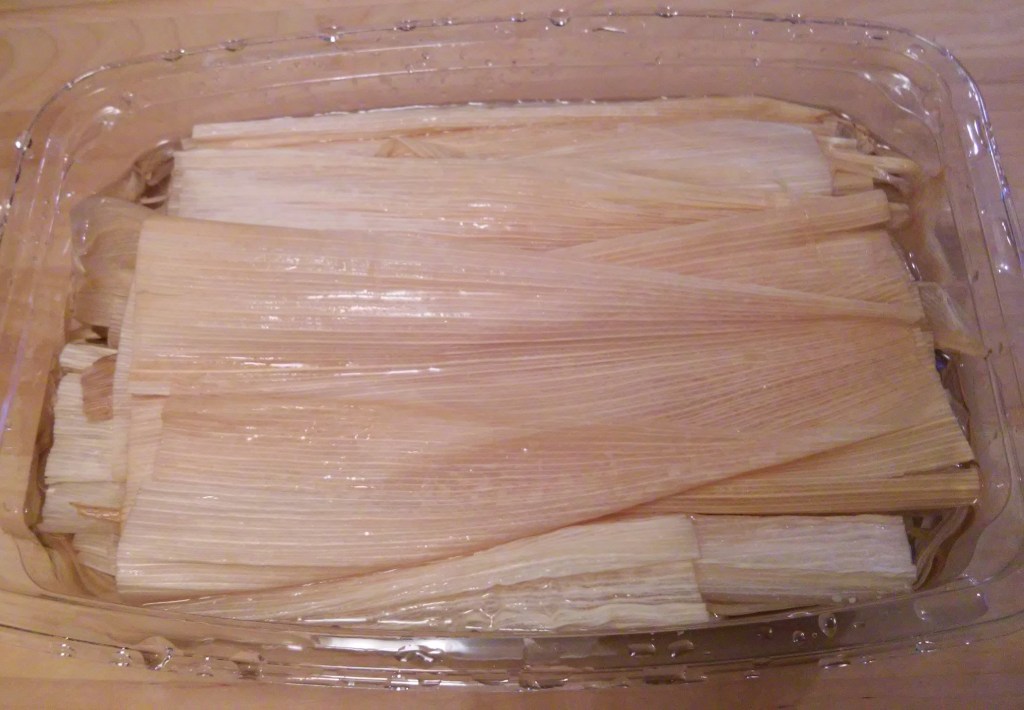
Remove from water, gently squeeze excess water and reserve, propped in a colander.
Prepare corn paste: In a small pot, bring broth (or water) to boil; measure one and half cups. In a large bowl, mix flour, salt and fat, then carefully pour the hot liquid into the bowl:
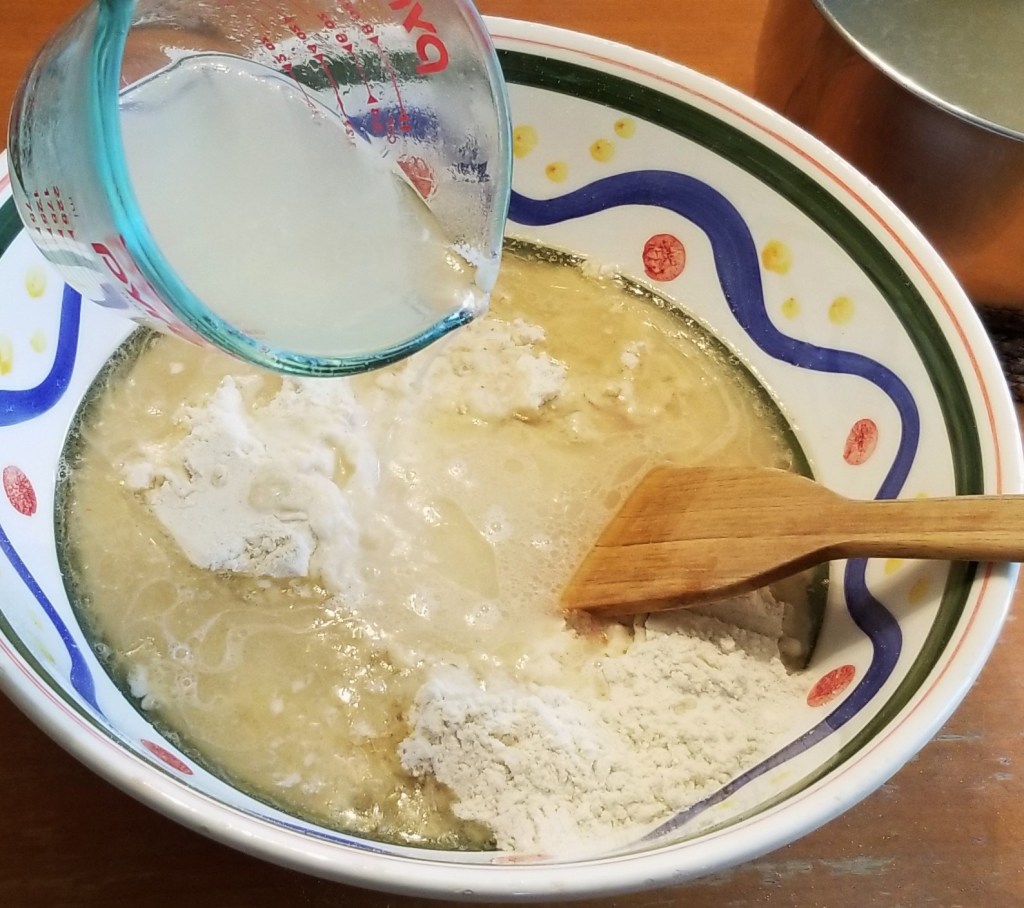
Incorporate all ingredients into a thick, uniform paste. Allow to rest for a few minutes.
Meanwhile, prepare beans: Mix beans, fat and salt together, smashing the beans with the back of a spoon or a potato masher. Leave a few beans intact or partially mashed, for texture:
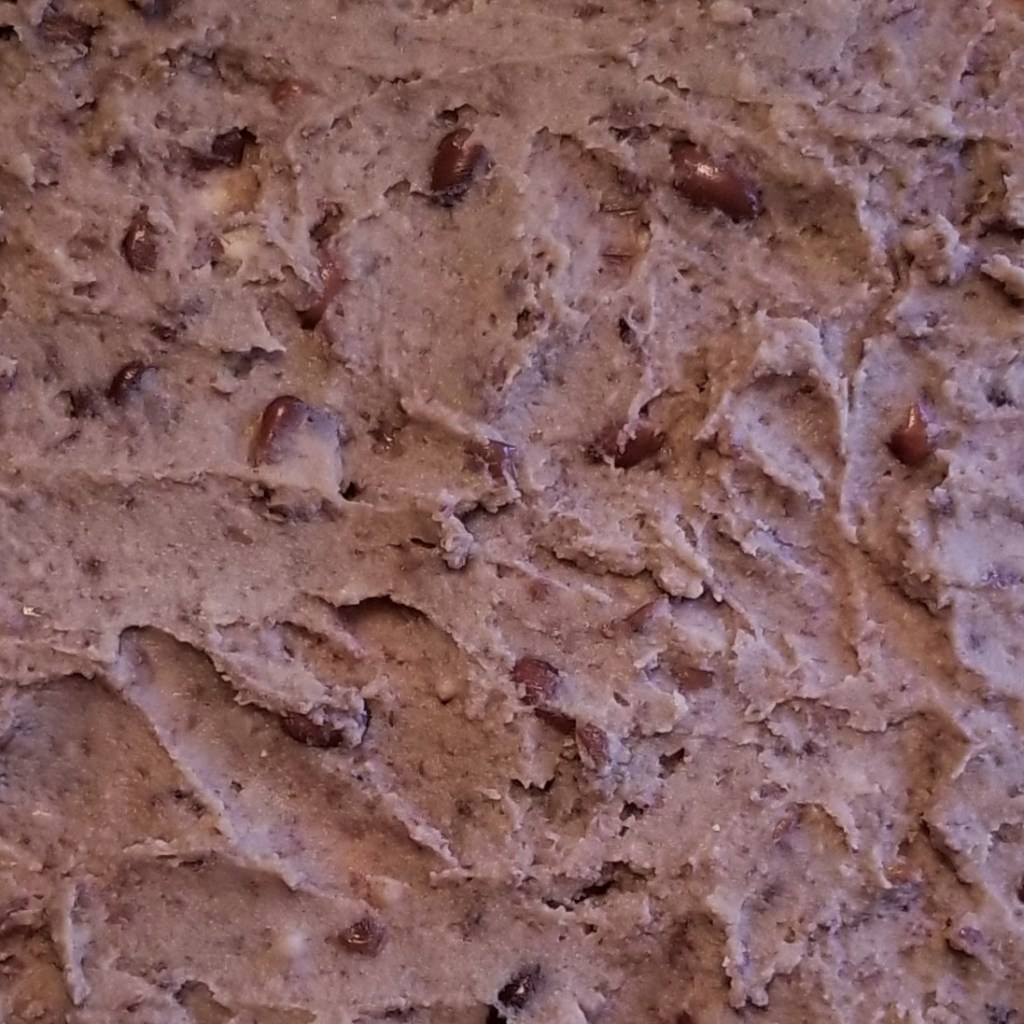
Reserve beans.
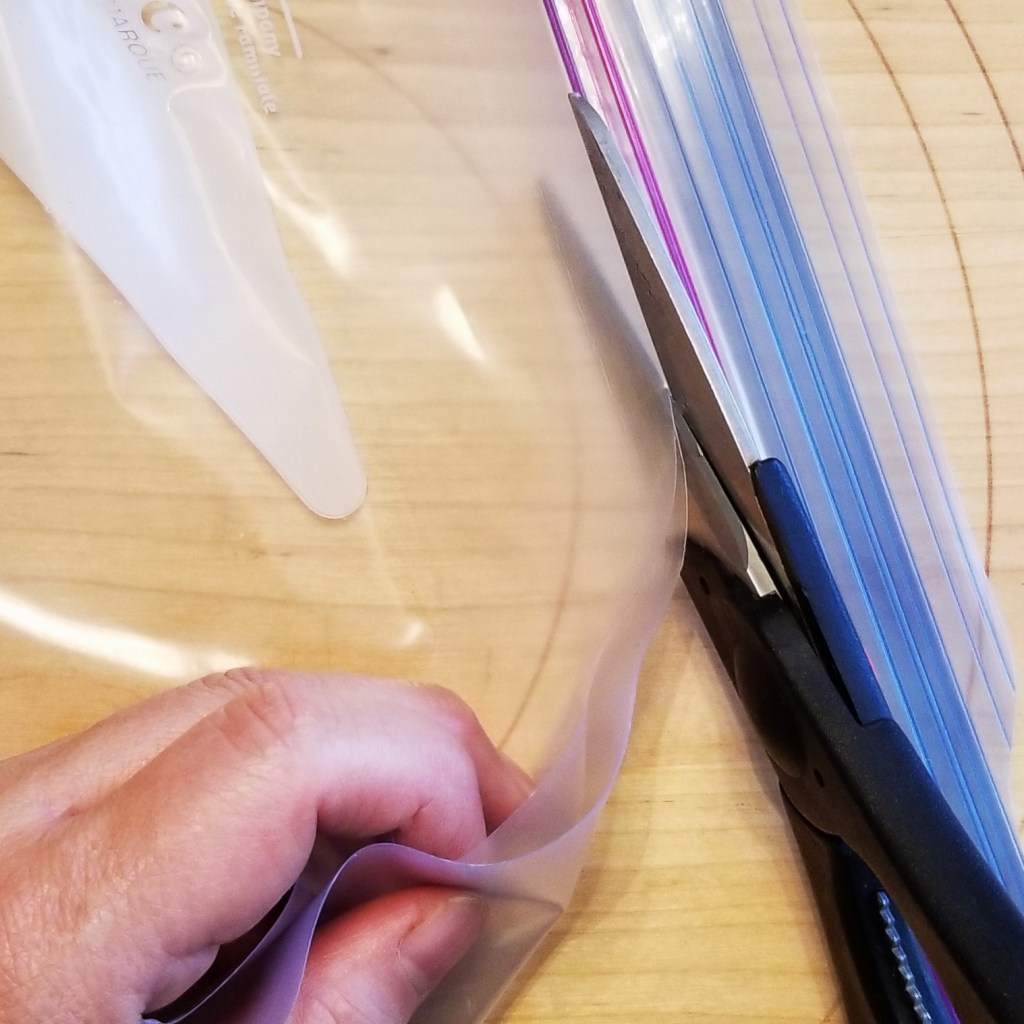
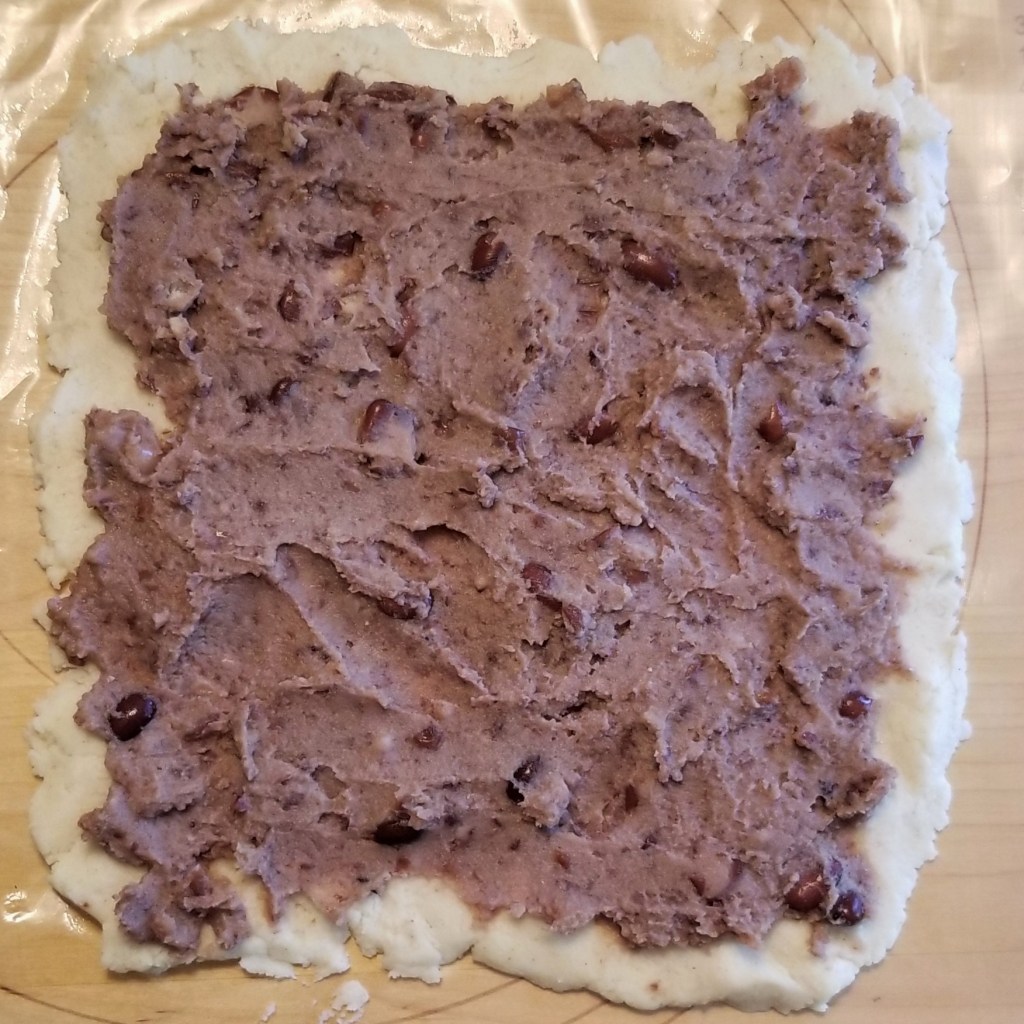
Assemble tamales: Cut a large rectangle of parchment paper, or open a large freezer bag by trimming the top (as seen below, photo below, left), then cutting the sides and unfolding into a flat rectangle; set on working surface. Place one quarter of the corn paste on the lining, then flatten with fingers and extend into a thin square, about 8×8 inches; place about one quarter of the smashed beans on top and flatten with fingers (photo below, right):

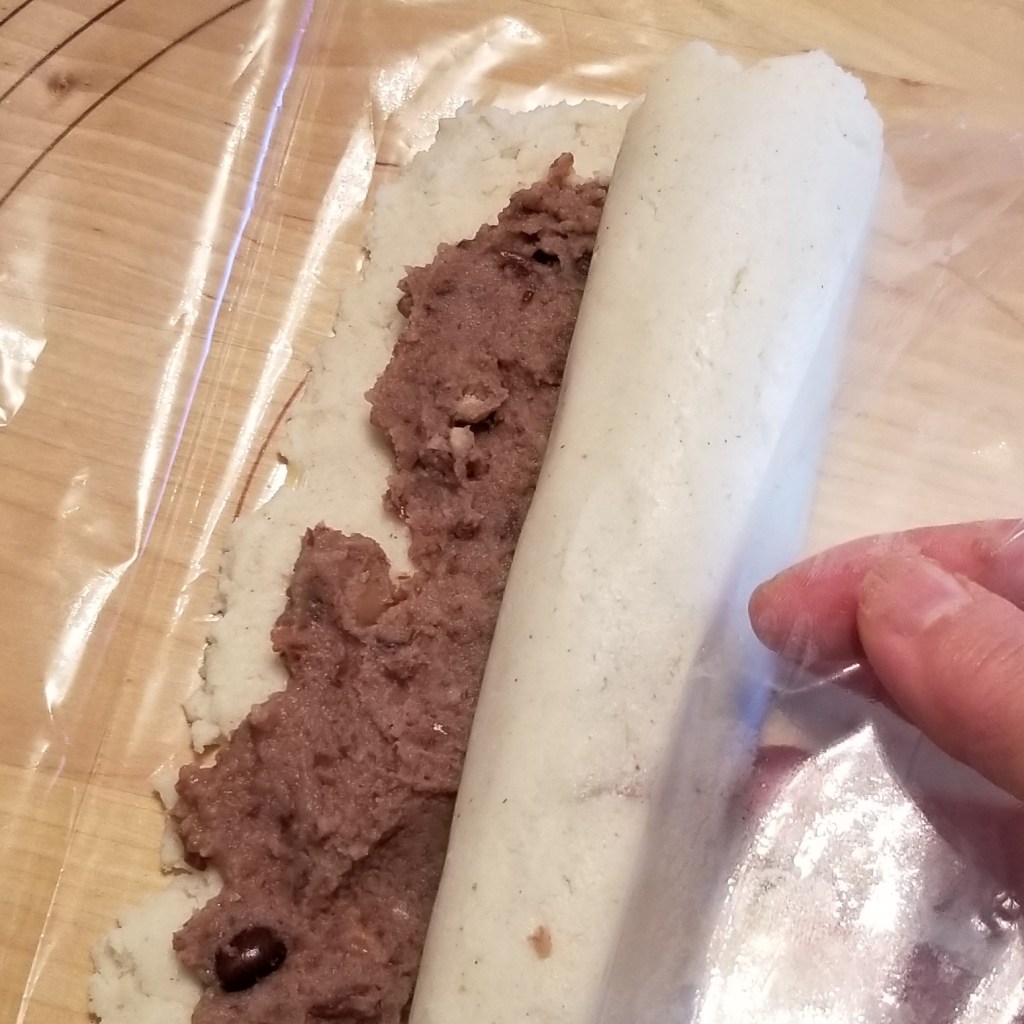
Continue flattening and extending beans, until covering most of the corn layer, leaving about one inch edge all around (photo below, left). Roll into a log, lifting the plastic or paper as the layers are rolled (photo below, right):
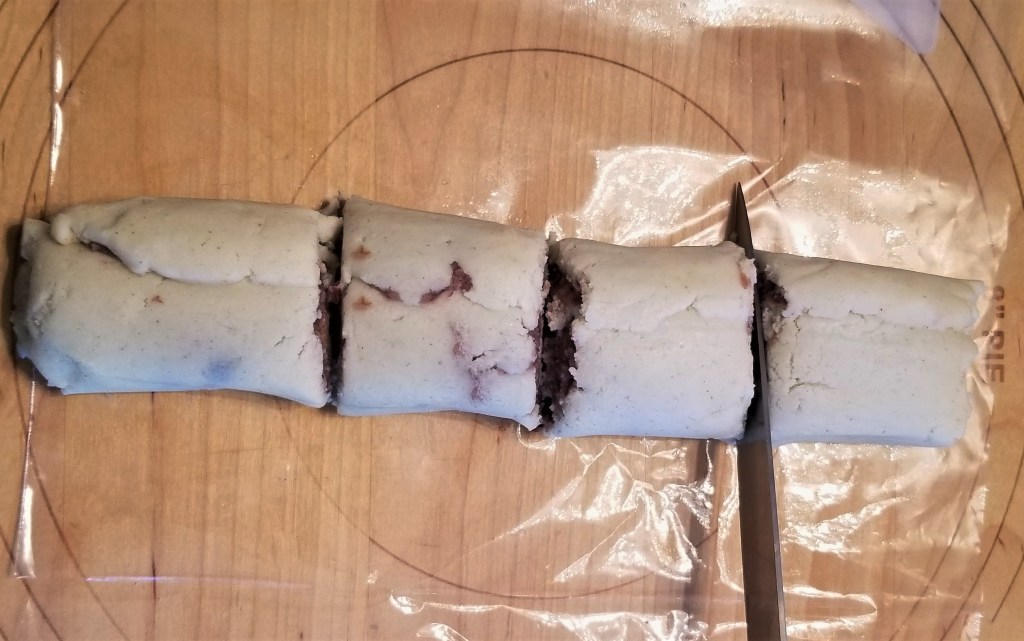
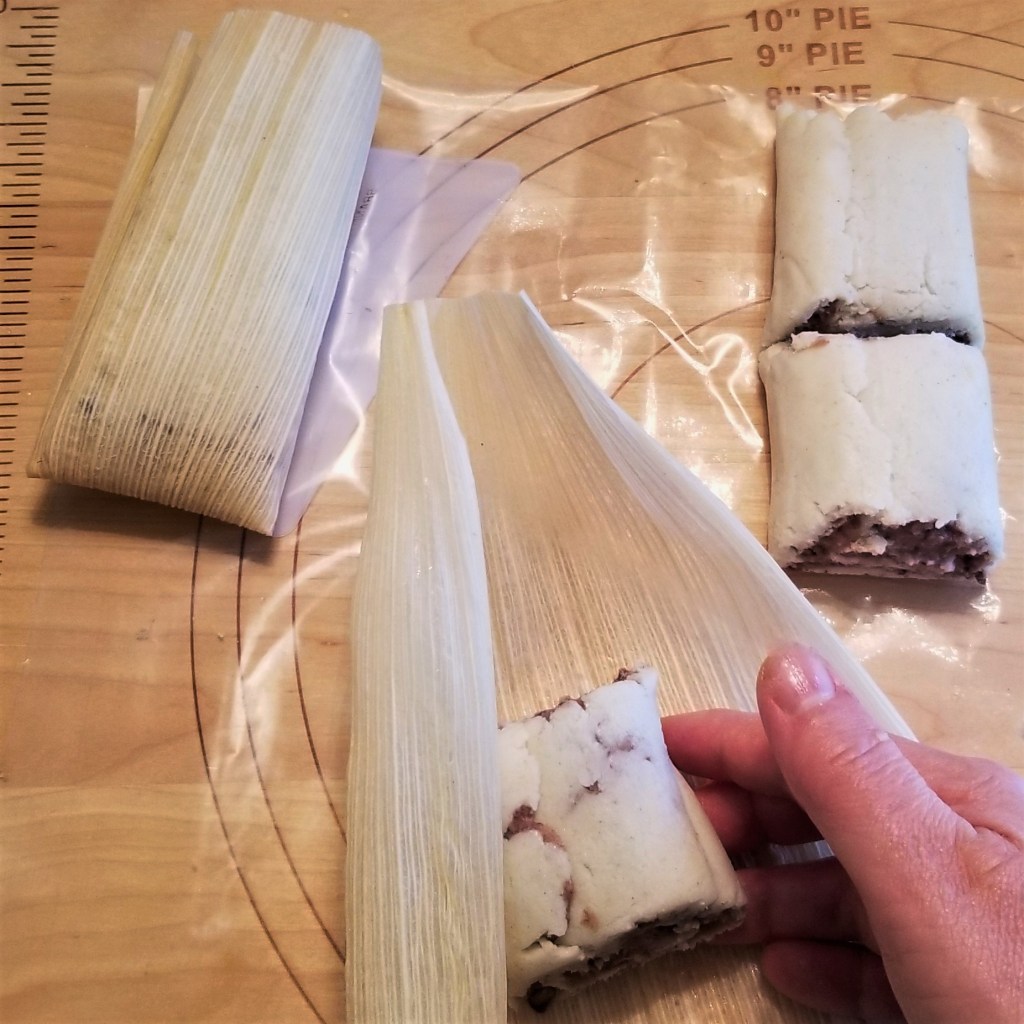
Slice the log into sections of approximately 2 inches in length:
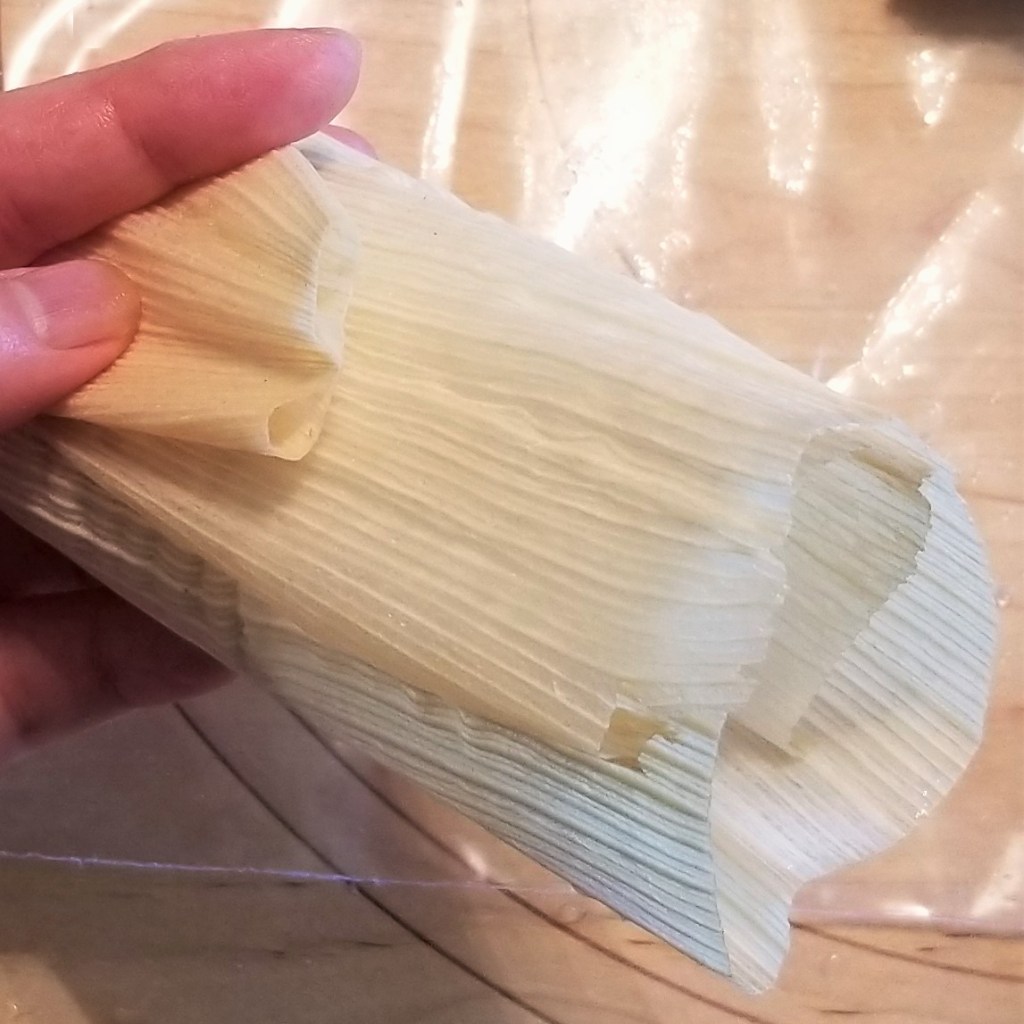
Take one corn husk and place one portion of roll in the middle (photo below, left); fold sides of husk to wrap roll (photo below, centre); fold tip of the husk to form a pouch (photo below, right):
Repeat with the rest of the portions, propping tamales vertically, with the folded side down, in a large steamer basket (I used a large metal colander, as shown in the photo below, left). Repeat procedure with the rest of the corn paste and beans, to form about 16 tamales. Cover propped tamales with more corn husks, then with a clean kitchen towel (photo below, right):

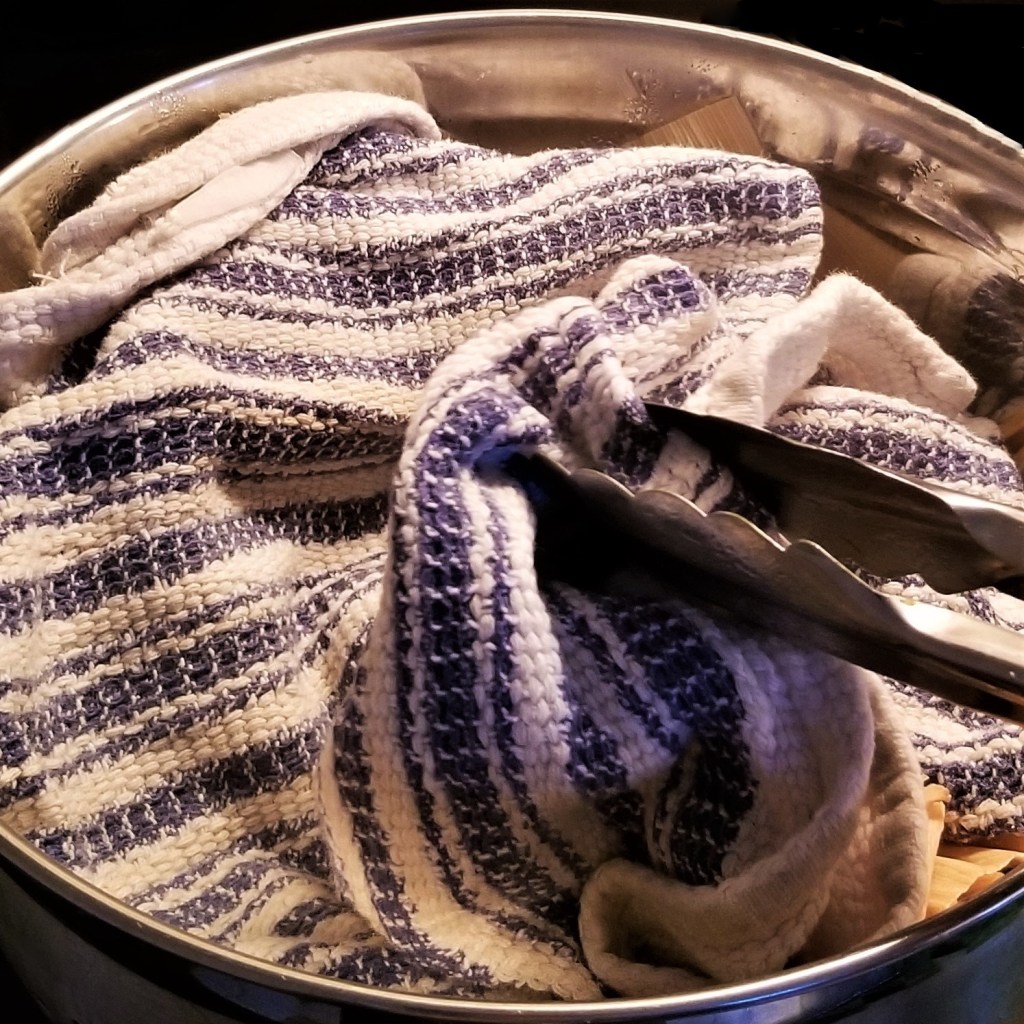
Pour water at the bottom of the steamer pot (I used a large pot where my colander will tightly fit on top), making sure that the water will not touch the tamales. Bring water to boil, then snuggly place the basket (or colander) with the tamales on top. Cover with a lid, and more folded kitchen towels as needed, to keep steam from escaping from the pot. Cook for at least one hour, checking that there is always enough boiling water at the bottom of the pot. After one hour, check doneness every fifteen minutes by carefully removing one tamal from the pot; open the husk, and when the dough looks firm and it is not sticking to the husk, the tamales are ready:
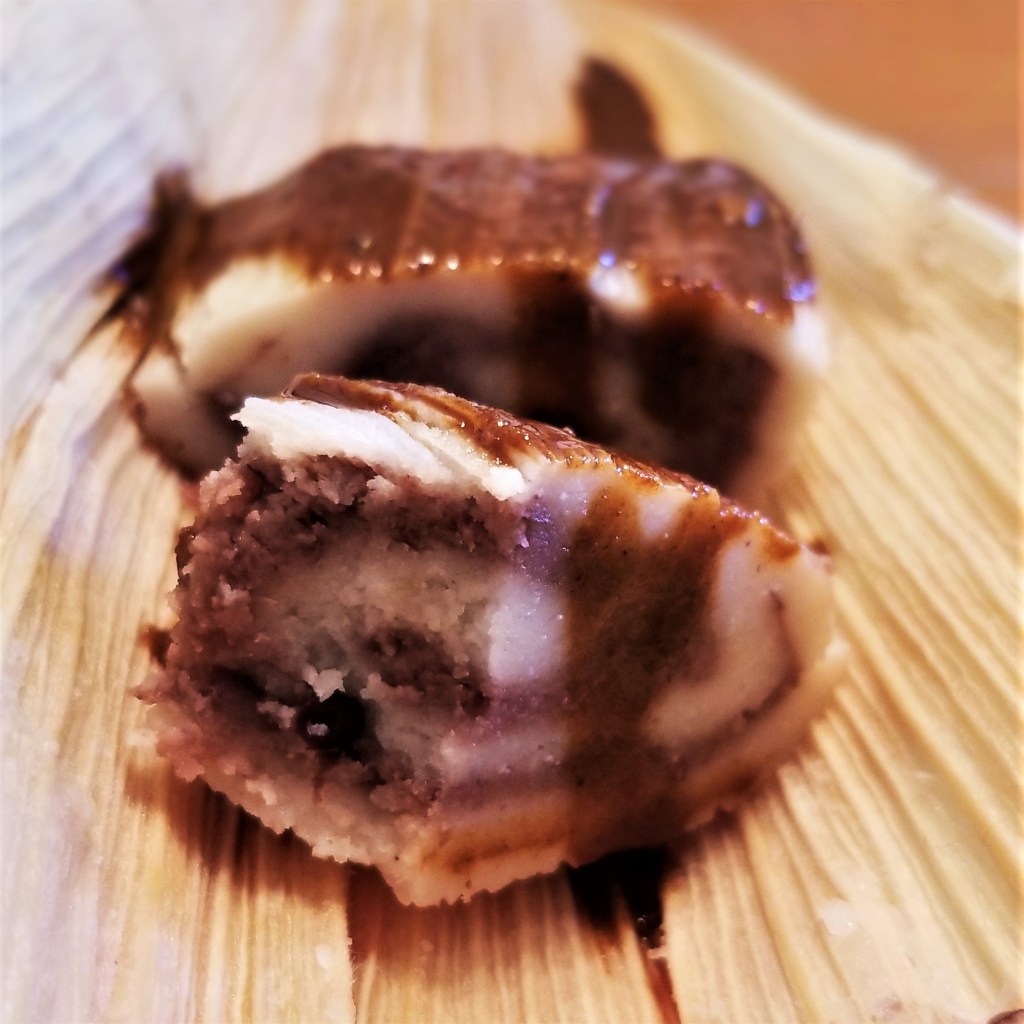
My batch took one hour and fifteen minutes. If being served outdoors, in the corn fields, maybe plates would not be available, and mole may be scooped directly on top of the tamales, and eaten from the husk:
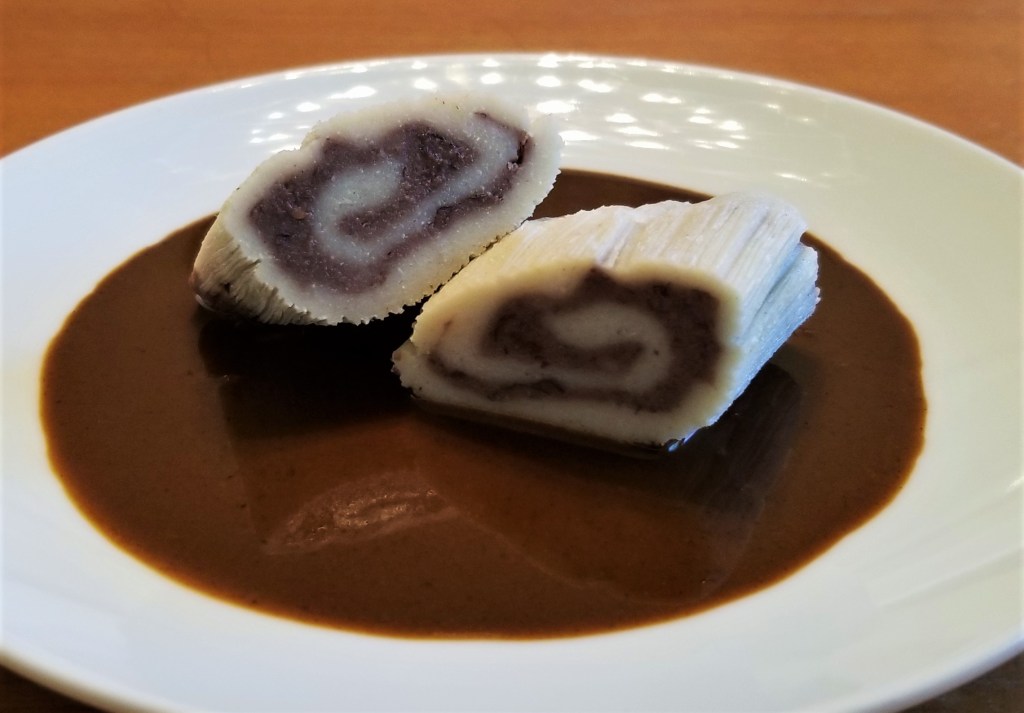
An equally delicious but perhaps more contemporary option, is to remove tamales from the husk, slicing in half to show off the rolled layers, and platting on top of a pool of mole:
This dish contains a very strong legume/grain protein, from the bean and corn combo, but for a more complete meal, serving with rice a la Mexicana and a protein, such as chicken (or cheese for vegetarian option) would also be excellent.

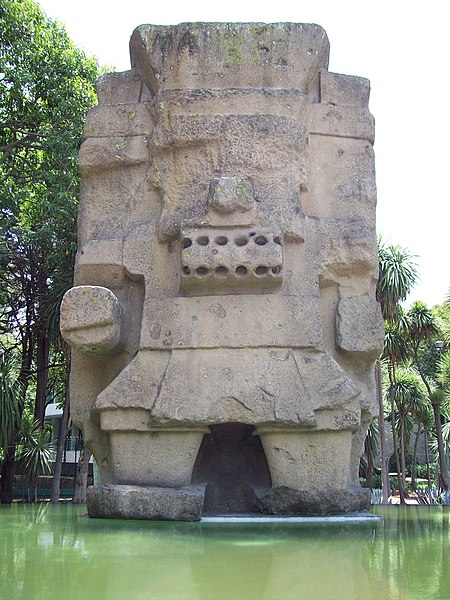
FUN FACT: A giant monolith representing Tlaloc was discovered in the mid 1800s in the small town of Coatlinchan, where it remained for another century. When the National Museum of Anthropology was built in Mexico city in the 1960s, it was decided to move the statue to adorn the entrance of the museum. Tlaloc was a complex god in the Mexica (Aztec) pantheon, who could bring the desired rain and fertility to the fields, but also had the power to destroy, when his wrath caused floods and landslides. This was symbolically present the day the statue was moved from its resting spot in Coatlinchan; it was a very emotional and sad time for the community, but also became a memorable moment for the rest of the country, because an unseasonal torrential rain accompanied the statue for its 48-km journey to Mexico City. To this day the monolith sits at the centre of a majestic fountain, at the main entrance of Mexico’s National Museum of Anthropology:
For your convenience, click on the images below for products available on Amazon™. DISCLAIMER: Any reviews included in this post are my own, for items I have purchased or already owned, not provided by any company; as an Amazon Associates Program affiliate, I might receive a commission for any purchases originated from the links below, at no extra cost to you:


I am sharing my recipe at Thursday Favourite Things #465, with Bev @ Eclectic Red Barn, Pam @ An Artful Mom, Katherine @ Katherine’s Corner, Amber @ Follow the Yellow Brick Home, Theresa @ Shoestring Elegance and Linda @ Crafts a la Mode.
I am bringing my recipe to Full Plate Thursday #510, with Miz Helen @ Miz Helen’s Country Cottage.
I am joining Fiesta Friday #354 with Angie @ Fiesta Friday, co-hosting this week with Liz @ Spades, Spatulas & Spoons. UPDATE: Thank you to Liz and Angie for featuring this recipe at Fiesta Friday # 355.
I am also sharing this recipe at What’s for Dinner? Sunday Link-Up #289, with Helen @ The Lazy Gastronome. UPDATE: Thank you so much to Helen for featuring my recipe at her #290 party.
I am bringing my recipe to Over the Moon #251, graciously hosted by Bev @ Eclectic Red Barn, and Marilyn @ Marilyn’s Treats.


For some reason, I had the impression tamales were more difficult to make. You make it look easy!
LikeLike
Once you get all the components set up, it is not hard at all, and you end up with lots of food, hehe!
LikeLiked by 1 person
These are my mom’s favorite tamales! 😋
LikeLiked by 1 person
😁👍
LikeLike
I have never seen these but I need to try them! Pinned – Thanks for sharing at the What’s for Dinner party. So glad you’ve joined us – have a wonderful week!
LikeLike
Thank you Helen, I hope you get to try them. Thank you for hosting, and have a wonderful week as well!
LikeLike
Your post is awesome and thanks so much for sharing it with us at Full Plate Thursday,510. Hope you are having a great week and come back soon!
Miz Helen
LikeLiked by 1 person
They are so beautiful and I enjoyed seeing the process of making them. I’ve always been curious and your explained it so well. They finished product reminded me of sushi a little bit. Thank you for bringing them to FF.
I also loved the story of the monolith. You always have such an interesting history lesson in your posts.
LikeLike
Thank you, Liz, you are so kind! And thank you for hosting FF!
LikeLike
********************************************************
Thank you for sharing at #OverTheMoon. Pinned and shared. Have a lovely week. I hope to see you at next week’s party too! Please stay safe and healthy. Come party with us at Over The Moon! Catapult your content Over The Moon! @marilyn_lesniak @EclecticRedBarn
********************************************************
LikeLiked by 1 person
Thank you, Marilyn and thank you for hosting!
LikeLiked by 1 person